Quick Start: React/Next.js Apps
Arcana Auth SDK lets you onboard users to 'React/Next.js' Web3 App quickly!
Prerequisites
1. Register & Configure
Log into the Arcana Developer Dashboard:
https://dashboard.arcana.network
In the Manage Apps dashboard screen, click the first card and create a new app entry to register app. Each app is assigned a unique Client ID at registration. The Client ID is required for integrating the app with the Arcana Auth SDK.
A default Testnet configuration profile is associated with the registered app. In the Manage Apps dashboard screen, select the registered app card and click 'Testnet' configuration settings. Choose Social Auth to configure user onboarding providers. Optionally enable gasless transactions in Arcana wallet to incentivize app users.
2. Install SDKs
For 'React/Next.js' app, install the following packages:
npm install --save @arcana/auth @arcana/auth-react
yarn add @arcana/auth @arcana/auth-react
<script src="https://cdn.jsdelivr.net/npm/@arcana/auth"></script>
<script src="https://unpkg.com/@arcana/auth"></script>
<script src="https://cdn.jsdelivr.net/npm/@arcana/auth-react"></script>
<script src="https://unpkg.com/@arcana/auth-react"></script>
Use latest SDKs
Use the latest Arcana Auth SDK release: v1.0.10. Migrate from Arcana Auth SDK v1.0.9 -> v1.0.10.
Versions older than Arcana Auth SDK v1.0.9 may encounter potential breaking changes that require app reconfiguration, integration code updates, and redeployment. Refer to the Migration Guides and Release Notes.
In addition to the latest Arcana Auth SDK, for React apps, you must also use the latest Arcana Auth React SDK release: v0.0.3
3. Integrate
const { AuthProvider } = window.arcana.auth // From CDN
//or
import { AuthProvider } from '@arcana/auth' //From npm
Create a new AuthProvider instance. Specify the unique Client ID obtained during the app registration. This gives you access to a Web3 provider.
const auth = new AuthProvider(
  "xar_test_445007f942xxxxxxxxxxxxxxxxxx484cAfd2", // App client ID
  {
    position: 'left',         // default: right
    theme: 'light',           // default: dark
    alwaysVisible: false,     // default: true, wallet always visible
    setWindowProvider: true,  // default: false, window.ethereum not set
    connectOptions: {
      compact: true           // default: false, regular plug-and-play login UI
    },
    chainConfig: {
      chainId: '137',                    // defaults to Ethereum
      rpcUrl: 'https://polygon-rpc.com', // defaults to 'https://rpc.ankr.com/eth'
    },
})
AuthProvider Optional Parameters
You can optionally customize the following settings in the AuthProvider constructor:
alwaysVisible: Arcana wallet visibility mode - always visible in the app context or only if a blockchain transaction is triggered by the app
chainConfig: use chainId to specify the chain identifier for the active chain in the wallet and rpcUrl for specifying the RPC Url for that chain identifier
position: wallet position within the app context - left|right
theme: wallet theme - light|dark
setWindowProvider: set window.ethereum in the app context with the standard EIP-1193 Ethereum provider value
connectOptions: built-in login UI compact mode - true|false
See AuthProvider constructor parameters for details.
import { StrictMode } from "react";
import { createRoot } from "react-dom/client";
import { AuthProvider } from "@arcana/auth";
import { ProvideAuth } from "@arcana/auth-react";
import App from "./App";

const rootElement = document.getElementById("root");
const root = createRoot(rootElement);

const provider = new AuthProvider(
  "xar_live_d7c88d9b033d100e4200d21a5c4897b896e60063"
);

root.render(
  <StrictMode>
    <ProvideAuth provider={provider}>
      <App />
    </ProvideAuth>
  </StrictMode>
);
import React from "react";
import { Auth } from "@arcana/auth-react";

export default function App() {
  return (
    <div className="App">
      <h1>Sample Auth React App</h1>
      <Auth />
    </div>
  );
Onboard Users
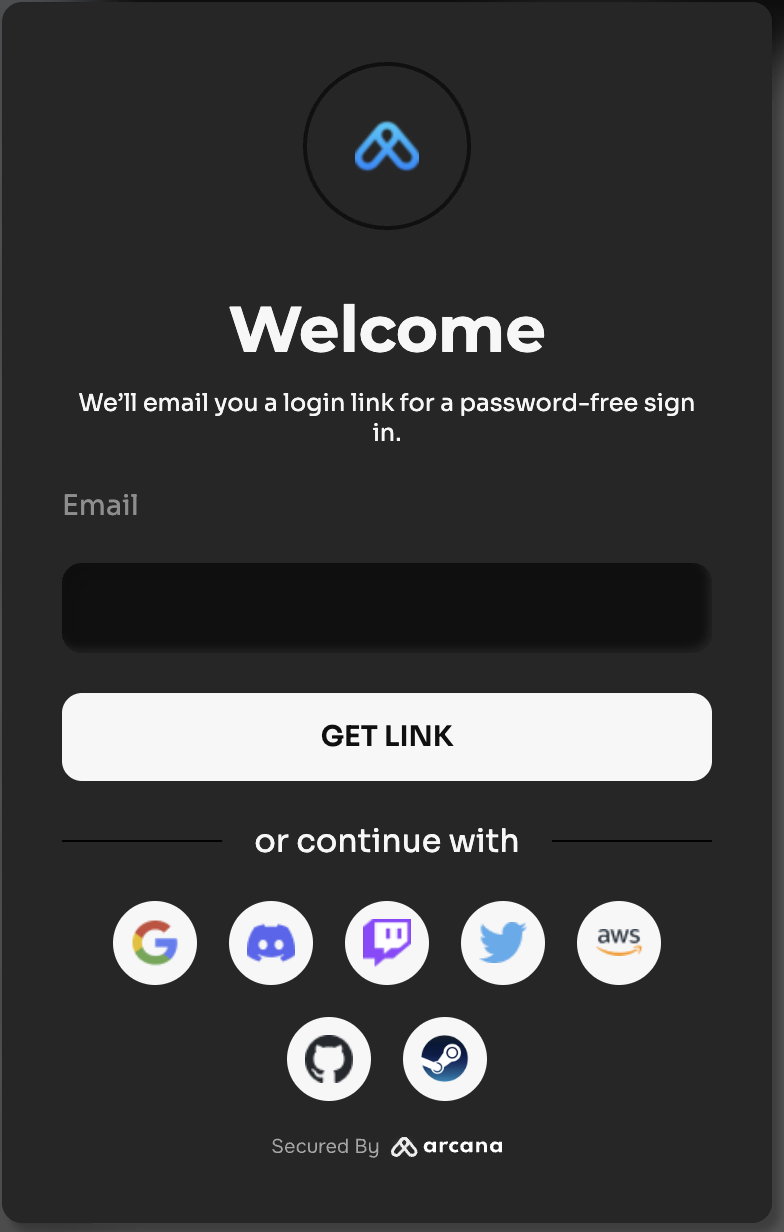
The built-in, plug-and-play login UI is enabled by default.
Update the App.js file by importing Auth from the auth-react package and render it in the App function to bring up the default login UI component. You can configure the wallet UI theme layout using Auth component props. Once the user clicks to log in, they will see the built-in, plug-and-play login UI pop up in the app context displaying all the configured authentication providers.
import { StrictMode } from "react";
import { createRoot } from "react-dom/client";
import { AuthProvider } from "@arcana/auth";
import { ProvideAuth } from "@arcana/auth-react";

import App from "./App";

const rootElement = document.getElementById("root");
const root = createRoot(rootElement);
const provider = new AuthProvider(
  "xar_live_d7c88d9b033d100e4200d21a5c4897b896e60063",
  {
    network: "mainnet",
    theme: "light",
    connectOptions: {
      compact: true,
    },
    chainConfig: {
      chainId: "80001"
    }
  }
); //See SDK Reference Guide for optional parameters

root.render(
  <StrictMode>
    <ProvideAuth provider={provider}>
      <App />
    </ProvideAuth>
  </StrictMode>
);
import { Auth } from "@arcana/auth-react";


// Use <Auth/> to use the built-in, plug & play login UI
function App() {
  const [theme, setTheme] = React.useState("light");
  return (
    <div>
      <Auth theme={theme} />
    </div>
)}

export default App;
You can also use the useAuth hook and refer to the Auth component states.
import { useAuth } from "@arcana/auth-react";

function App() {
  const { loading, isLoggedIn, connect, user } = useAuth()

  const onConnectClick = async () => {
    try {
      await connect(); // Built-in, plug & play login UI
    } catch (err) {
      console.log({ err });
      // Handle error
    }
  };

  if (loading) {
    return <p>Loading...</p>;
  }
  if (!isLoggedIn) {
    return (
      <button onClick={onConnectClick}>
        Login UI (Built-in)
      </button>
    );
  }
}

export default App
The figure below shows the built-in login UI plug-and-play pop-up authentication screen for a test app.
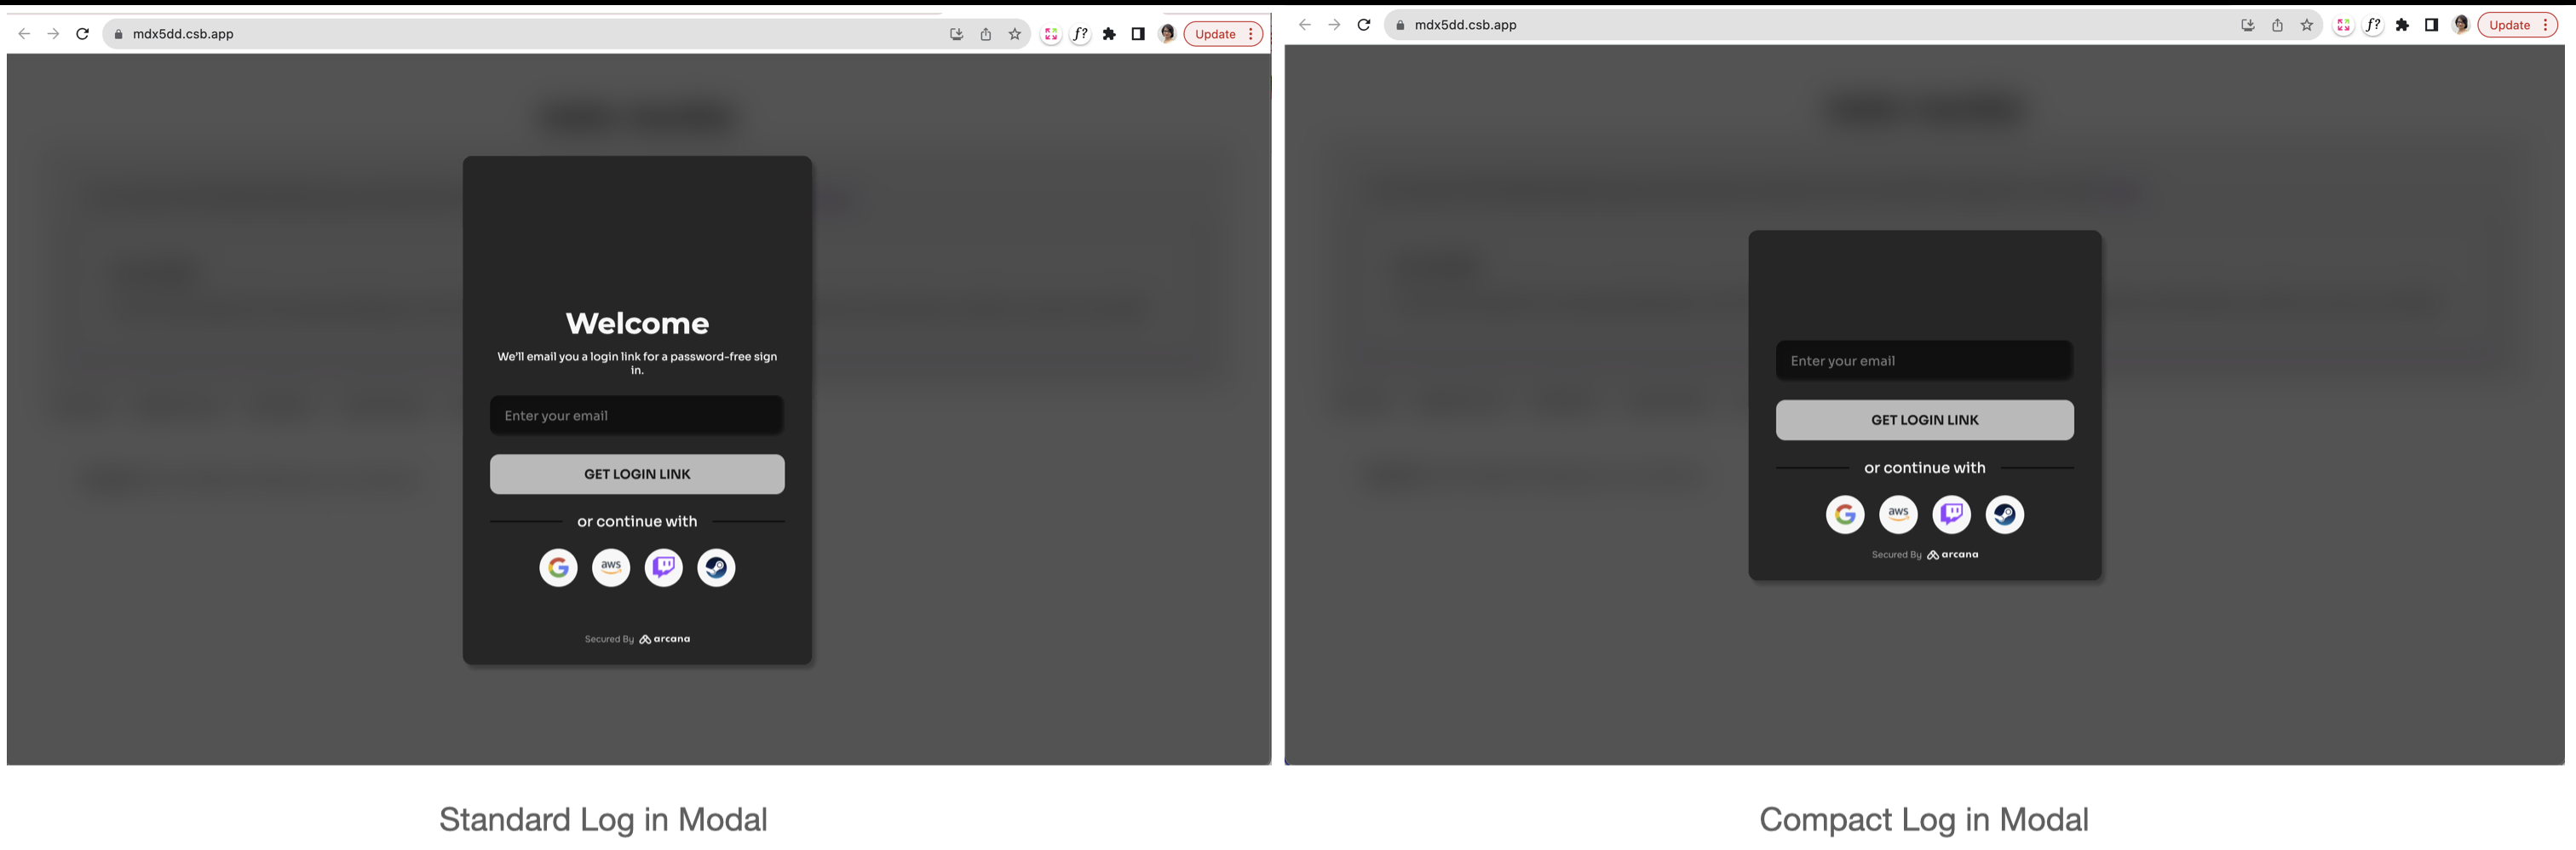
Compact Login UI
You can choose to use a compact form of the built-in login UI modal instead of the regular one.
No plug-and-play support for Firebase authentication.
The plug and play feature of the Arcana Auth product is not supported for Firebase. Developers must build a custom login UI and add code to onboard users. For details, see onboarding users via Firebase and custom login UI
Custom Login UI
You can onboard users through a custom login UI instead of the built-in plug-and-play one. See how to use custom login UI for onboarding users in a 'React/Next.js' app for details.
Arcana JWT Token
Upon successful authentication, Arcana Auth SDK returns a unique JWT token to the app called the Arcana JWT Token. App developers can use this token to verify user login and subsequently generate another token for app use. Learn more about how to verify the Arcana JWT Token for apps deployed on Testnet and Mainnet.
Sign Transactions
Use the standard JSON RPC Web3 wallet operations supported by the AuthProvider.
Manage the user experience for signing blockchain transactions by choosing the default, built-in Arcana wallet UI and tinkering with the wallet visibility or selecting a custom wallet UI.
4. Deploy
Finally, deploy the app on Testnet (default). For Mainnet deployment, see Testnet > Mainnet Migration Guide.
That's all!
Your 'React/Next.js' app is now powered by Arcana Auth SDK and Arcana Auth React SDK to quickly onboard users and allow authenticated users to sign blockchain transactions.
See Also
- 'React/Next.js' integration example:
sample-auth-react, sample-auth-nextjssubmodule in Auth Examples - Arcana Developer Dashboard User Guide
- Configuring Arcana wallet visibility
- Developer's Guide for Arcana wallet
- Handling Arcana Auth SDK error messages
- Arcana Auth SDK Usage Guide
- Arcana Auth SDK Reference Guide
- Arcana Auth Wagmi SDK Reference Guide
- Arcana Auth Flutter SDK Reference Guide
- Enabling Gasless Operations in an App
- Arcana Gasless (Standalone) SDK Quick Start Guide
- Arcana Gasless (Standalone) SDK Usage Guide
- Gasless Error Messages
Arcana Auth SDK Quicklinks
Arcana Auth React SDK Quicklinks