Configure Wallet Visibility
In this tutorial, you will learn how Web3 app developers can configure the Arcana wallet user experience for signing blockchain transactions.
Developers can choose to configure the Arcana wallet visibility such that once the user is authenticated, the Arcana wallet is instantly displayed in the context of the app. Or they can configure the Arcana wallet to show up only when a blockchain transaction is triggered.
Prerequisites
-
Make sure you can access the Arcana Developer Dashboard: https://dashboard.arcana.network
-
Use the Arcana Developer Dashboard to register the app and configure auth settings. Optionally, configure authentication providers.
Steps
Managing Arcana wallet visibility in a Web3 app that is integrated with the Arcana Auth SDK is simple!
Step1: Integrate the App
Follow the instructions to integrate the app with the Arcana Auth SDK. During AuthProvider instantiation, make sure you set the alwaysVisible input parameter to one of the following values as per the required app user experience for signing blockchain transactions:
alwaysVisible = true(default): The Arcana wallet UI is always visible once the user logs in.alwaysVisible = false: The Arcana wallet UI is displayed only when a blockchain transaction requires the user's approval.
Besides the Arcana wallet visibility setting, app developers can also tweak other configuration parameters for required user experience:
position: location of the Arcana wallet on the application screen. (default = right)theme: light or dark theme (default = dark)network: choose 'testnet' or 'mainnet' (default = 'testnet')chainConfig: the chainID and RPC URL of the blockchain network selected as the default when the Arcana wallet UI shows up
For a complete list of parameters see Arcana Auth SDK Reference Guide.
Here is some sample code that shows how an app can integrate with the Arcana Auth SDK and specify the Arcana wallet configuration so that the Arcana wallet shows up only when a blockchain transaction is triggered and requires the user's approval.
npm install --save @arcana/auth
yarn add @arcana/auth
<script src="https://cdn.jsdelivr.net/npm/@arcana/auth"></script>
<script src="https://unpkg.com/@arcana/auth"></script>
const { AuthProvider } = window.arcana.auth // From CDN
//or
import { AuthProvider } from '@arcana/auth' //From npm
const auth = new AuthProvider(
  "xar_test_445007f942xxxxxxxxxxxxxxxxxx484cAfd2", // App client ID
  {
    position: 'left',         // default: right
    theme: 'light',           // default: dark
    alwaysVisible: false,     // default: true, wallet always visible
    setWindowProvider: true,  // default: false, window.ethereum not set
    connectOptions: {
      compact: true           // default: false, regular plug-and-play login UI
    },
    chainConfig: {
      chainId: '137',                    // defaults to Ethereum
      rpcUrl: 'https://polygon-rpc.com', // defaults to 'https://rpc.ankr.com/eth'
    },
})
try {
  await auth.init()
} catch (e) {
  // Handle exception case
}
That's all!
This is how the wallet shows up when configured with the specified settings above in the context of an app:
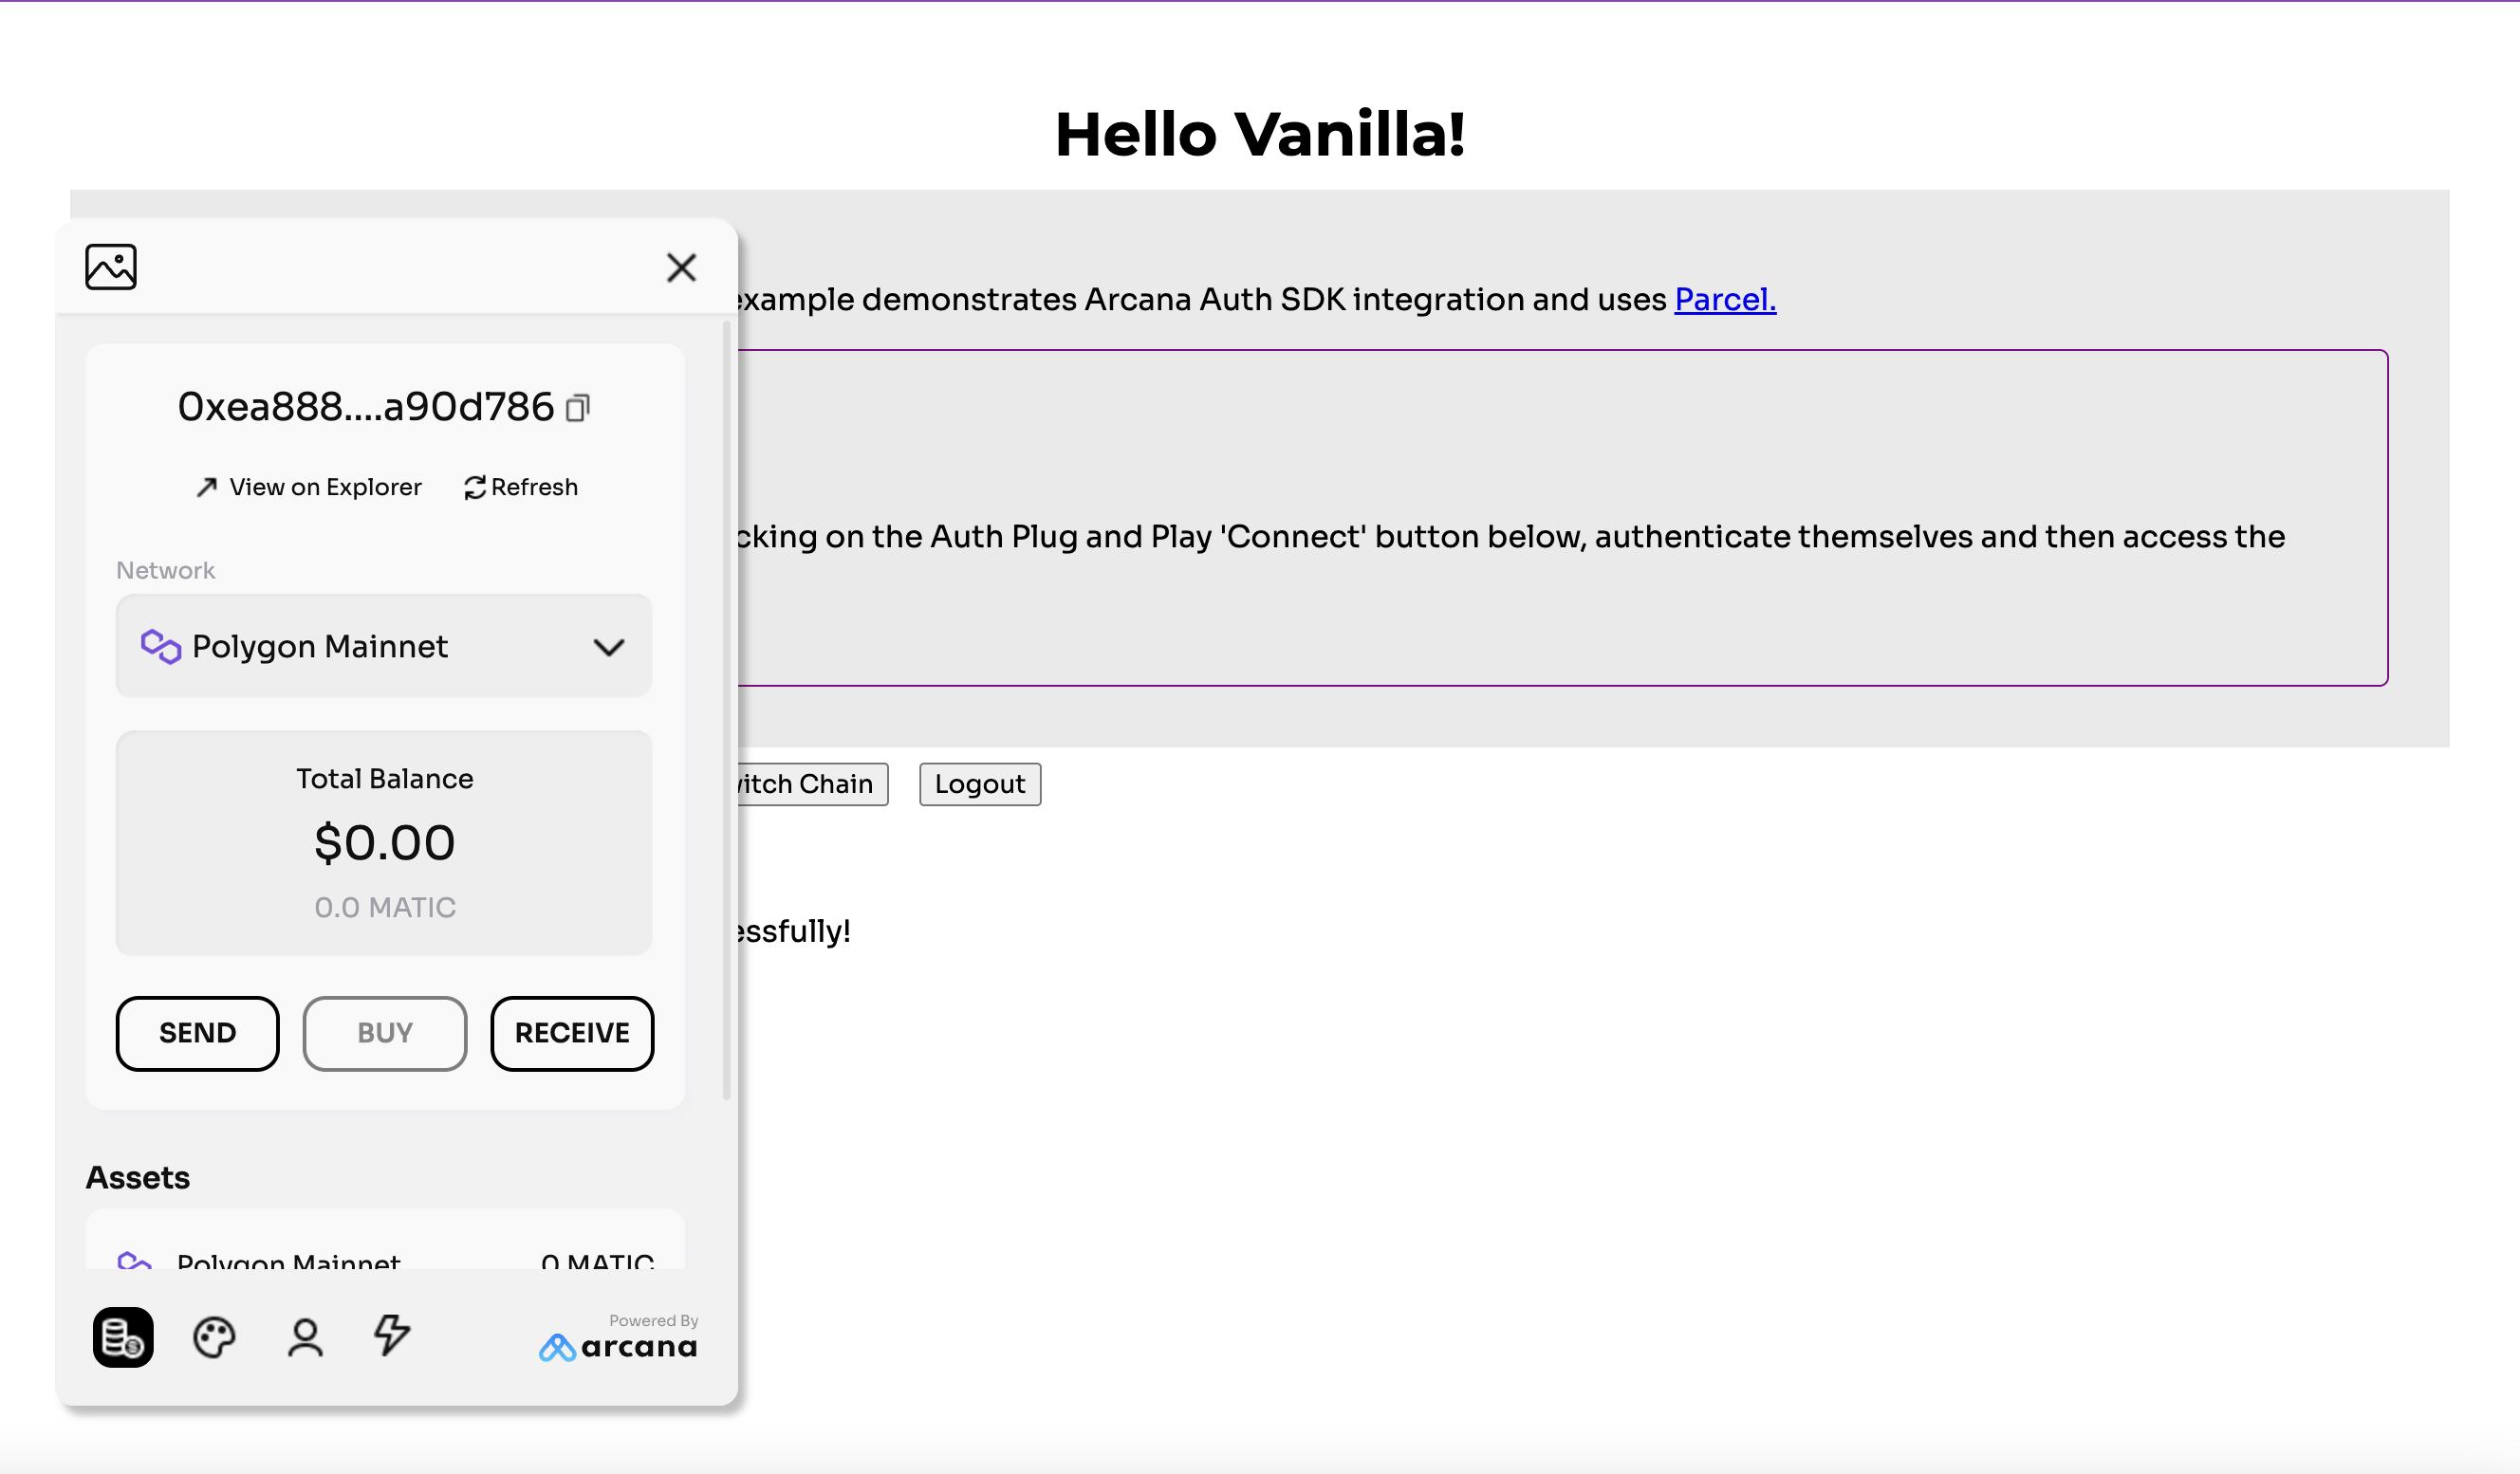
The Web3 app is successfully integrated with the Arcana Auth SDK with the requisite the Arcana wallet visibility setting to manage the user blockchain signing experience.
What's Next?
After integrating an app with the Arcana Auth SDK, with the requisite wallet visibility setting, the developers can add code to onboard users and allow the authenticated users to sign blockchain transactions, and manage crypto assets using the Arcana wallet UI. . Developers can also add code to call other Web3 wallet operations programmatically in the app. For details refer to the Arcana wallet Developers Guide.