Manage NFT Assets
Estimated time to read: 4 minutes
Learn to use the Arcana wallet UI to manage your NFT assets.
Prerequisites
- Log in to the app integrated with the Arcana Auth SDK to access the Arcana wallet UI and manage NFT assets.
NFT Operations
The following NFT operations are supported:
- List NFT assets associated with the wallet address
- View NFT details
- Send NFT
- Receive NFT
-
Manage NFTs
- Add an NFT
- Edit NFT entry
- Delete NFT entry
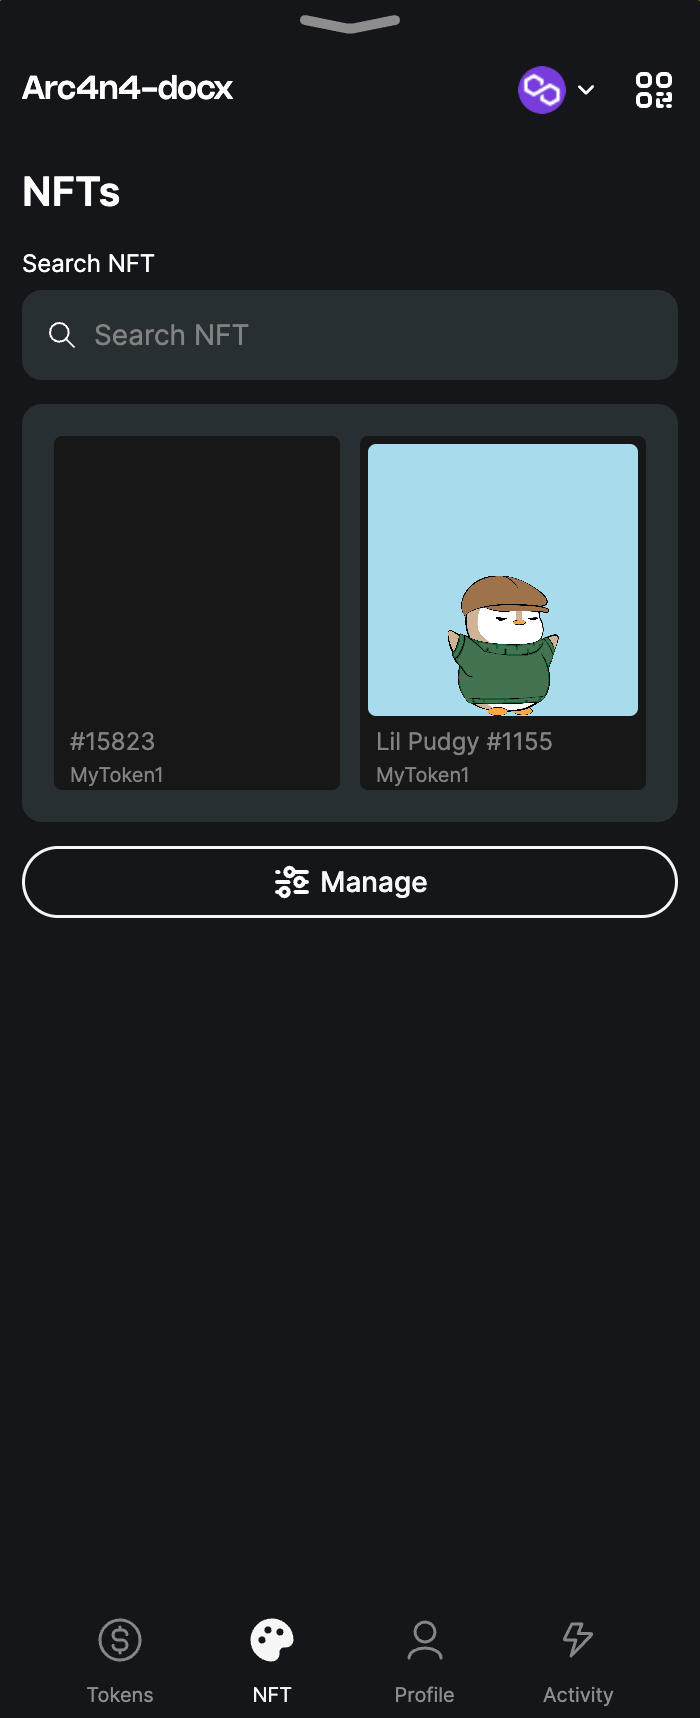
List NFTs
Click the ![]()
![]() 'NFT' tab at the bottom of the Arcana wallet UI. View thumbnails of NFTs linked to the active wallet address and blockchain network.
'NFT' tab at the bottom of the Arcana wallet UI. View thumbnails of NFTs linked to the active wallet address and blockchain network.
Auto-fetching of NFTs
The Arcana wallet automatically fetches NFTs linked to the wallet address and active chain. NFT thumbnails appear in the wallet's NFT tab. This feature uses Ankr APIs and supports only NFTs minted on blockchains backed by Ankr. The Arcana wallet supports auto-fetching of NFTs for the following chains:
Mainnet
* Arbitrum
* Avalanche
* Base
* Binance Smart Chain
* Ethereum
* Fantom
* Flare
* Gnosis
* Optimism
* Polygon
* Rollux
* Syscoin
Testnet
* Ethereum Goerli
* Avalanche Fuji
For a full list of chains supported by Ankr APIs, see here.
View NFT Details
In the NFT tab, browse and select an NFT thumbnail to view its details. You can see all metadata, including description and attributes.

Send NFTs
To transfer NFTs, click the NFT thumbnail. In the details section, click icon to start the 'Send NFT' workflow. Enter the receiver's address and gas fee details, then click Preview.

Receive NFTs
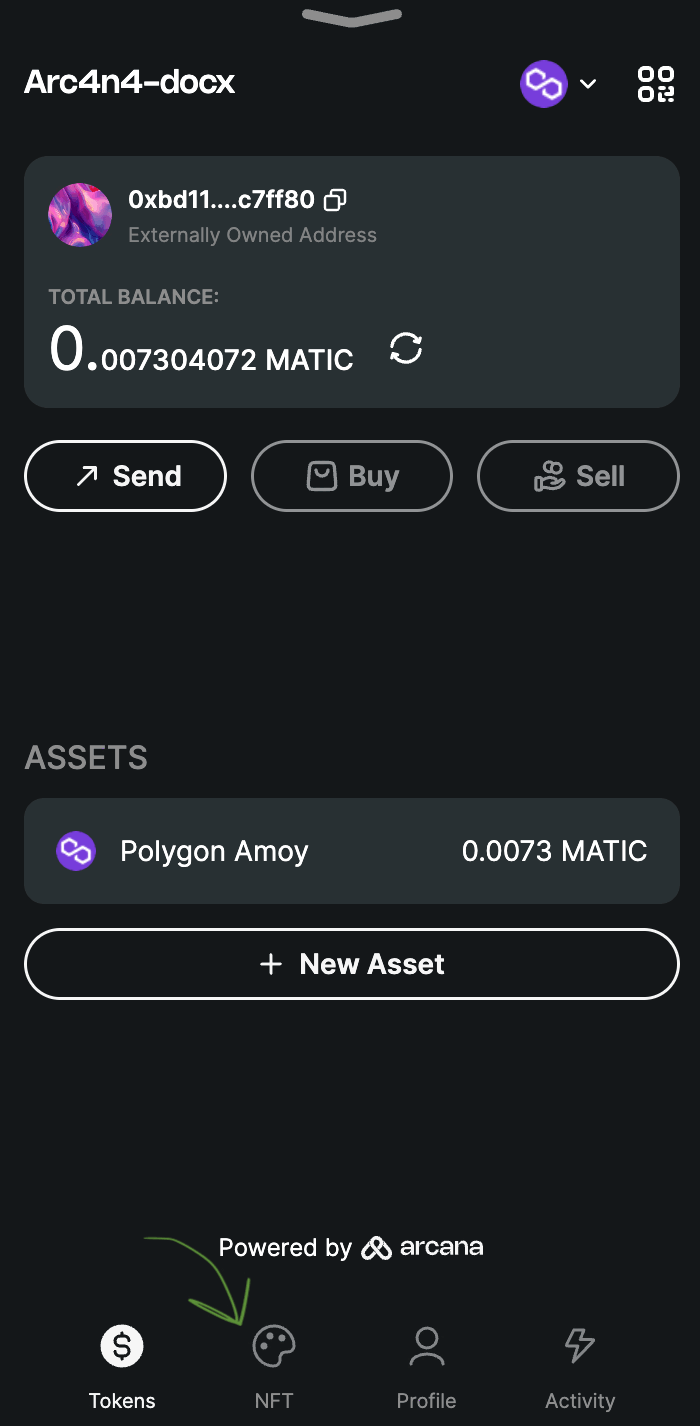
In the Token Assets tab click the QR code icon ![]()
![]() on the top right to display the wallet address and the QR code. Copy the wallet account address or the QR code and share it with the NFT sender for receiving an NFT.
on the top right to display the wallet address and the QR code. Copy the wallet account address or the QR code and share it with the NFT sender for receiving an NFT.
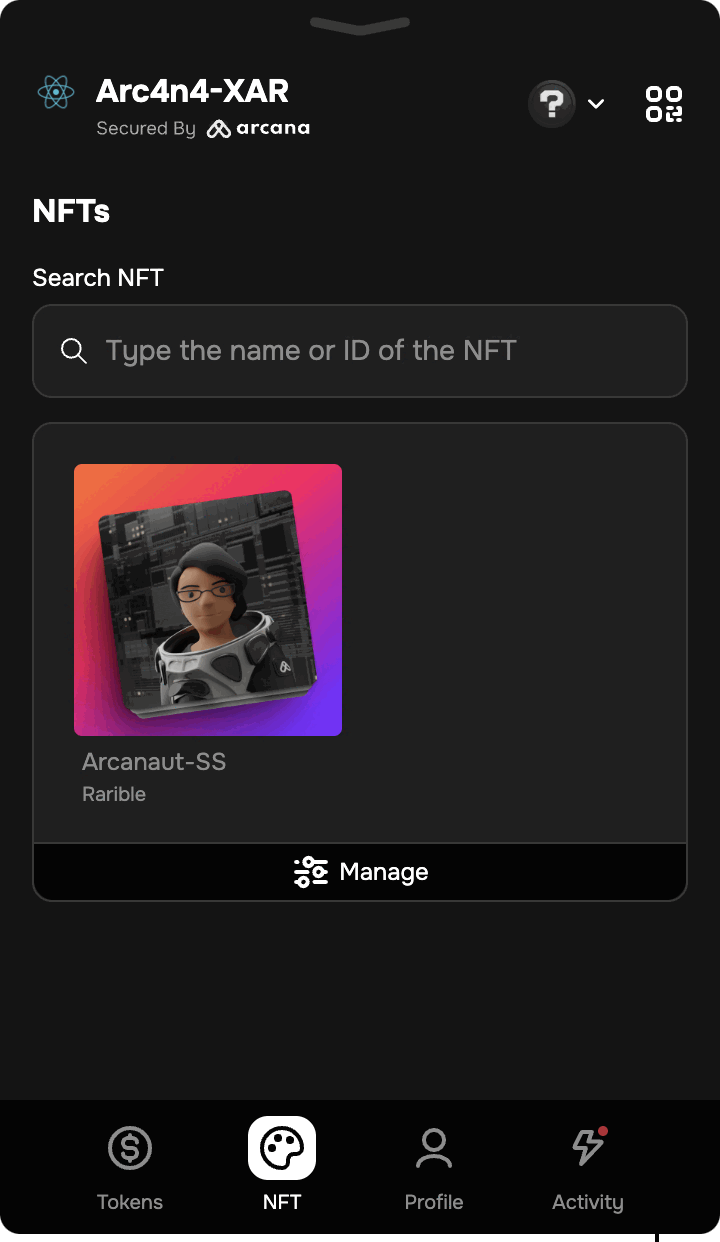
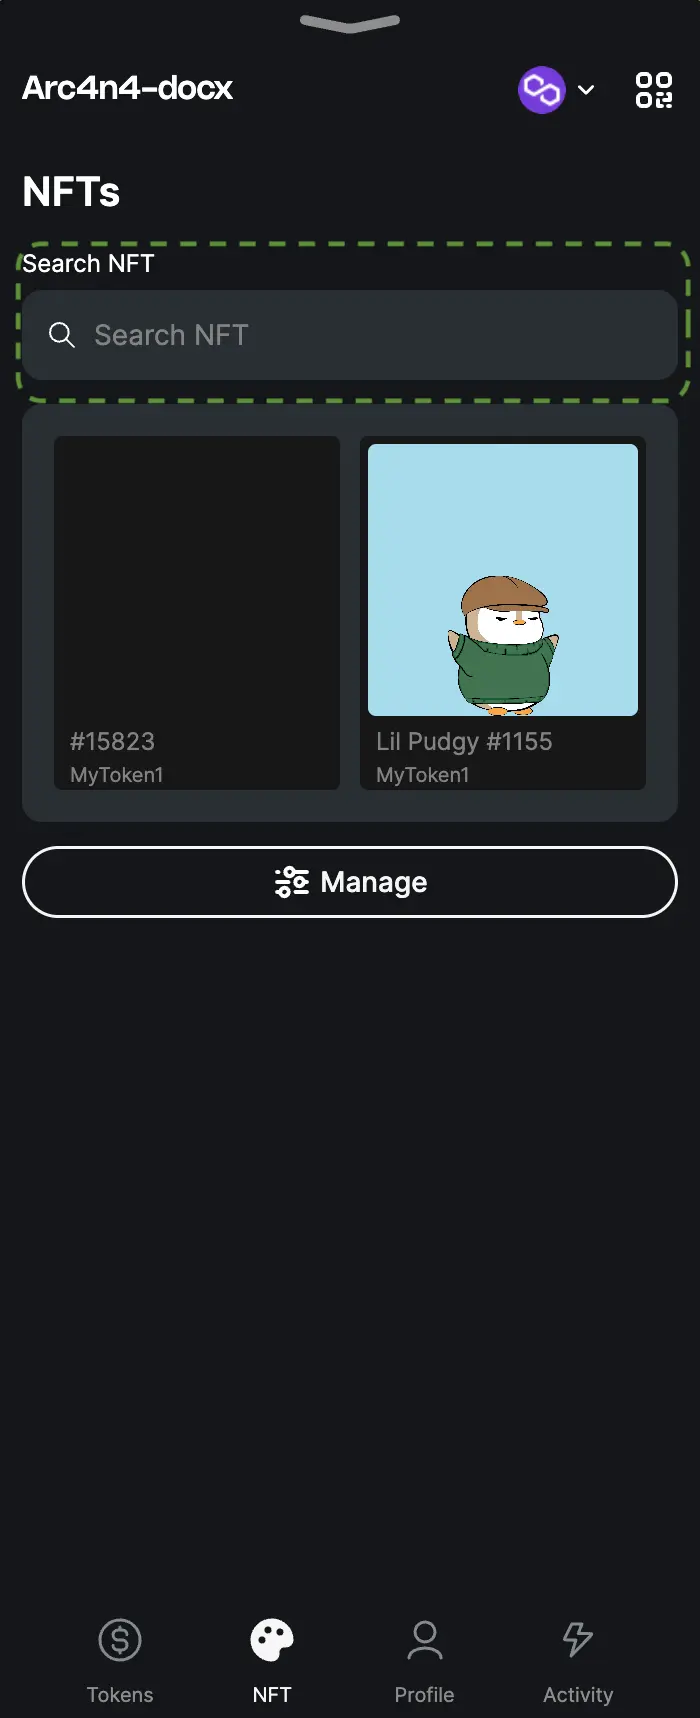
Search NFT
If you don't see the NFT you wish to view or transfer in the ![]()
![]() NFT Assets tab of the wallet, you can either scroll down or search for it using the search bar.
NFT Assets tab of the wallet, you can either scroll down or search for it using the search bar.
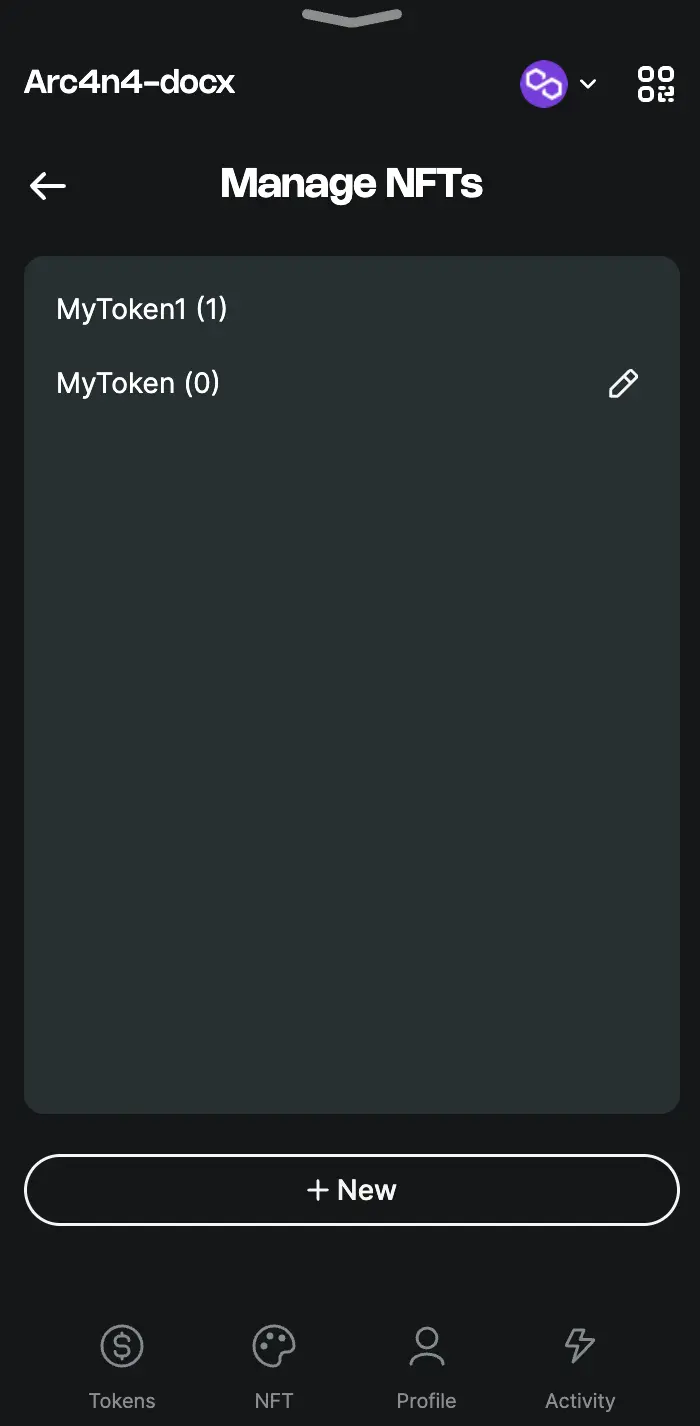
Manage NFTs
The Arcana wallet automatically fetches the NFTs associated with the wallet address for the chains that are supported by Ankr. For non-supported chains, manually add the NFTs by clicking Manage.
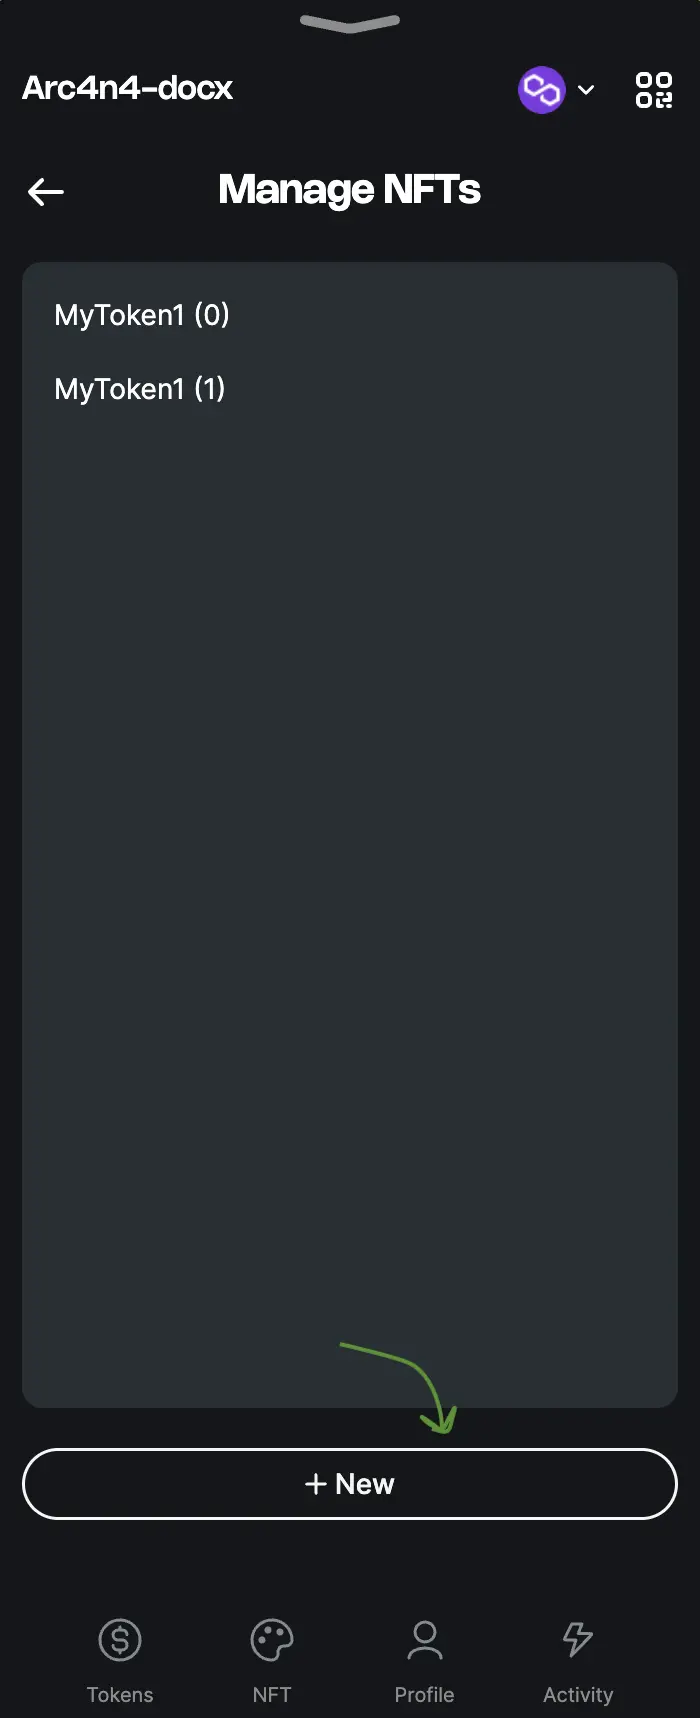
You can add, edit, and update NFT details. The NFT collection name appears automatically once the correct contract address is entered. The wallet address must match the NFT owner for manual addition to Arcana wallet.
NFT owners can delete NFTs, but only those manually added. Deleting an NFT removes it from the wallet but doesn’t destroy it. You can re-add it if you still own it.
Add NFT
Click Manage in the NFT tab of the wallet and select New to add an NFT. Provide requisite inputs and click Save.
Modify NFT
To edit or delete a manually added NFT, go to the NFT wallet UI tab. Click Manage and select the NFT thumbnail to access the pen icon next to the NFT name. Click the pen to edit the details, or delete the NFT, and then click Save.

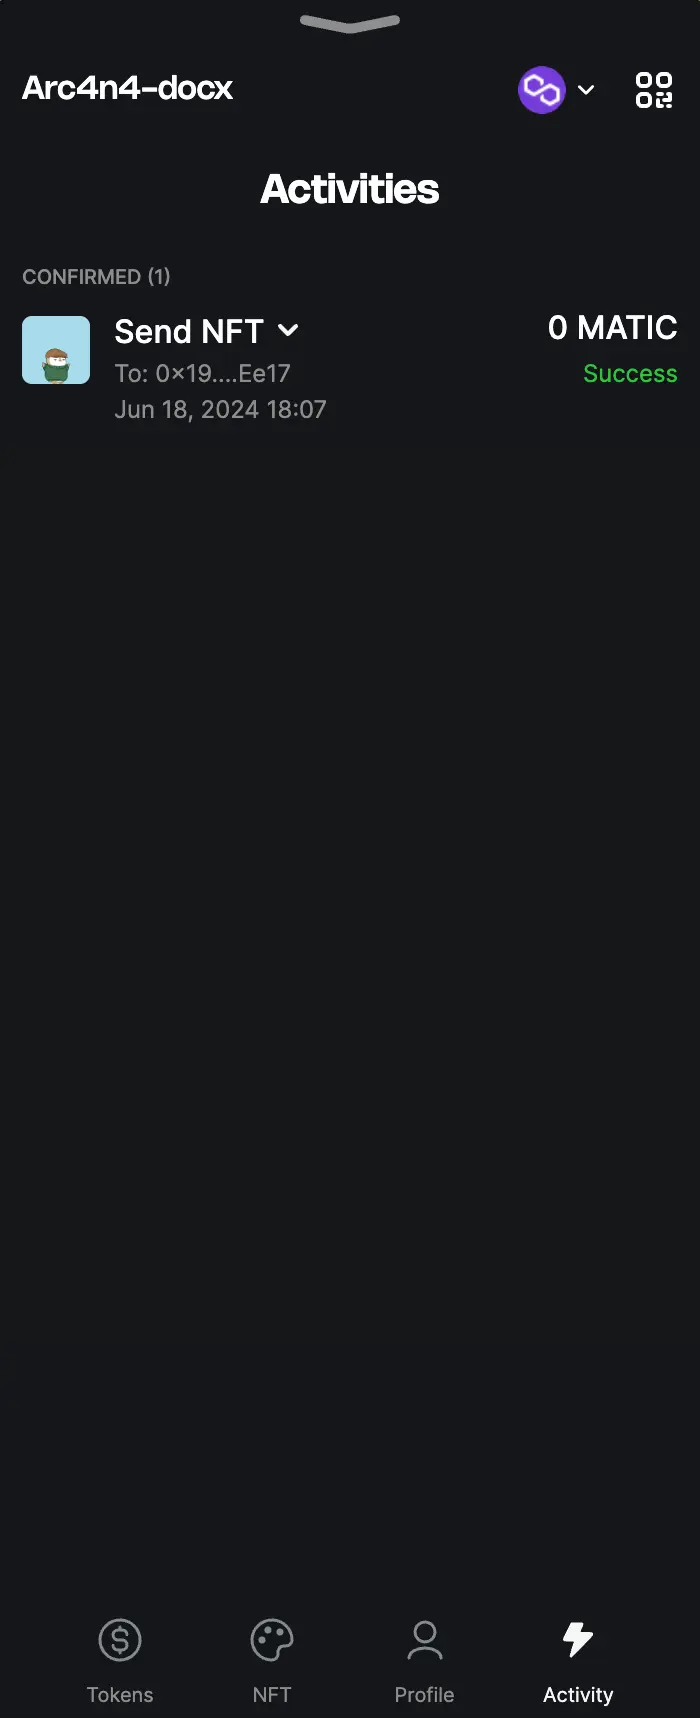
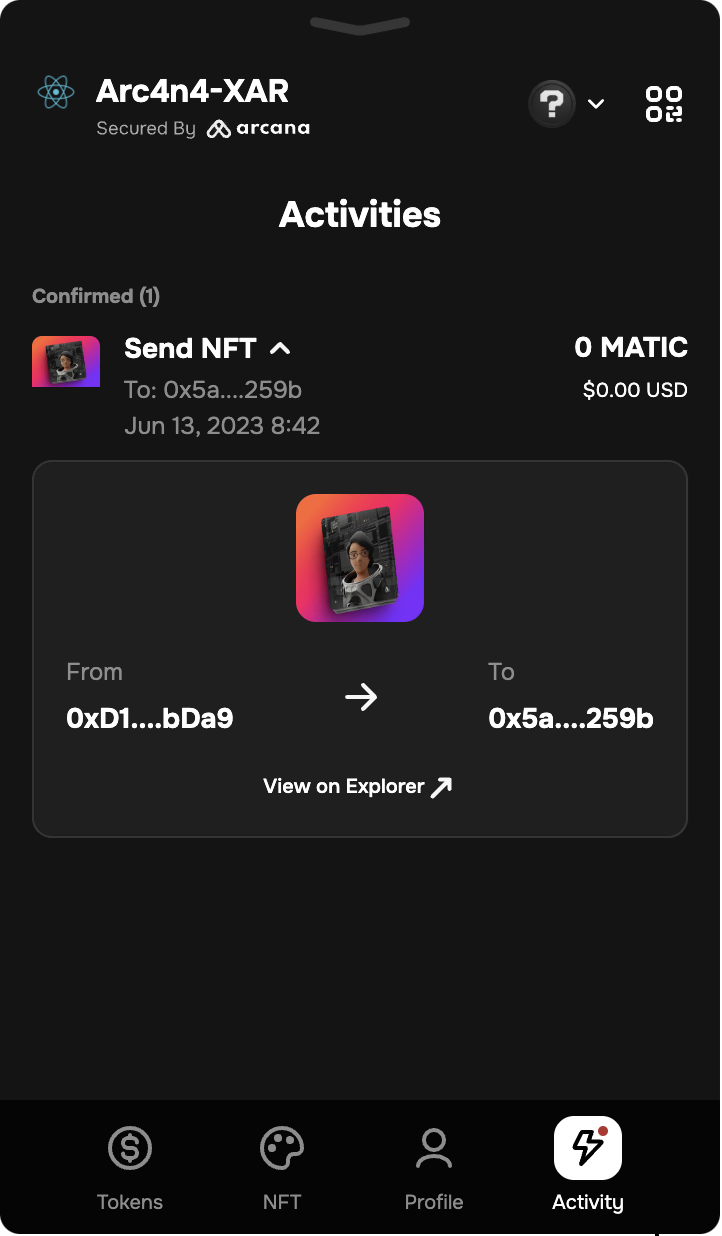
View NFT Activity
Click the ![]()
![]() Activity tab on the bottom right of the Arcana wallet UI to view wallet transaction activity and pending transactions.
Activity tab on the bottom right of the Arcana wallet UI to view wallet transaction activity and pending transactions.
You can see the NFT 'Send' transactions carried out by the wallet address. Only the activity for the current user login session is displayed. Click on an entry to view activity details.