Dashboard Users Guide
Estimated time to read: 15 minutes
The Arcana Developer Dashboard helps Web3 developers set up the Arcana Auth SDK configuration.
Log in, register your app, grab your unique Client ID, configure authentication settings, then install the Arcana Auth SDK and integrate it with the Web3 app.
This guide covers how to:
- Log into the dashboard
- Register a Web3 app with Arcana
- Get Client ID
-
Manage Configuration Profiles
- Testnet/Mainnet
- Switching configuration Profiles
-
Configure Auth Settings
- Branding
- Social Login Providers
- Chain Management
- Wallet Customization
- Login Session Management
- Keyspace Type
-
Switch application
- Monitor usage and billing
- Delete a registered app
Prerequisites
To log into the Arcana Developer Dashboard, you’ll need an account with a supported social login or use email for passwordless access.
- GitHub
- Twitch
- Discord
Dashboard Login
Use https://dashboard.arcana.network to log in with one of the available options.
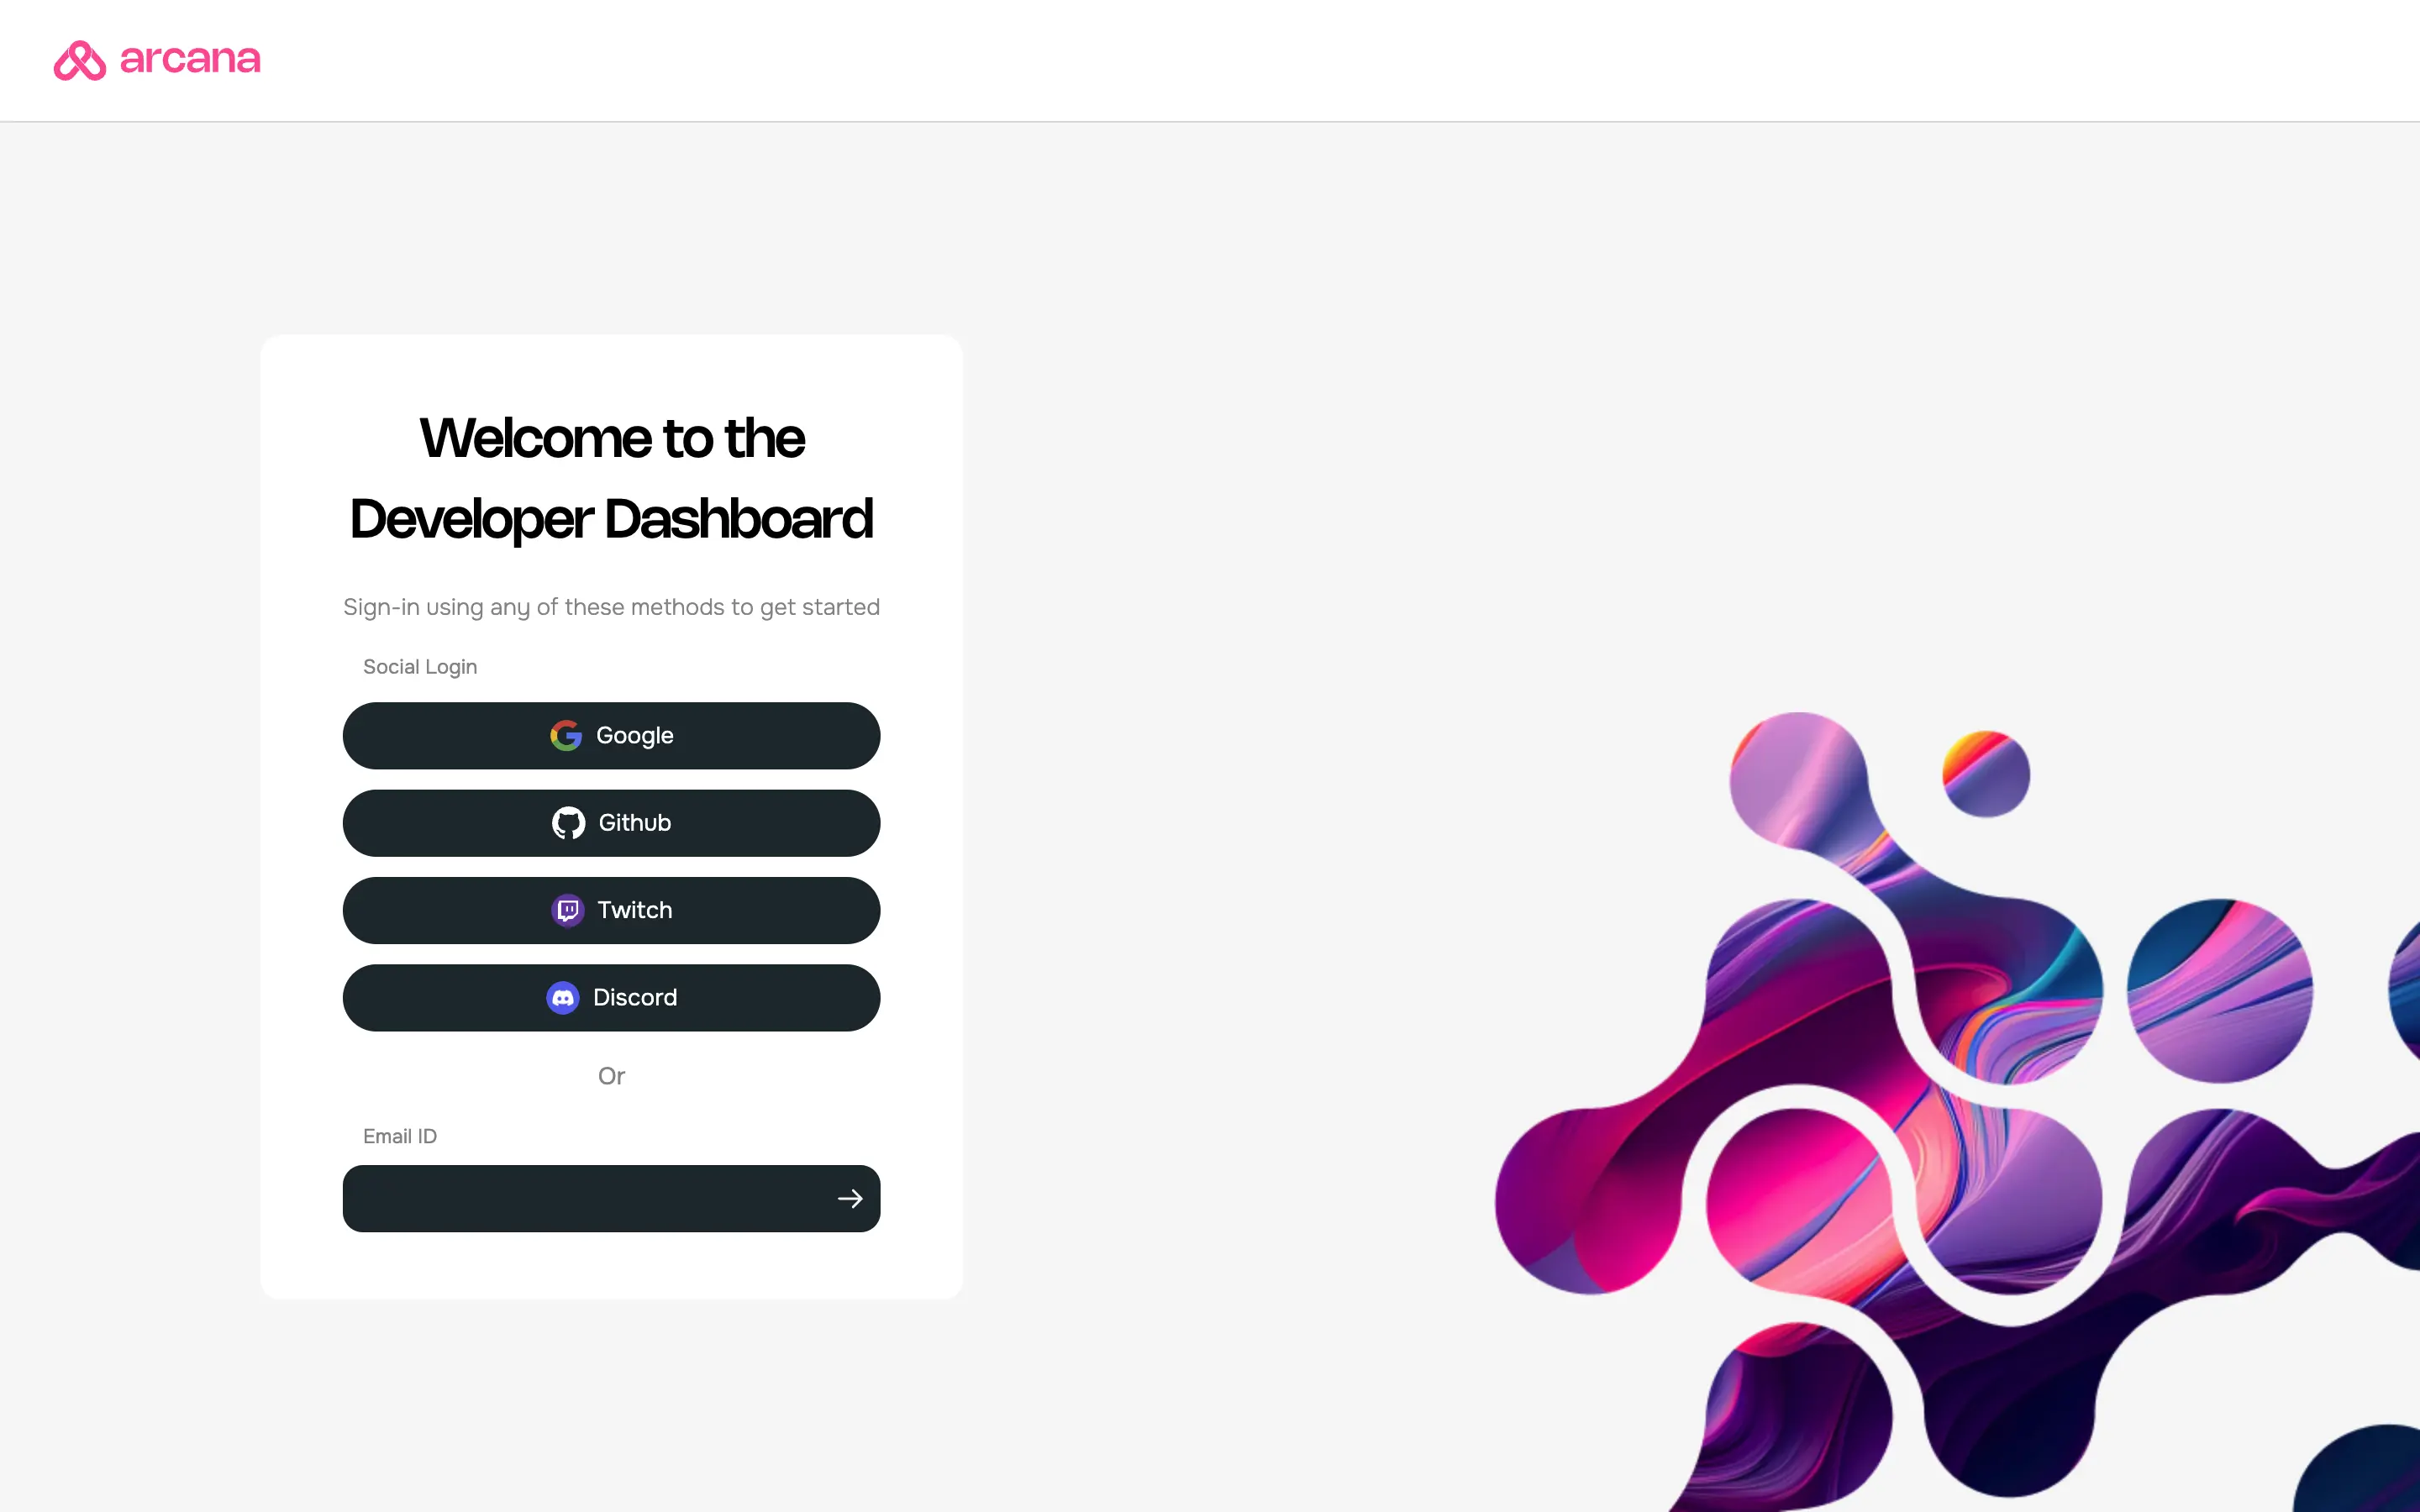
Aggregate Login
The aggregate login feature in the Arcana Auth SDK merges login identities from social providers into one Arcana account if the email ID is the same across these providers. Developers can log into the Arcana Developer Dashboard using any supported provider and still access the same Arcana account and app settings.
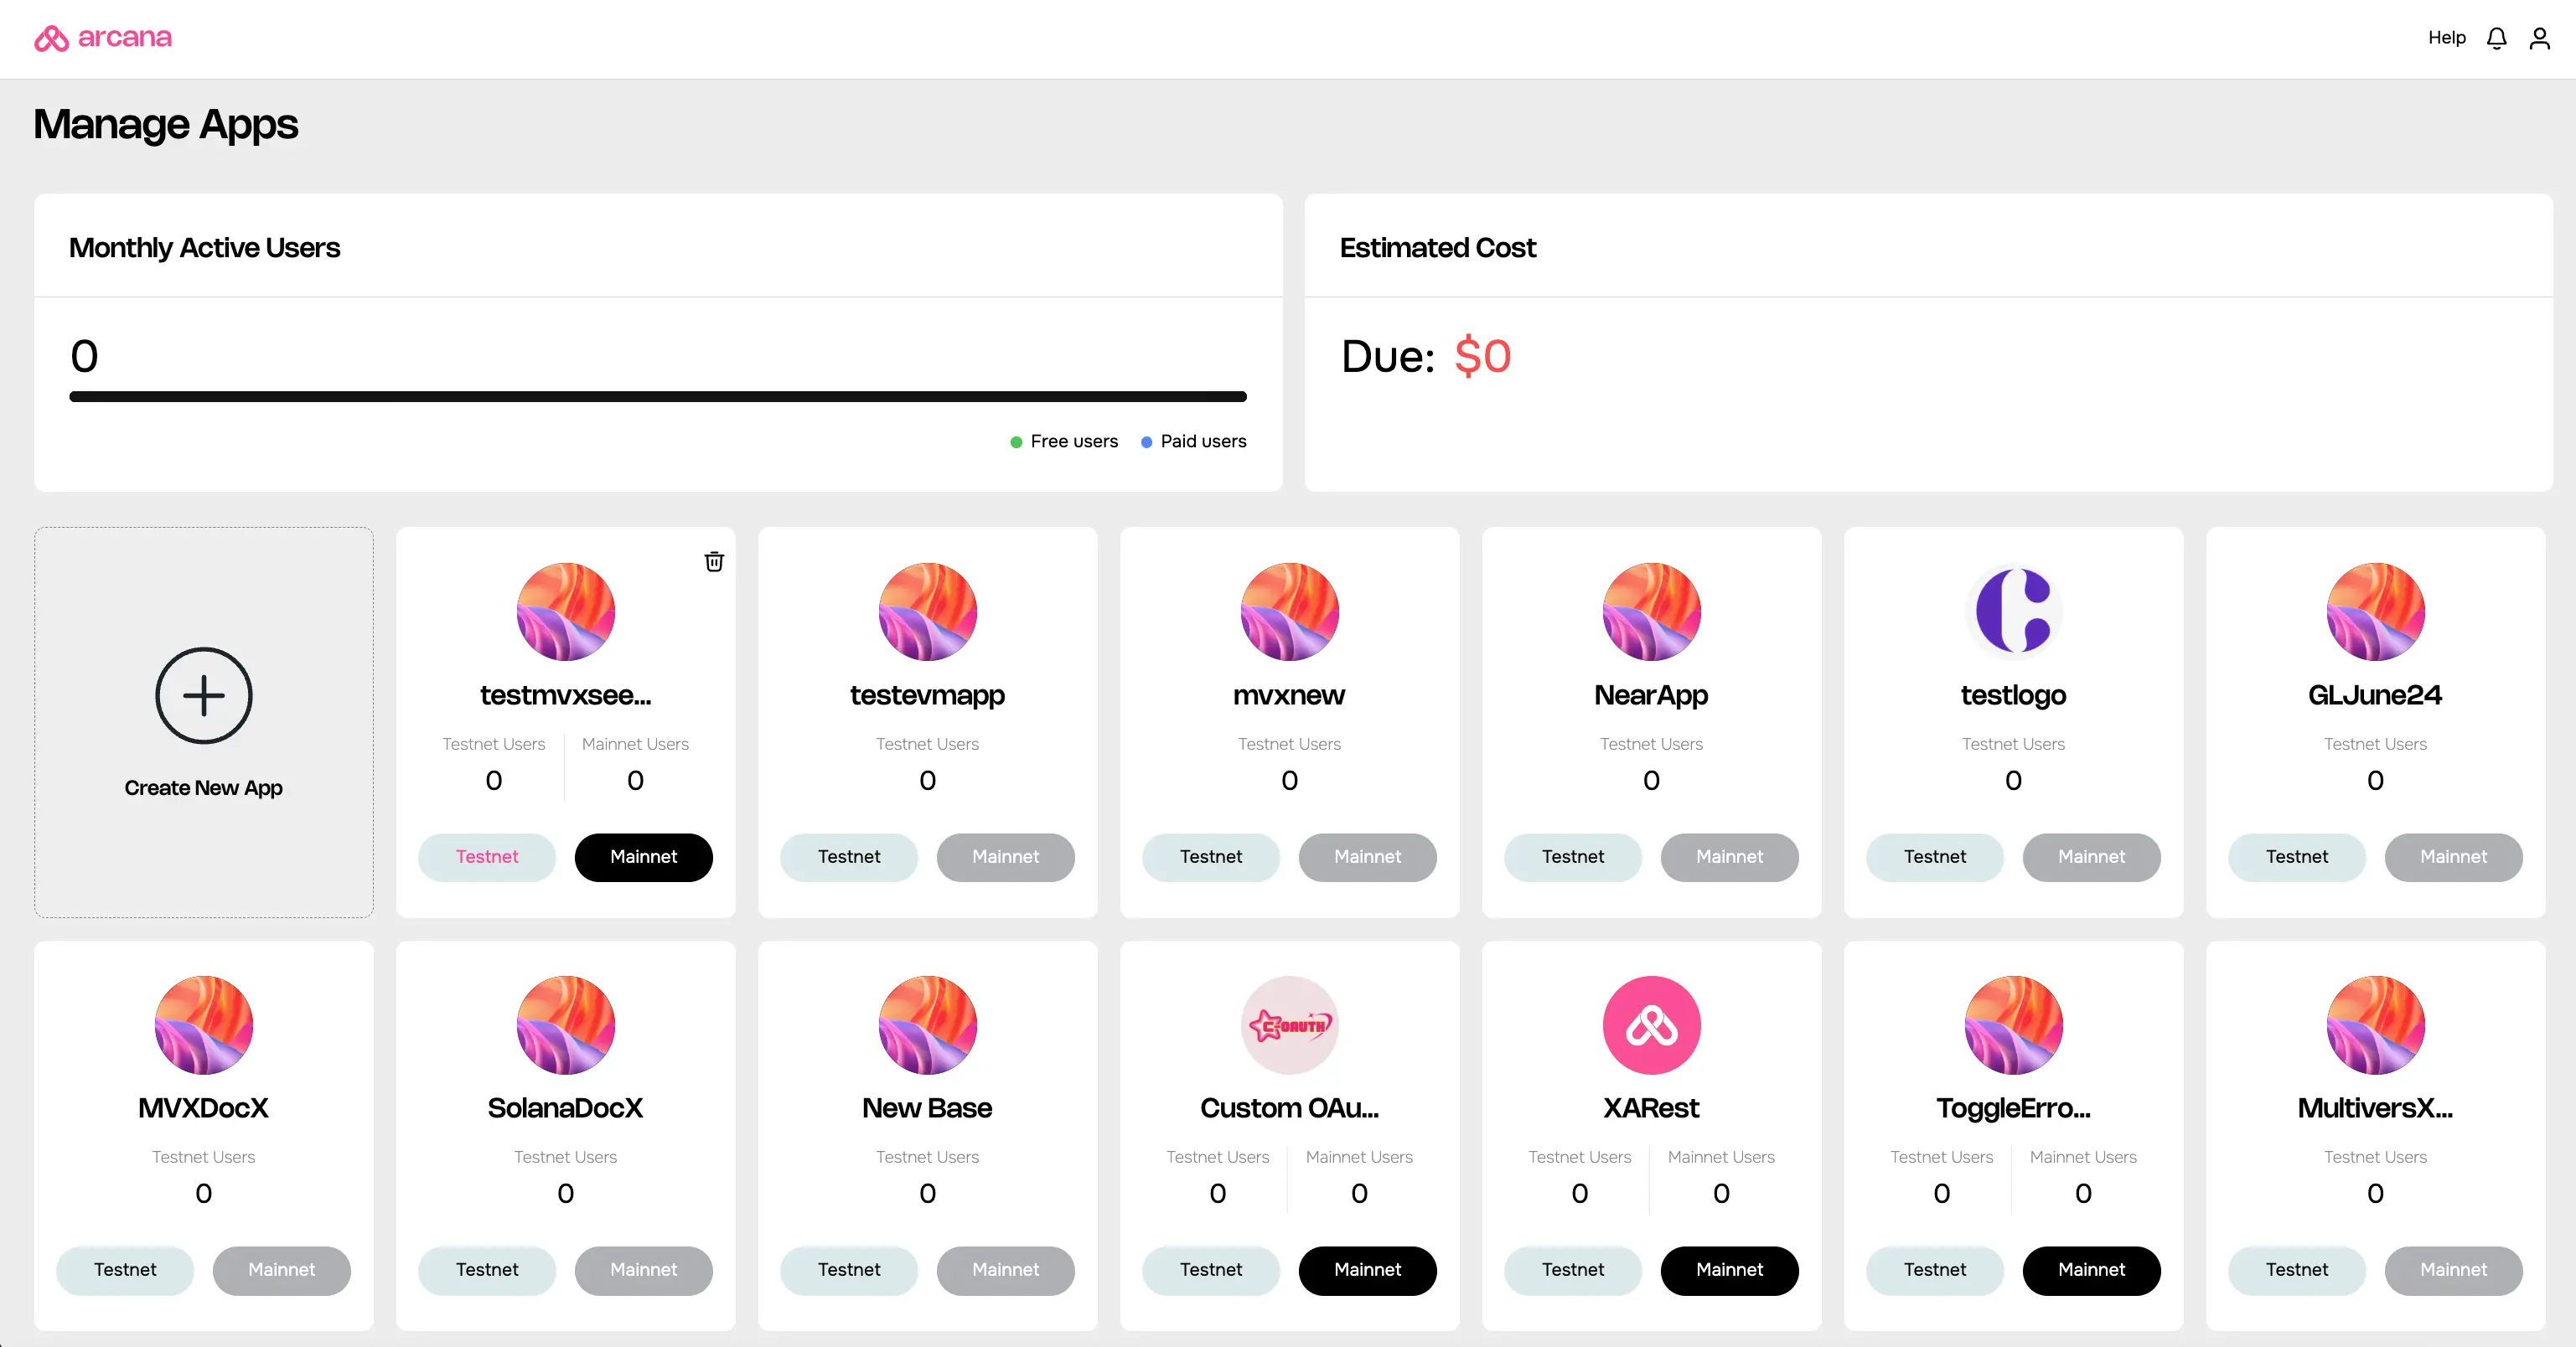
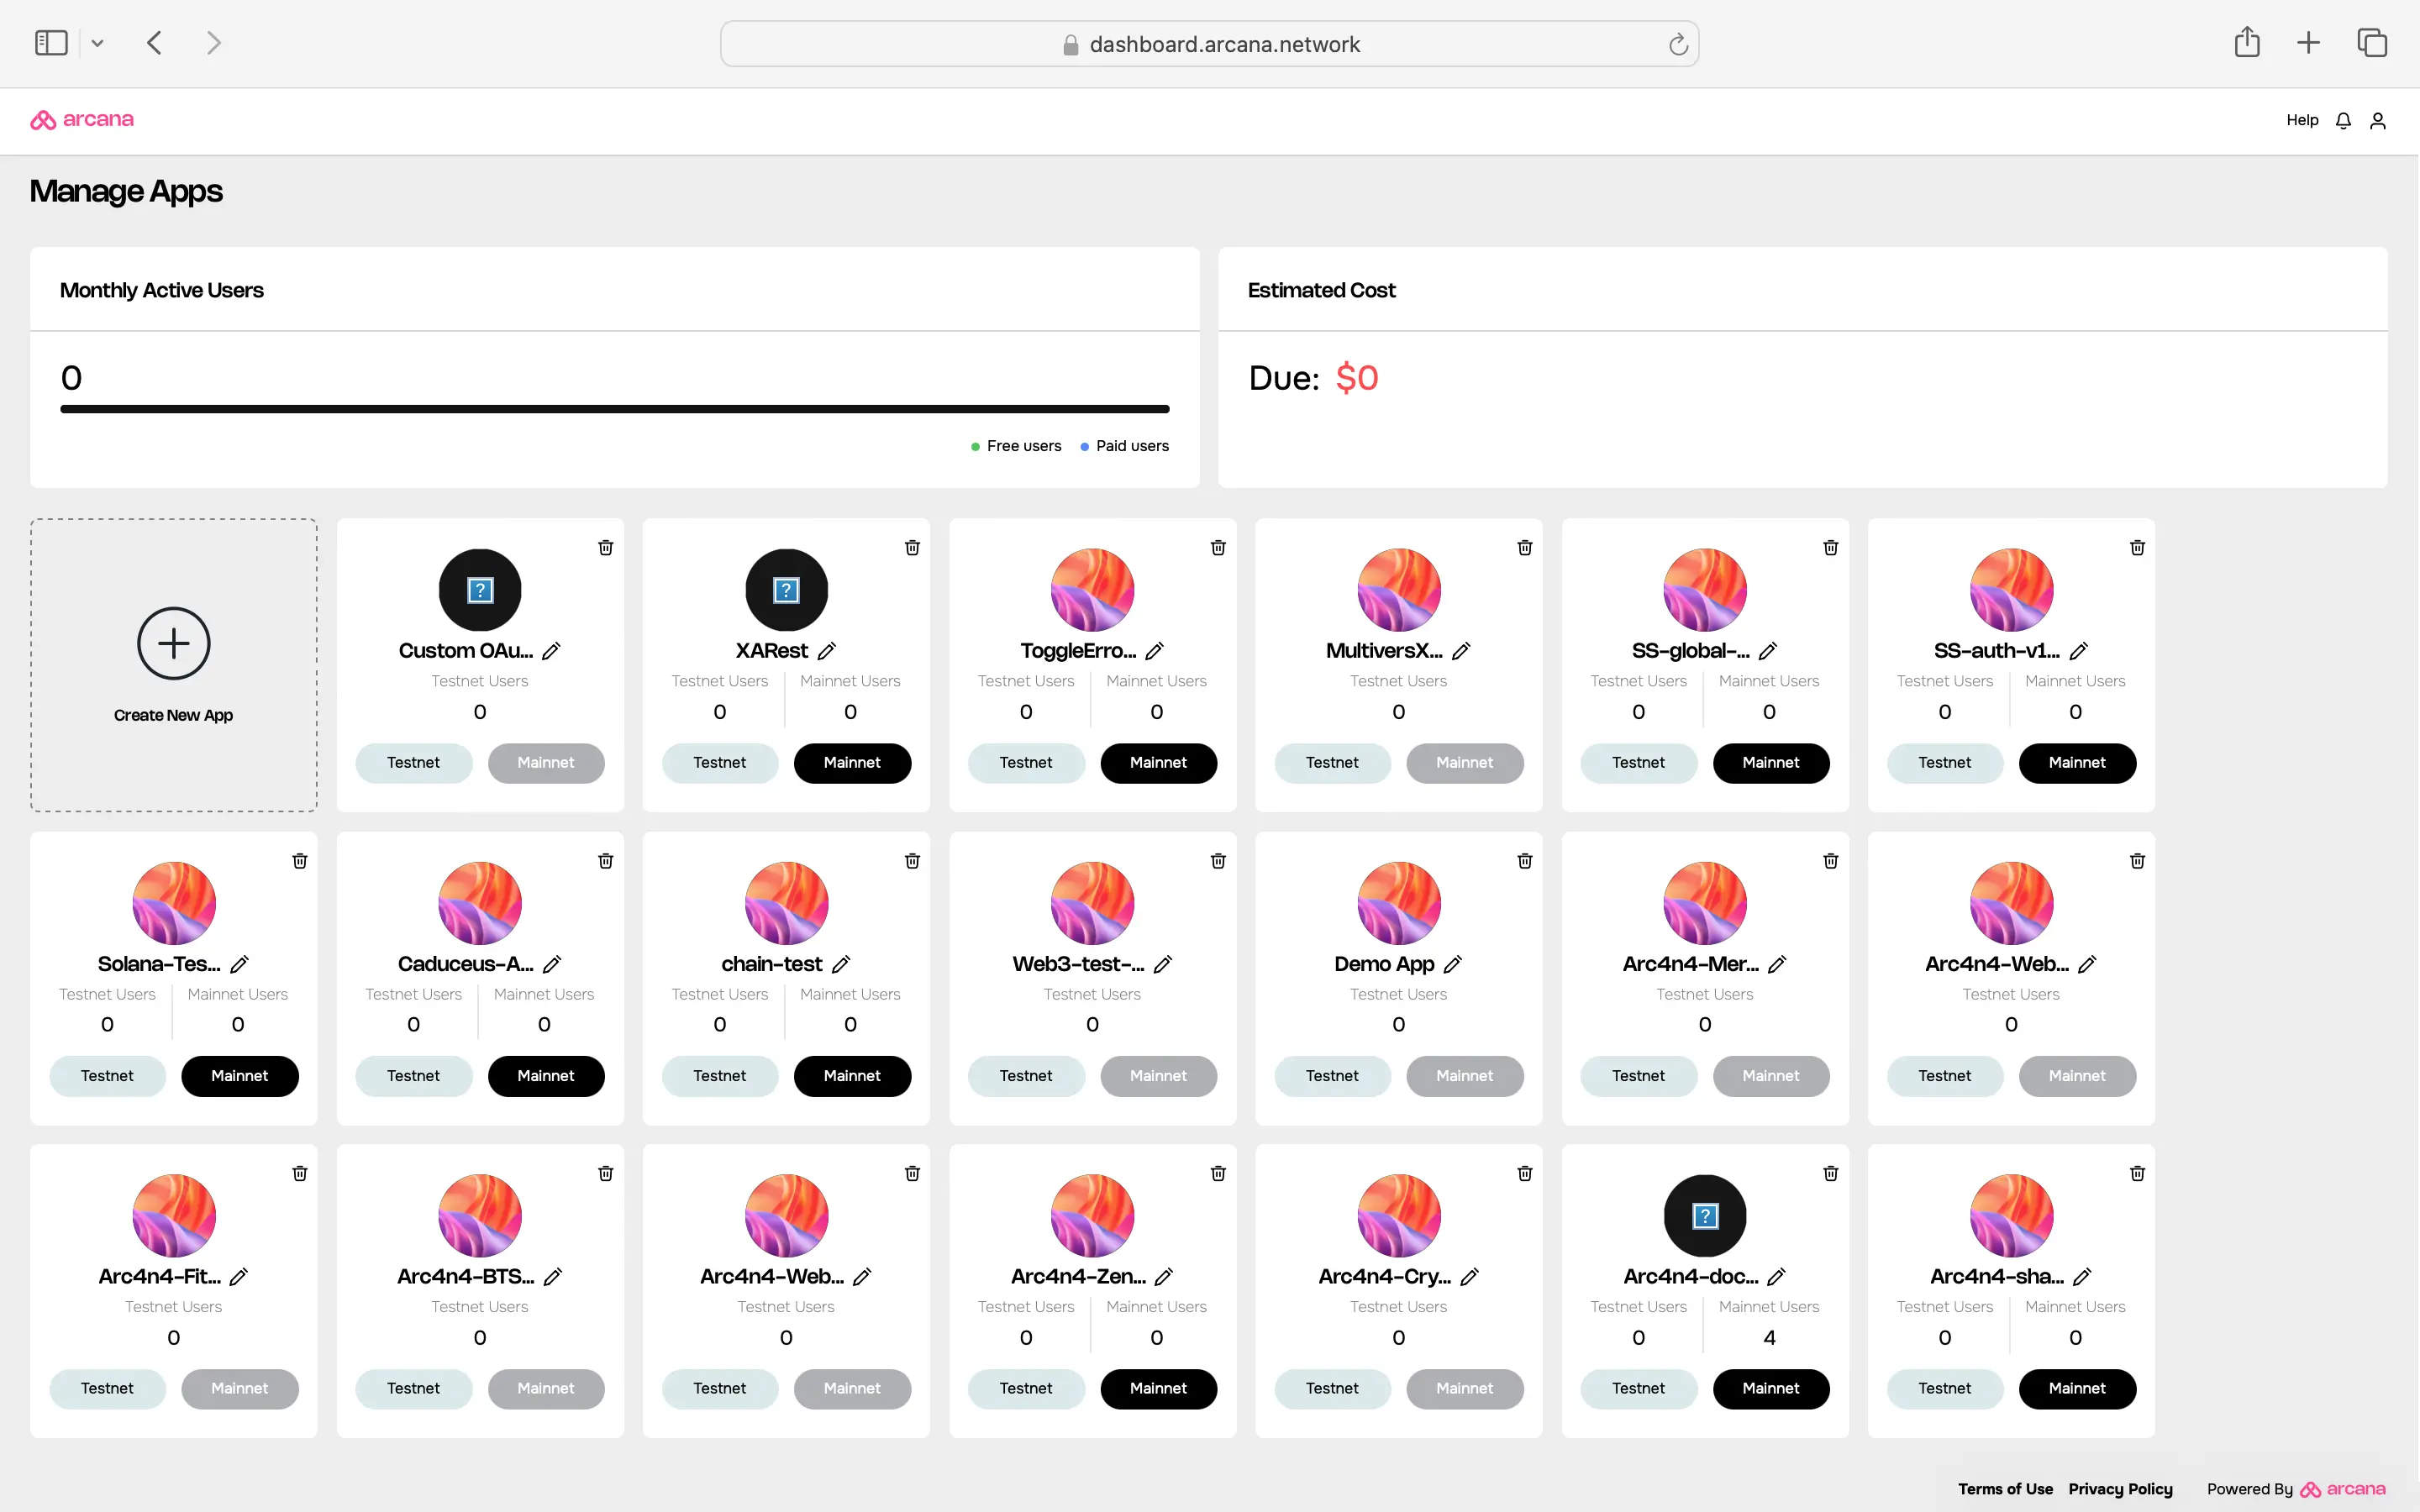
Register Application
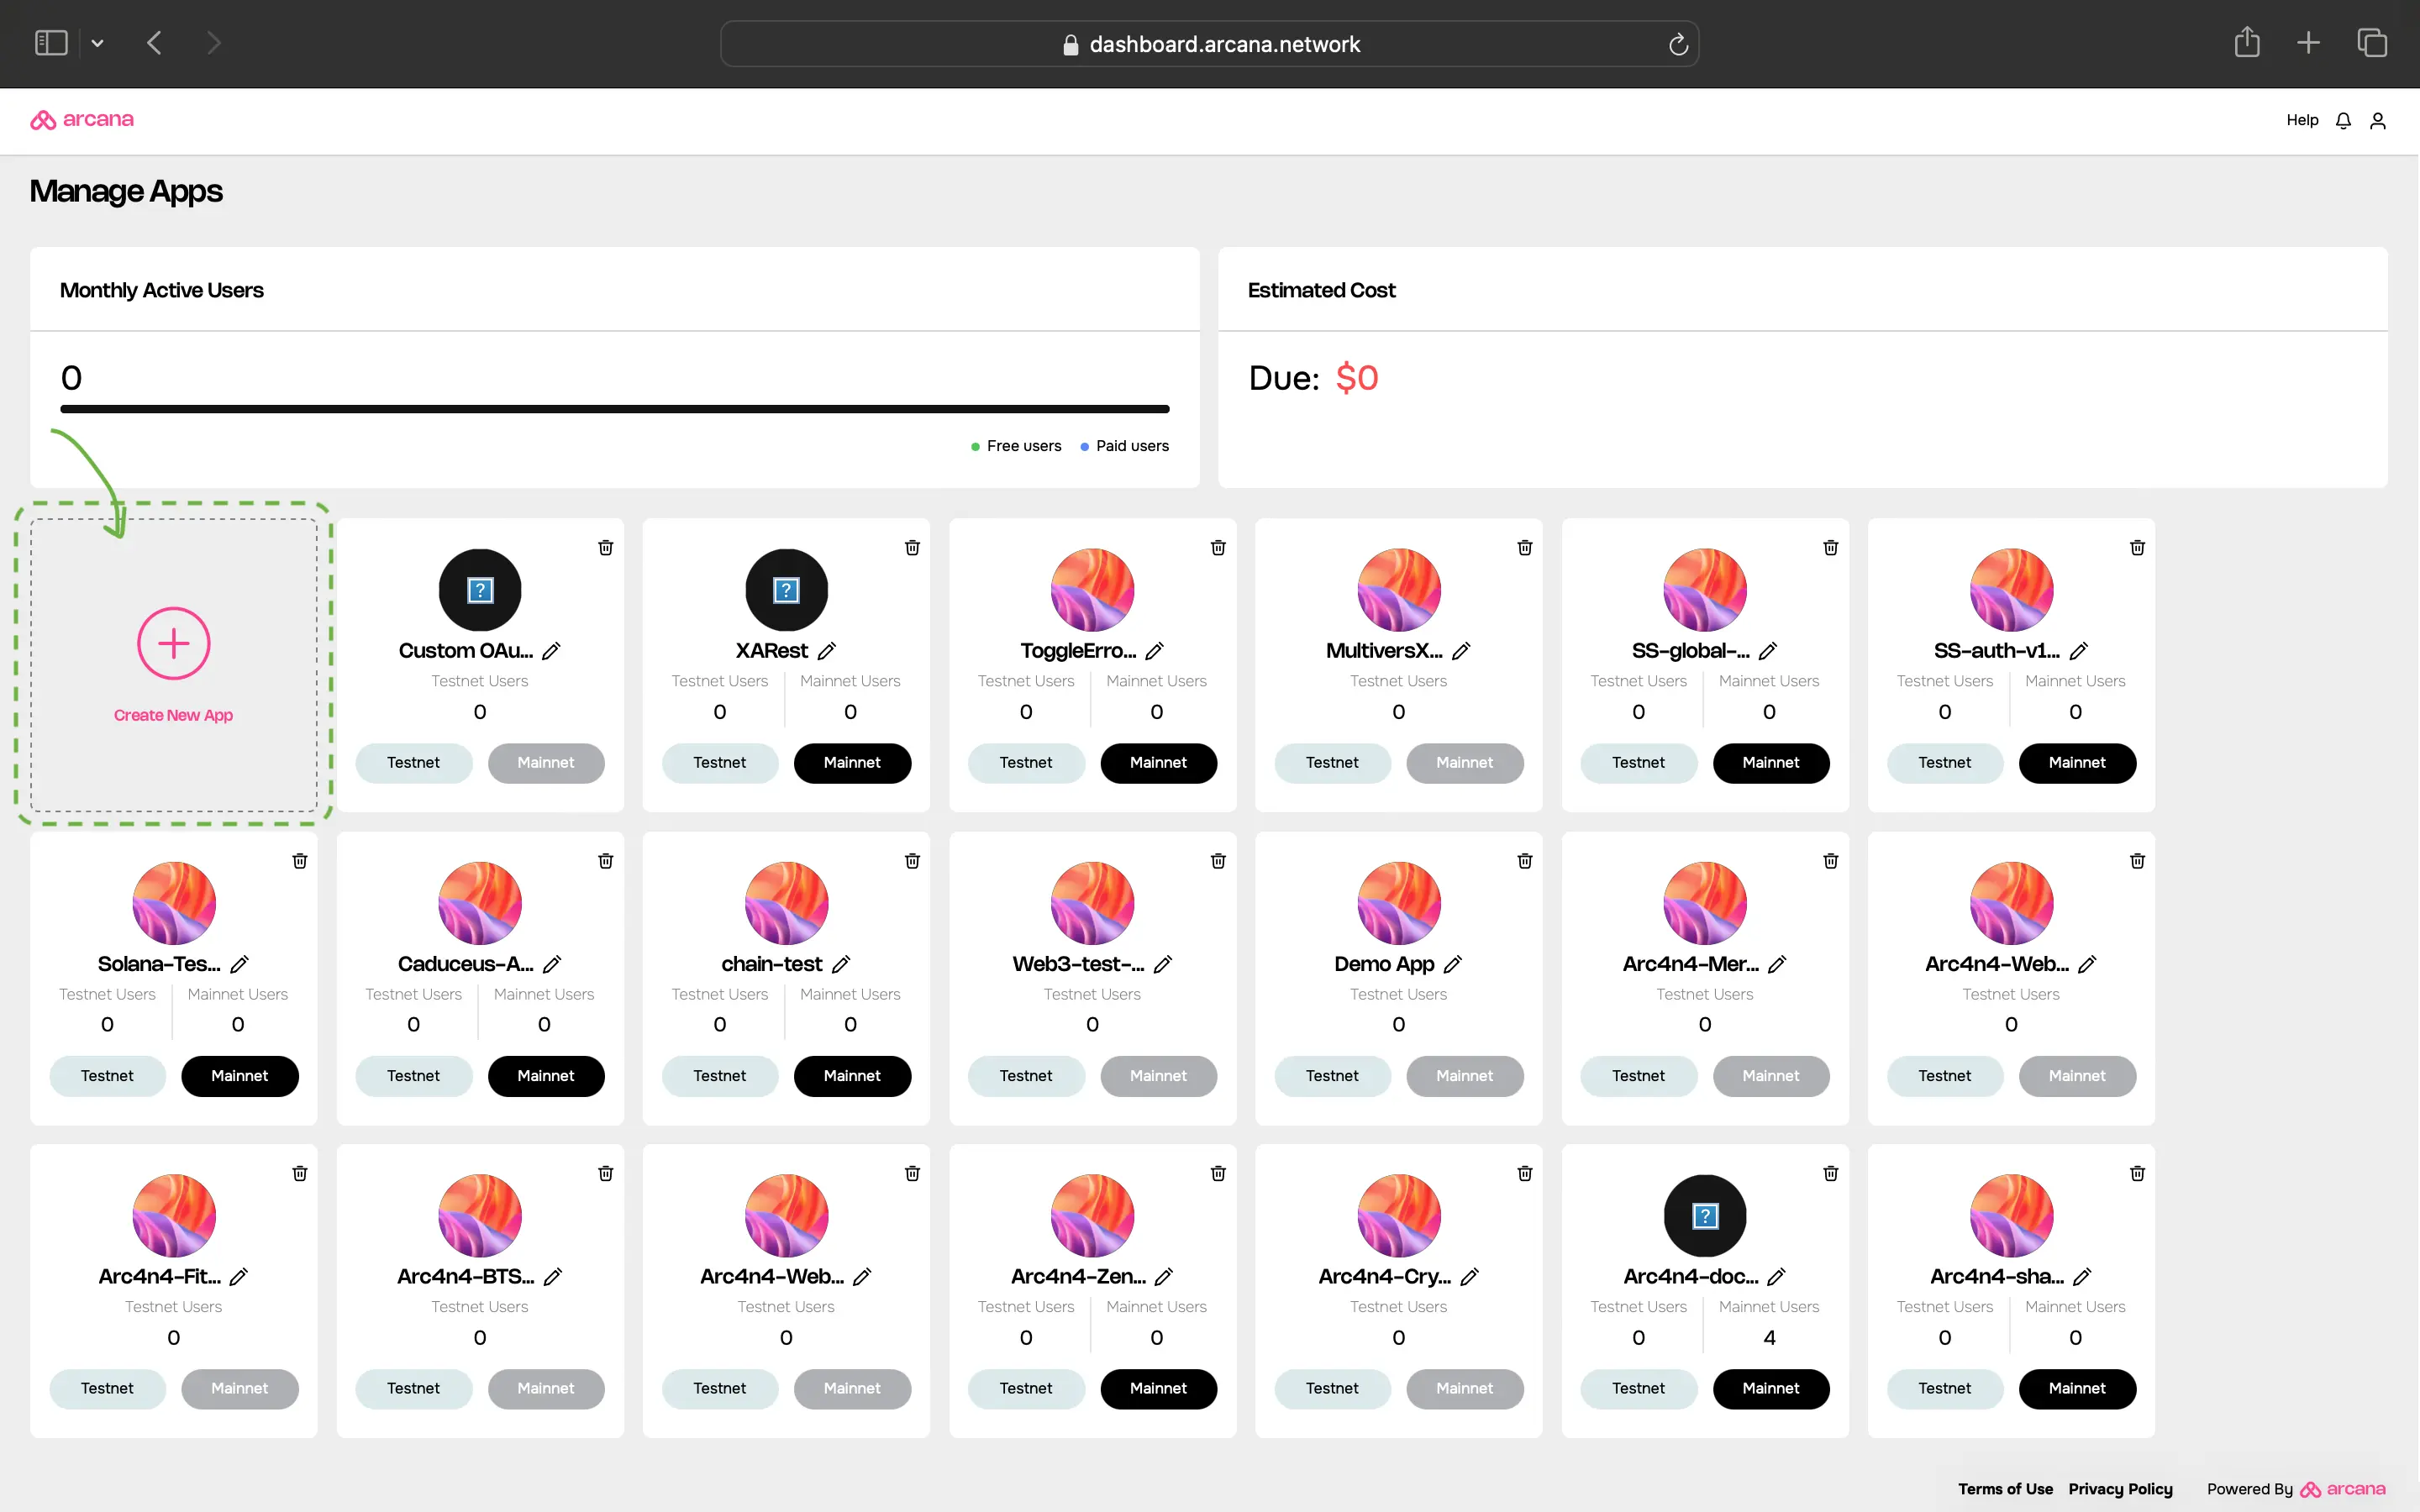
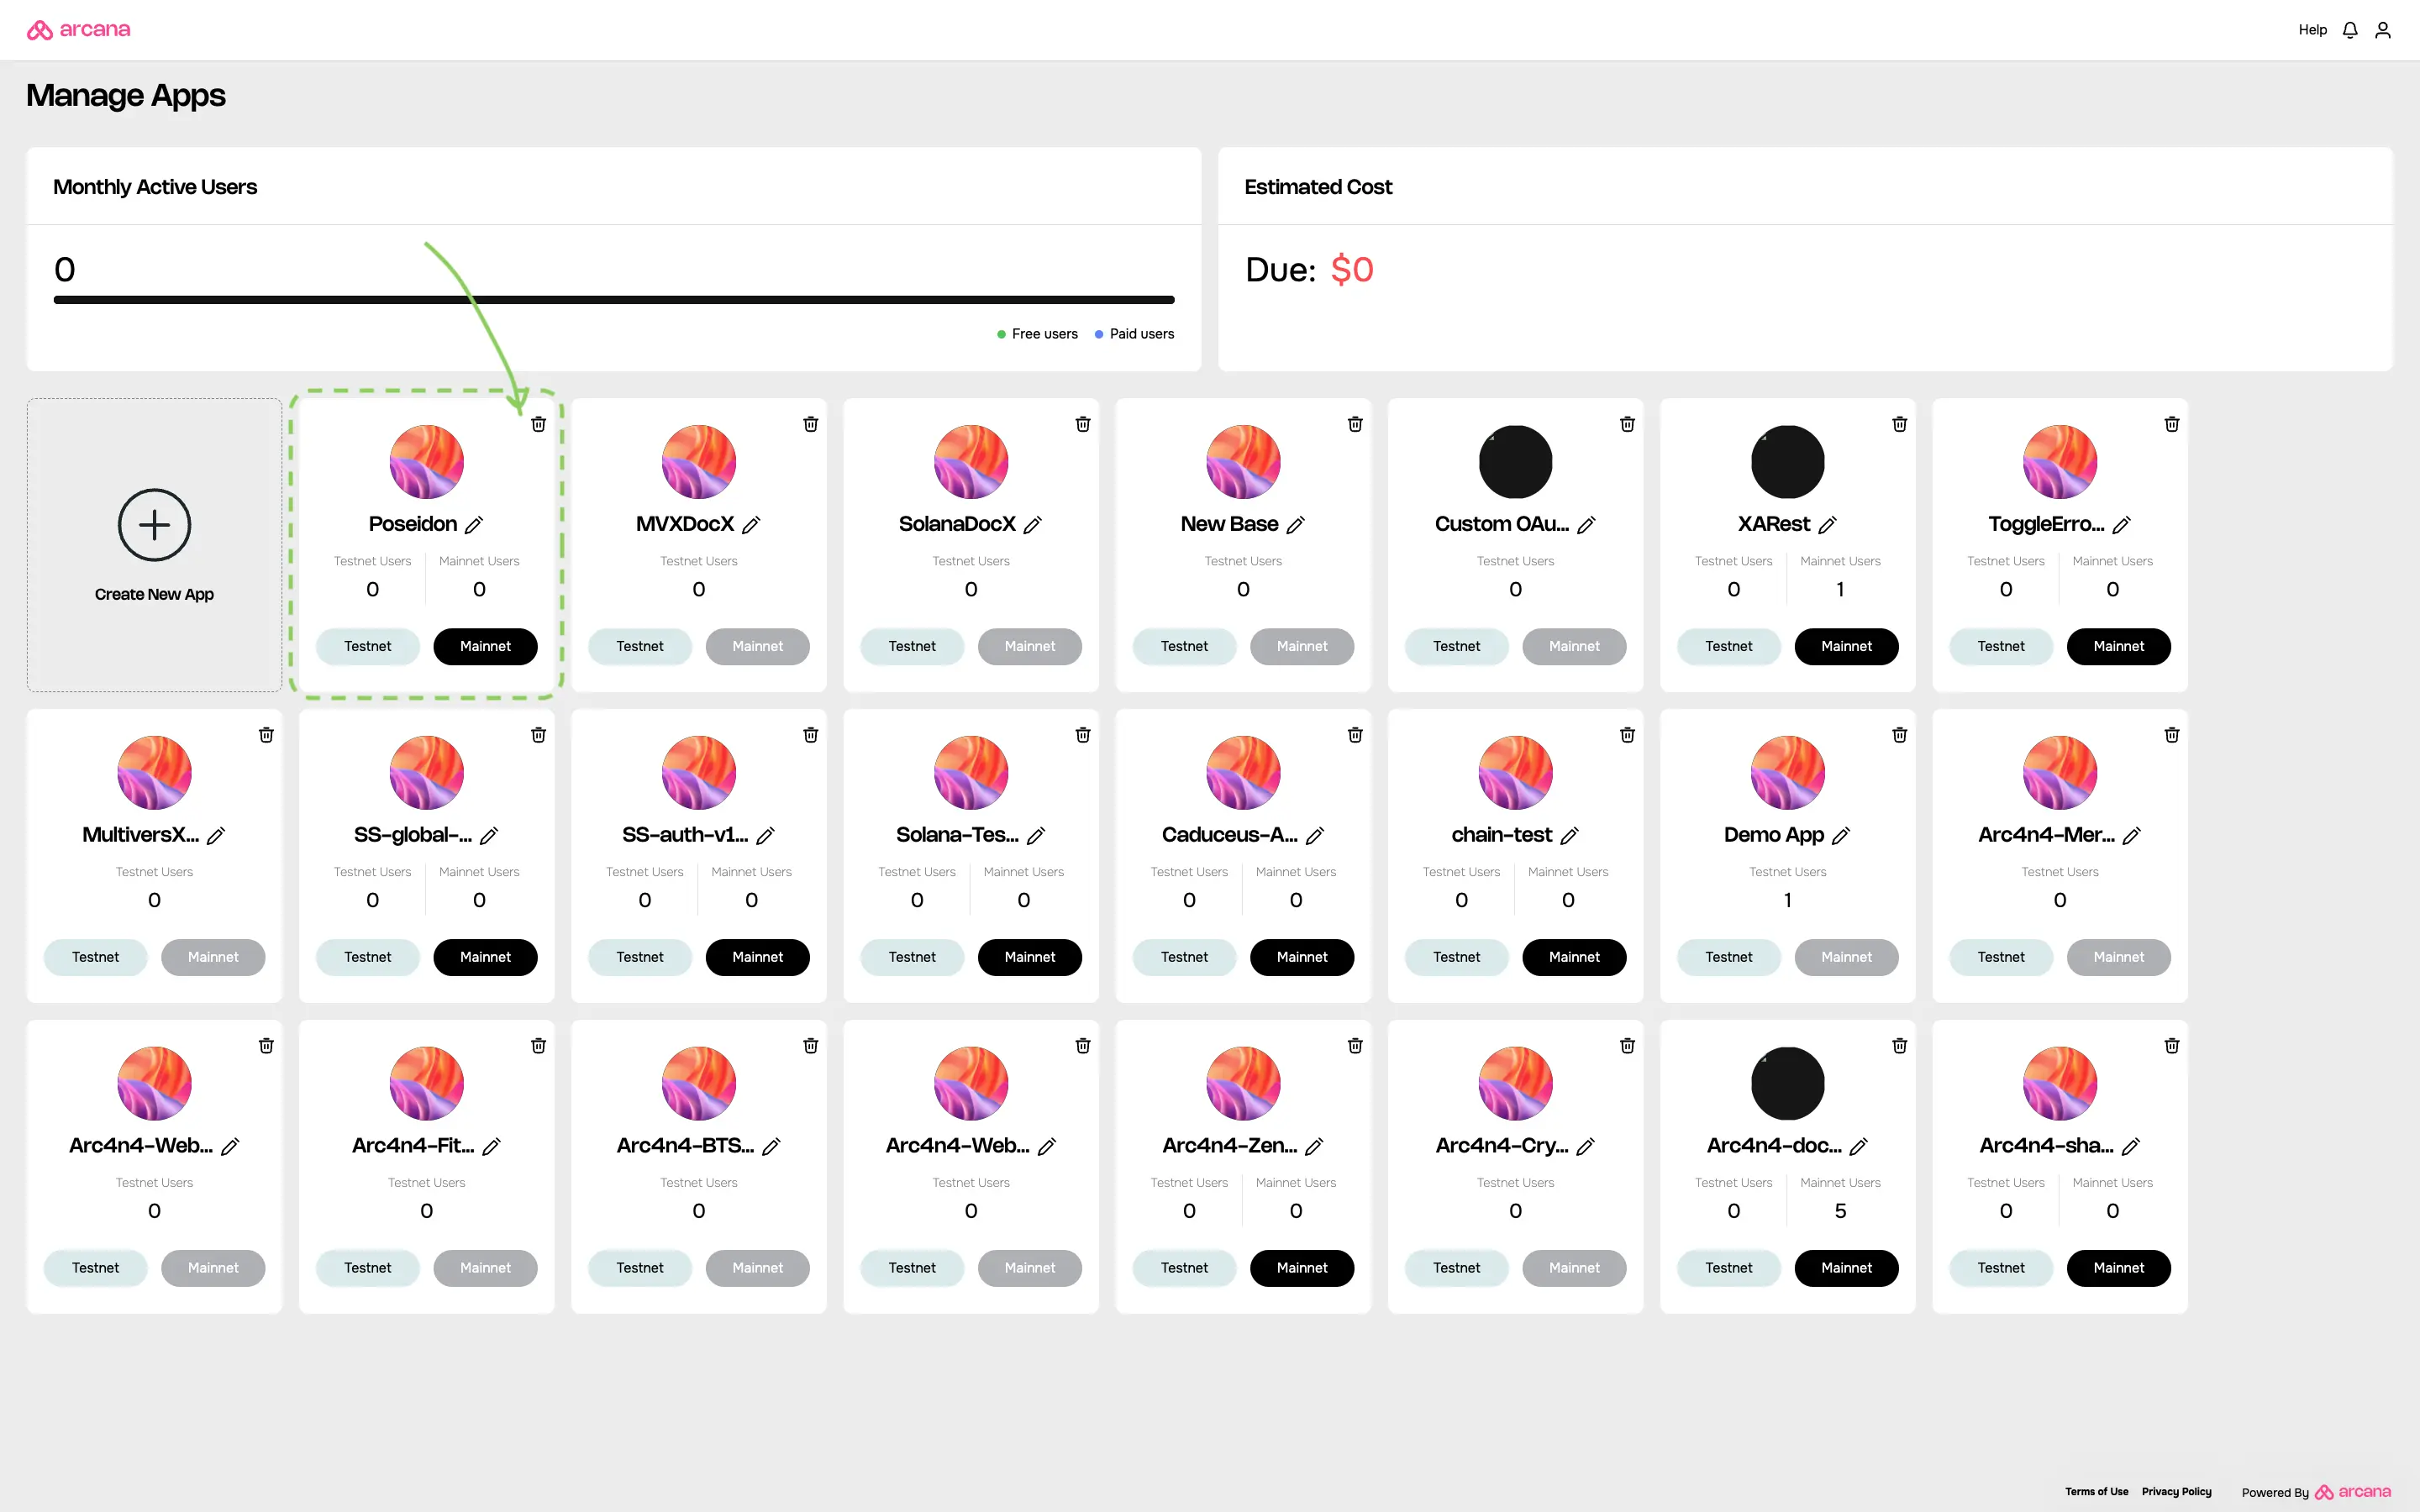
After logging into the dashboard, the Manage Apps screen is displayed. It contains one app card per registered app. The app card contains a summary of app usage statistics and buttons to view and edit the configuration profiles for Testnet and Mainnet settings.
To register the app, create a new app entry by clicking on the Create New App wizard.
Provide the following inputs to register the app:
- App name
- Chain Type: EVM, Solana, MultiversX, Near
- Default Blockchain
- Wallet UI Mode
Add a unique name for the app. It can be edited later. After registration, a unique Client ID is associated with each app name. This Client ID does not change if the app name is edited later.
All emails related to a registered app billing or user login will mention the latest app name as displayed in the dashboard. Once an app is deleted, the Client ID is no longer valid. Creating a new app with the same name and registering it with Arcana will result in a new Client ID associated with the app.
Edit App Name
Click on the pen icon next to the app name. Click Enter in the editable text field to save the changes.
During registration, developers must choose between EVM chains or non-EVM chains supported by the app. The pre-configured chain list in the Arcana wallet will display only the configured chains.
Non-EVM Chains
When registering an app through Arcana Developer Dashboard, the choice of chain type (EVM, Solana, MultiversX, Near) is final. App developers can't change it later. They can switch the default chain within the same type. For example, a Solana app on Testnet can switch to Solana Mainnet or Solana Dev but not to MultiversX or an EVM chain.
Based on your chain type selection, you will see a list of supported chains. Choose one as the default. This default chain will appear as the current, active chain in the Arcana wallet when the user logs into the app integrated with the Arcana Auth SDK.
The wallet UI mode setting allows the developers to choose whether they want to use the default, built-in Arcana wallet UI or build a custom wallet UI for the app users.
One Time Setting
The Custom Wallet UI option selected during app registration is a one-time setting. Once selected, the app cannot use the built-in Arcana wallet UI at all. Developers must create a custom wallet UI and plug in the requisite Web3 wallet operations.
Global Keyspace Not Supported
If the Custom Wallet UI option is selected during app registration, the app is assigned app-specific keys by default. The app configuration does not have the option to configure global keyspace.
View Wallet UI Mode
Once specified during app-registration, the Wallet UI mode setting can be viewed later via the Configure > Arcana Wallet settings section in the app configuration profile.

After providing all the required inputs, click Create to register the app.
The app is registered, and a unique Client ID is assigned. By default, every newly registered app is associated with a Testnet configuration profile.

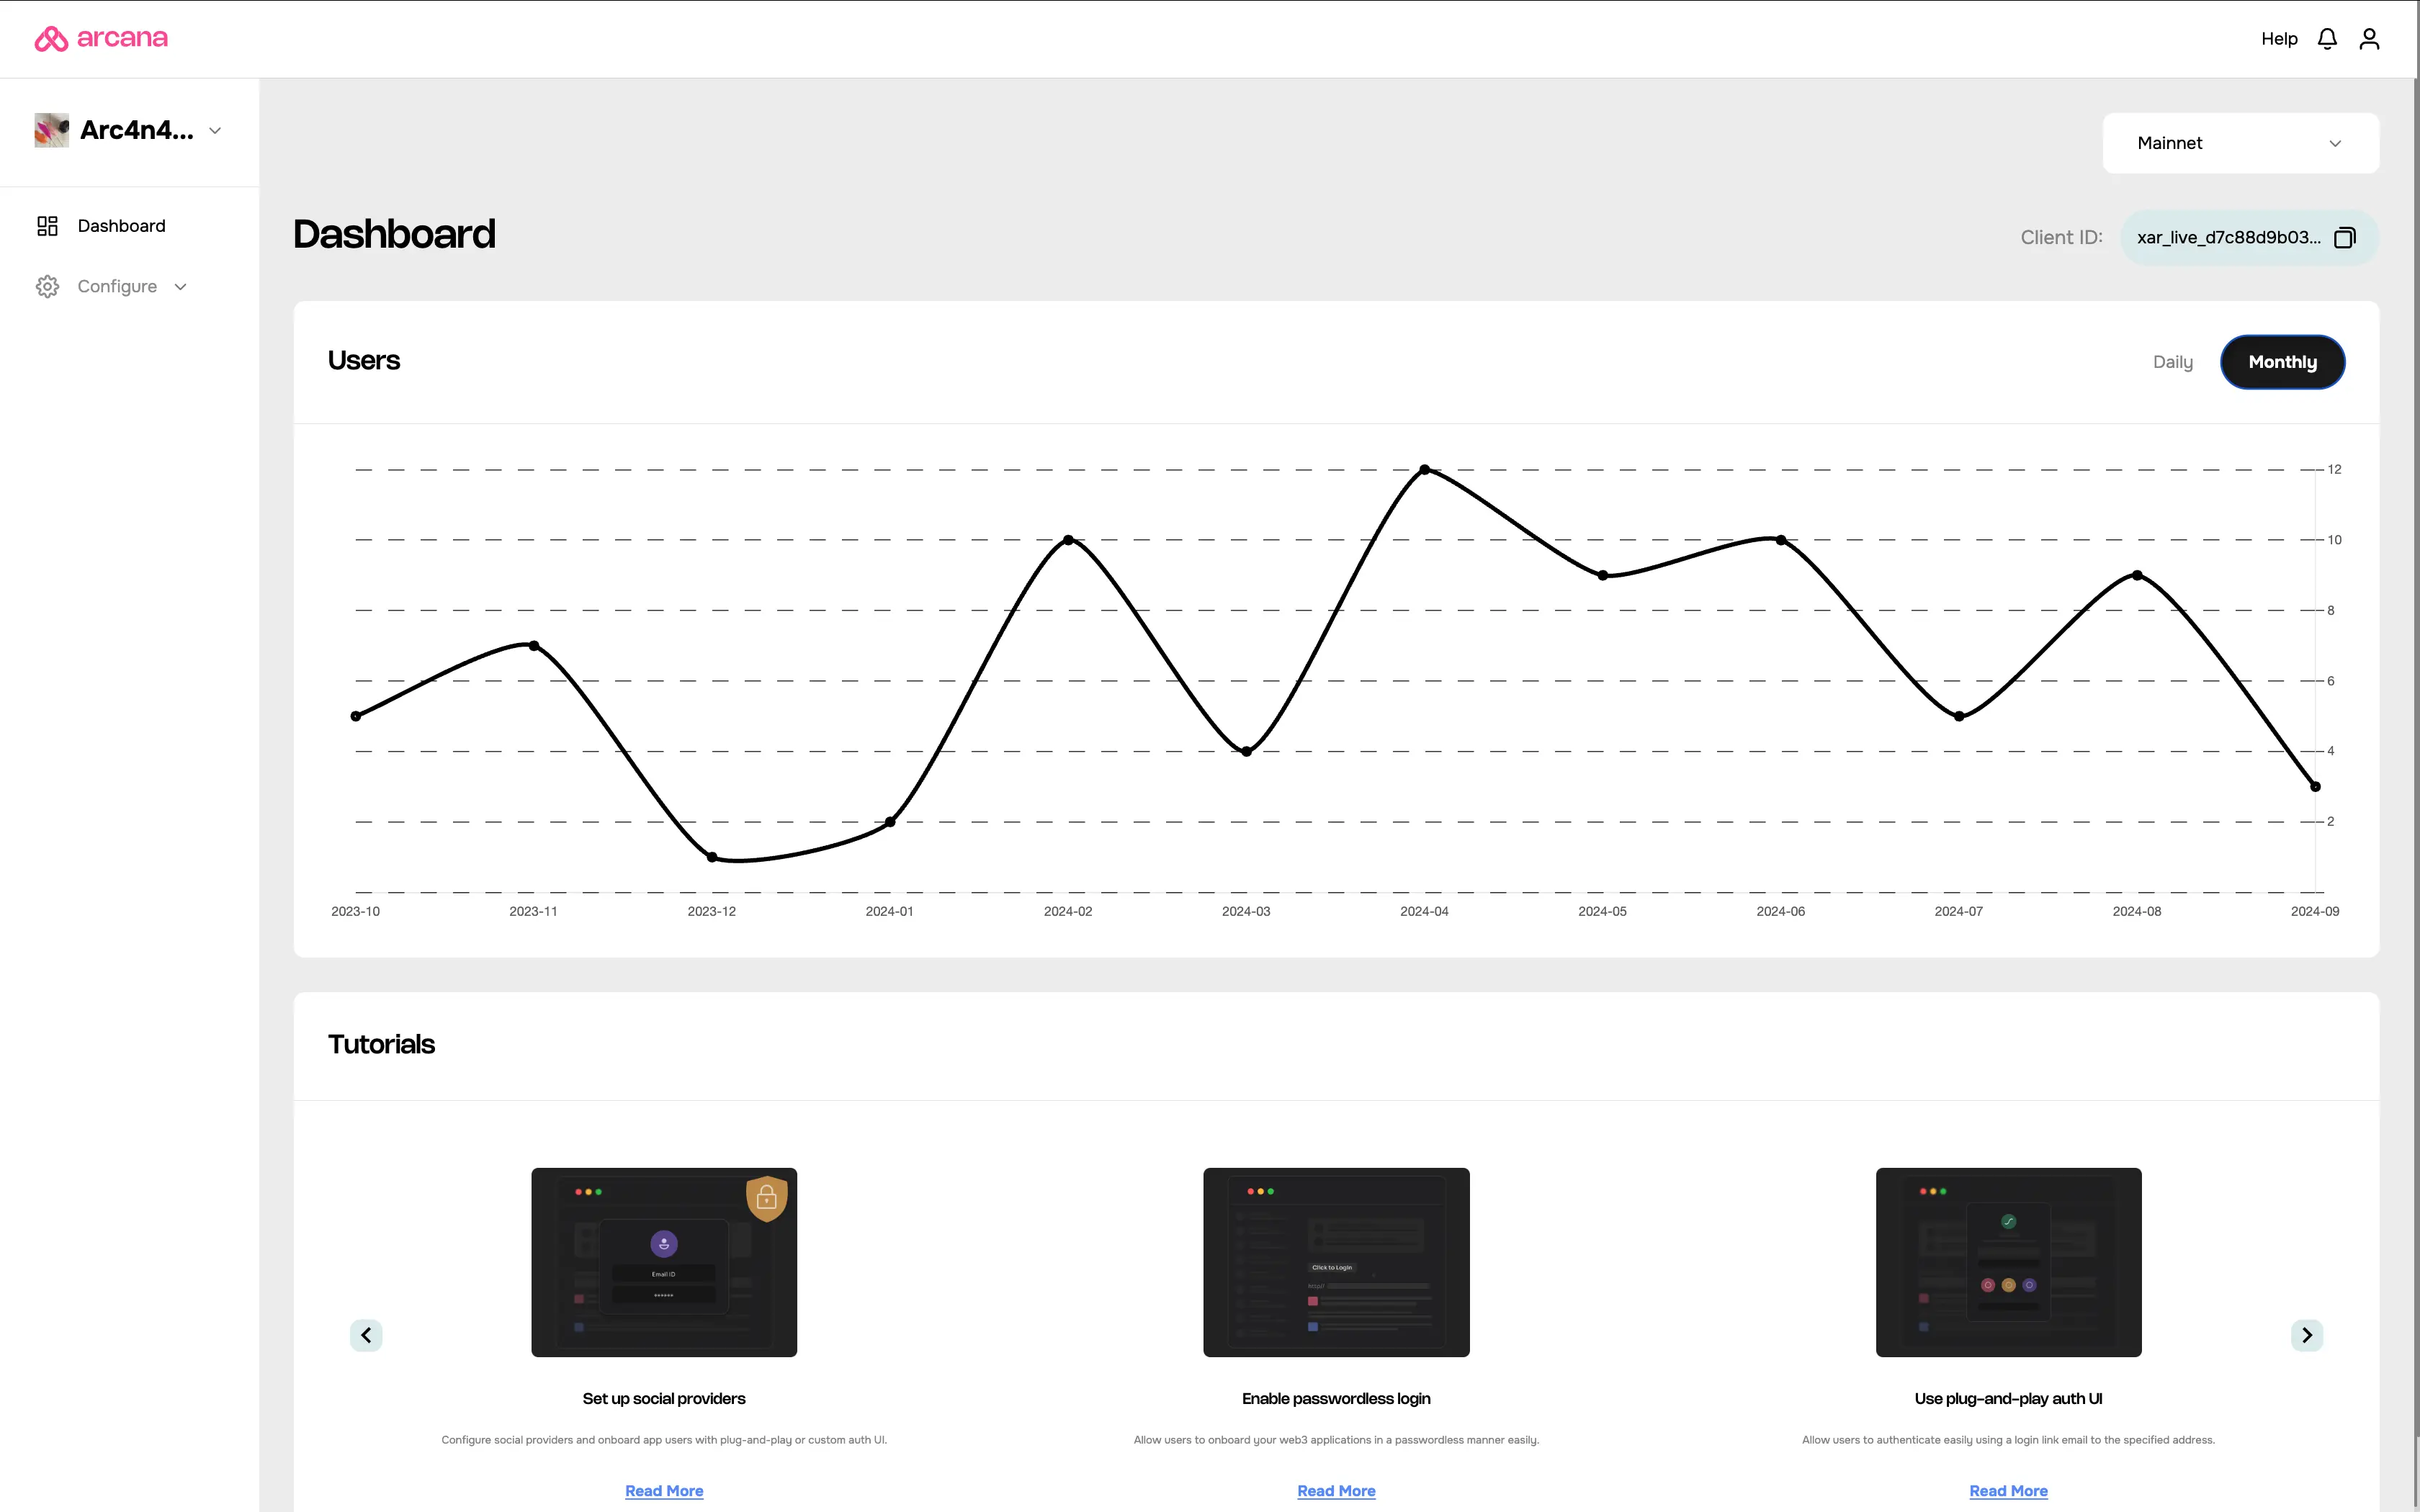
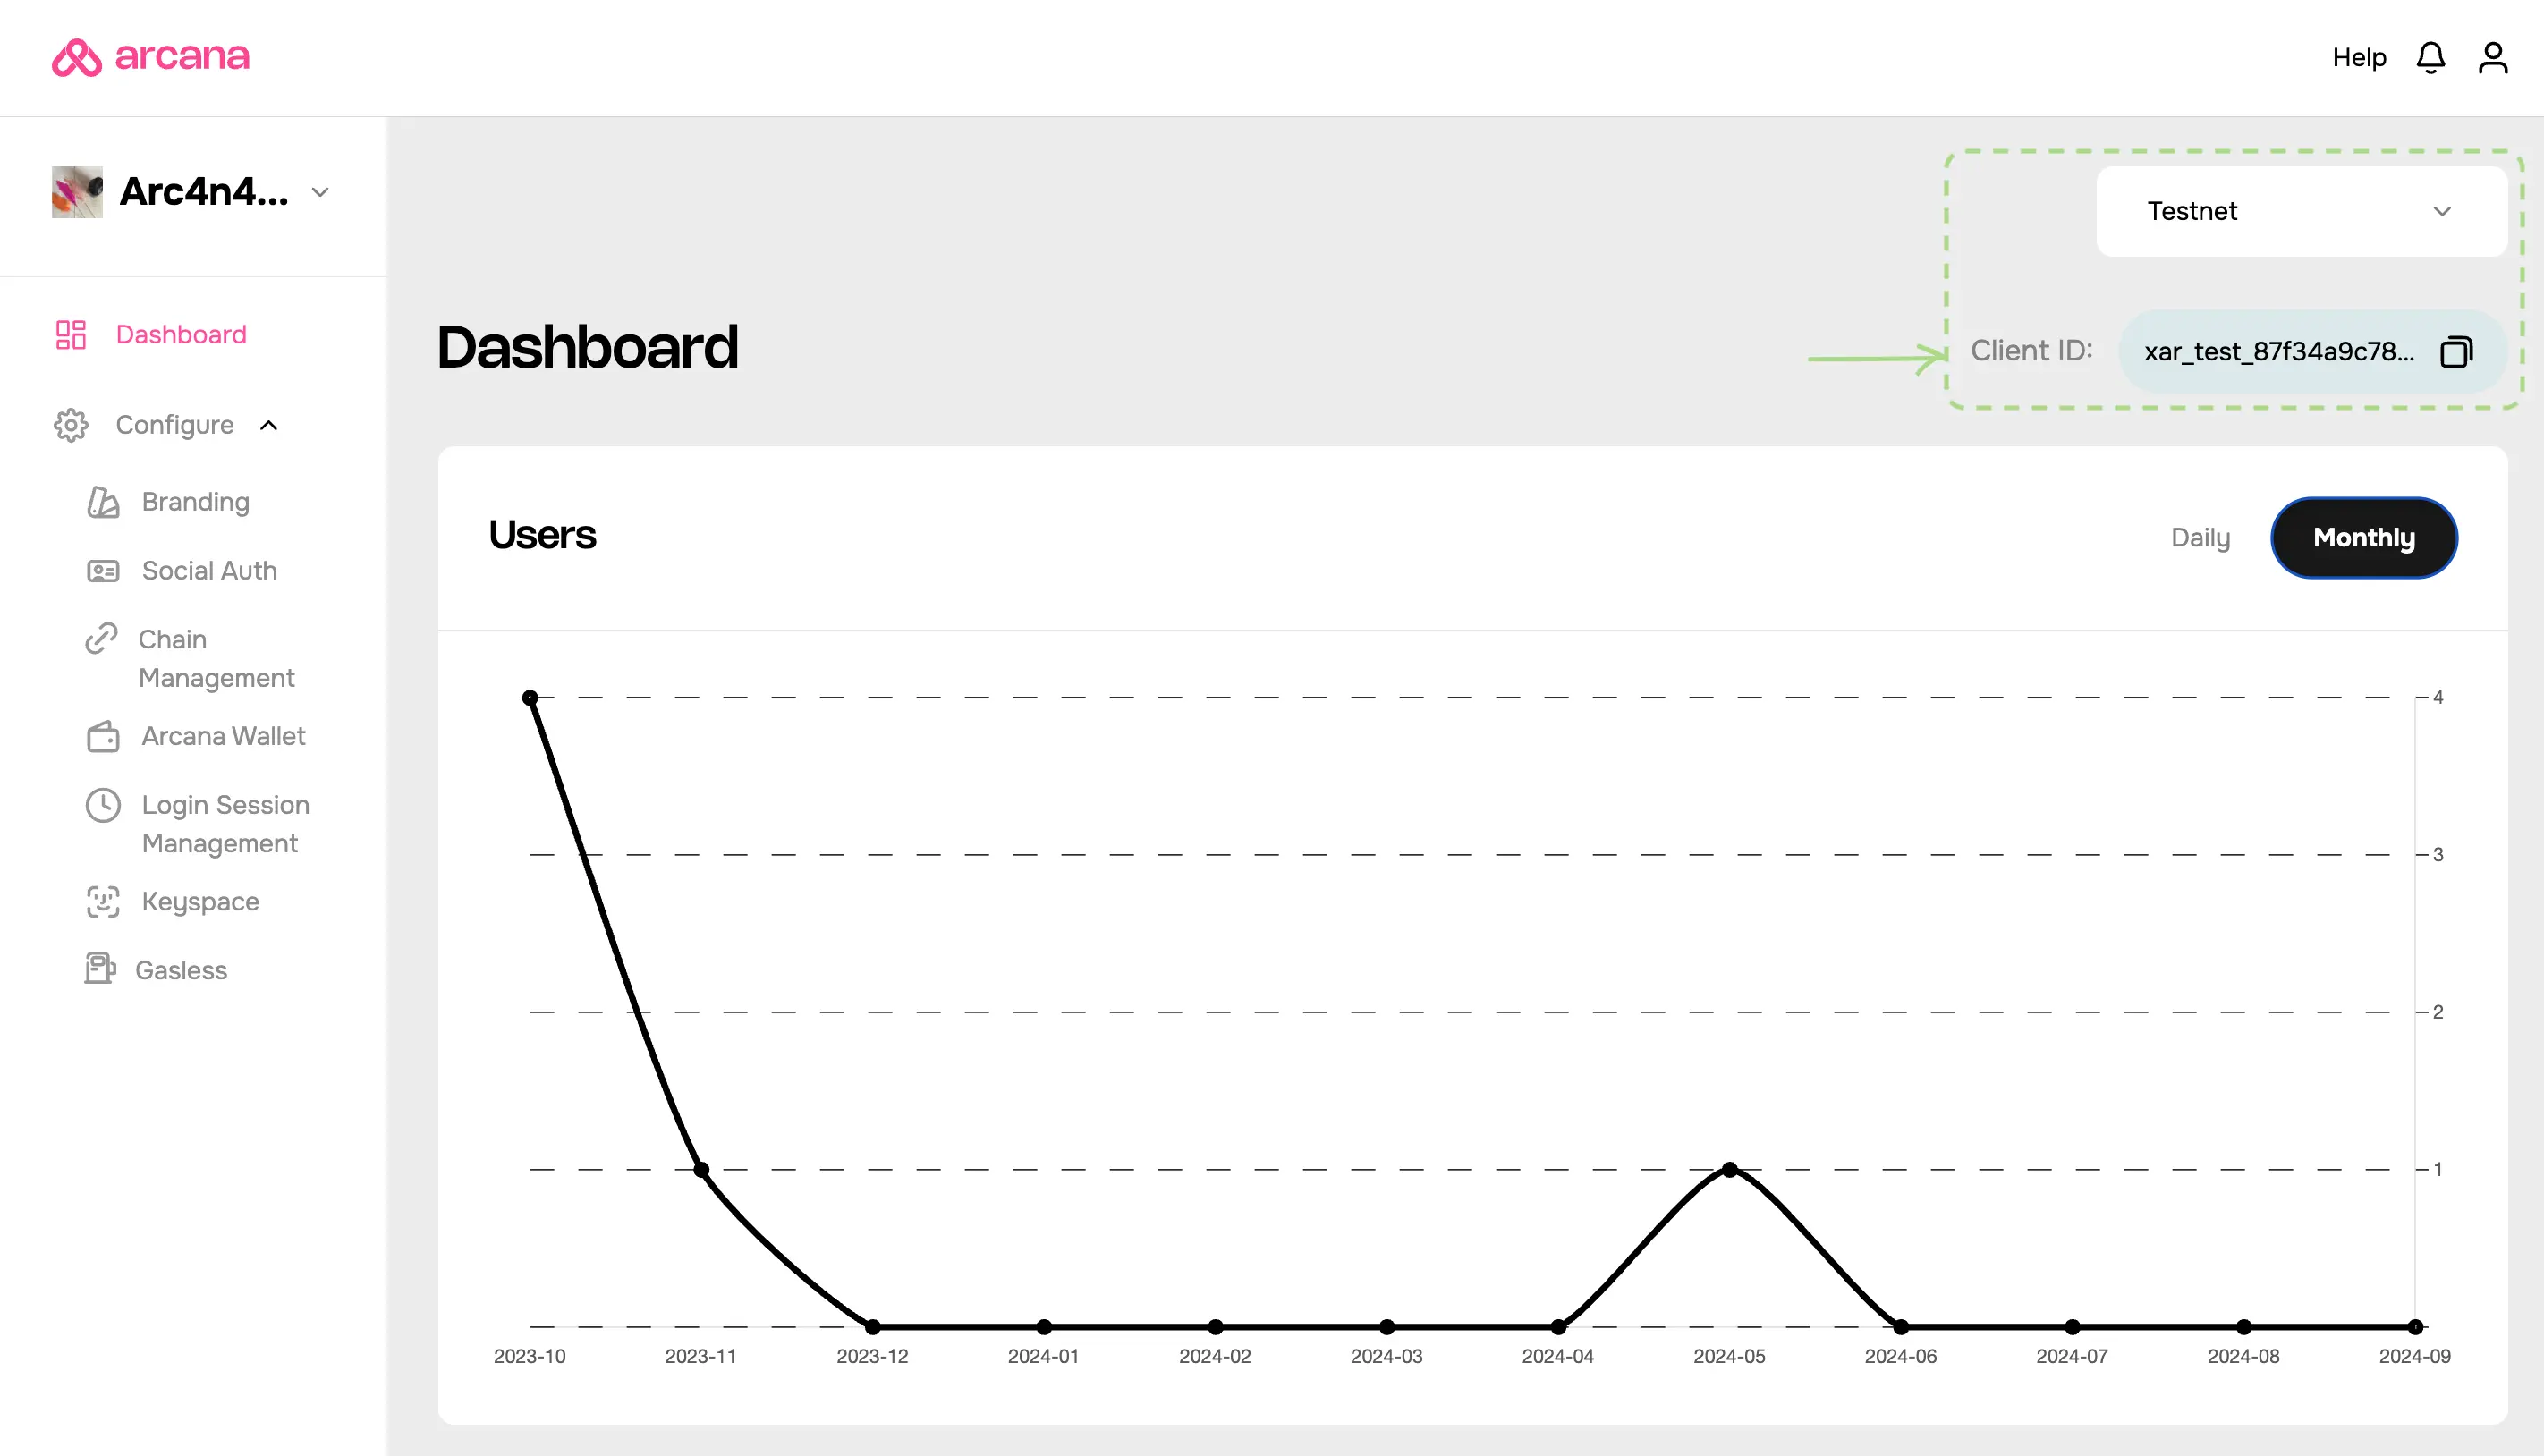
Get Client ID
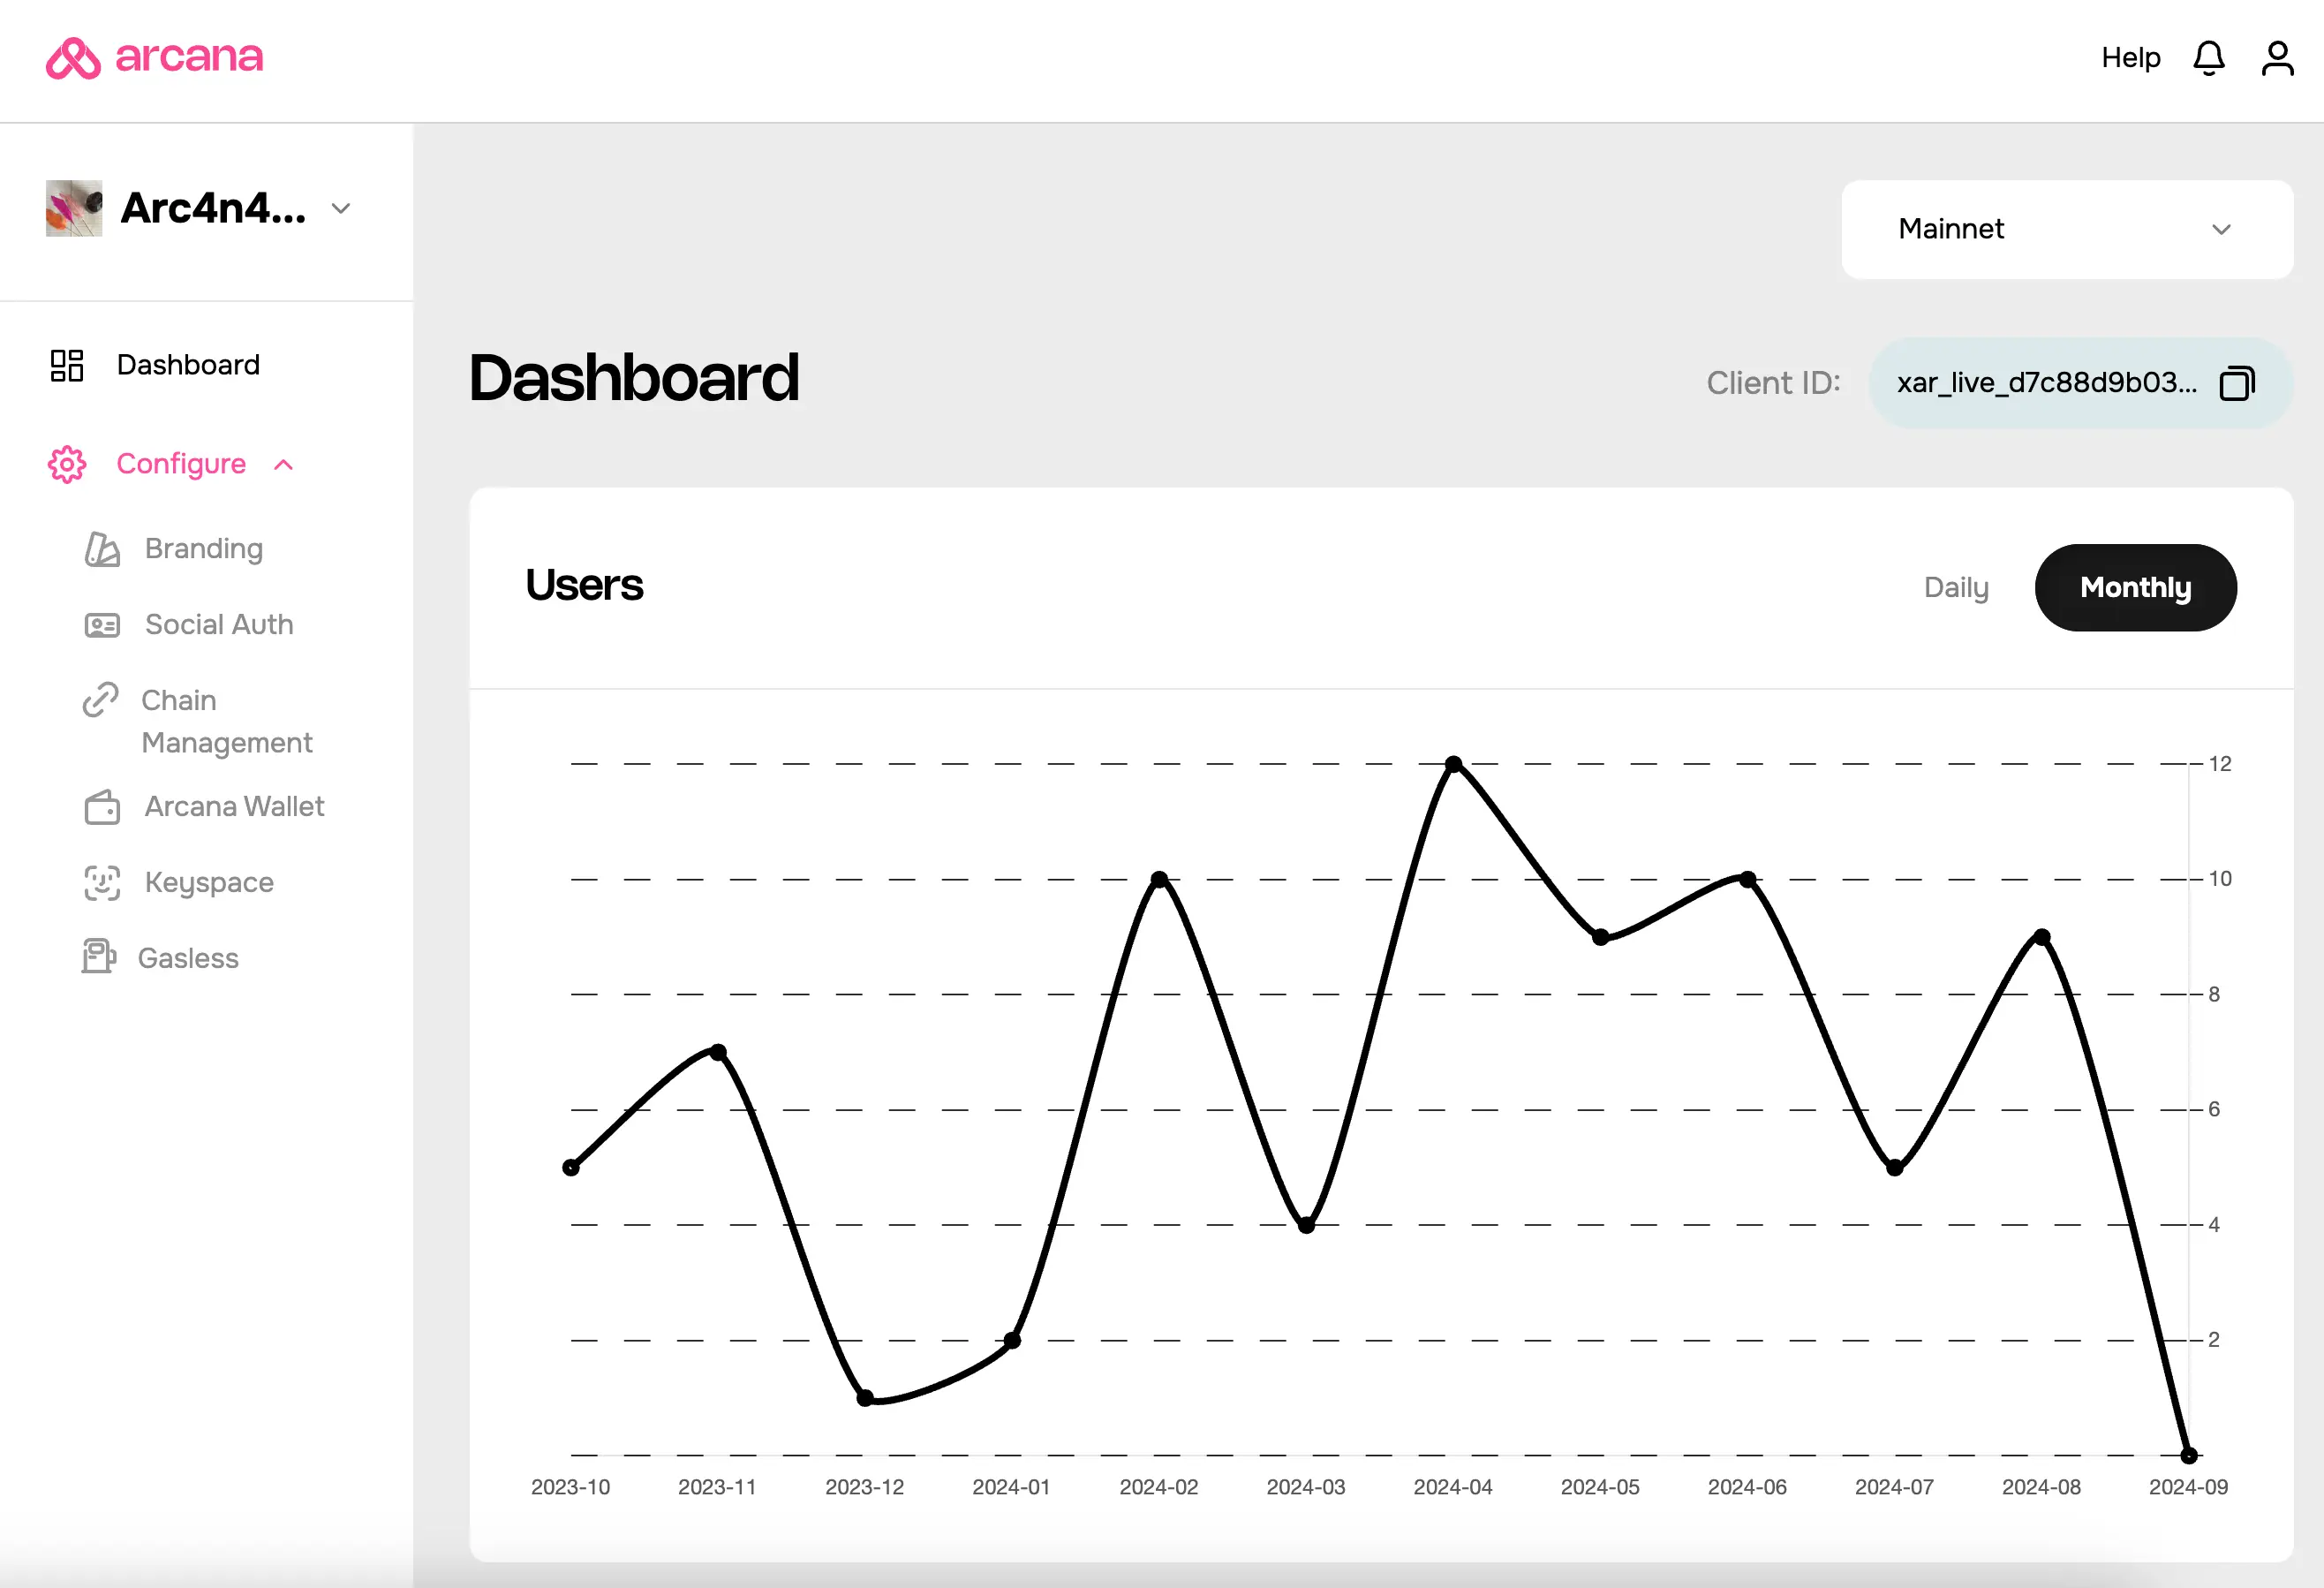
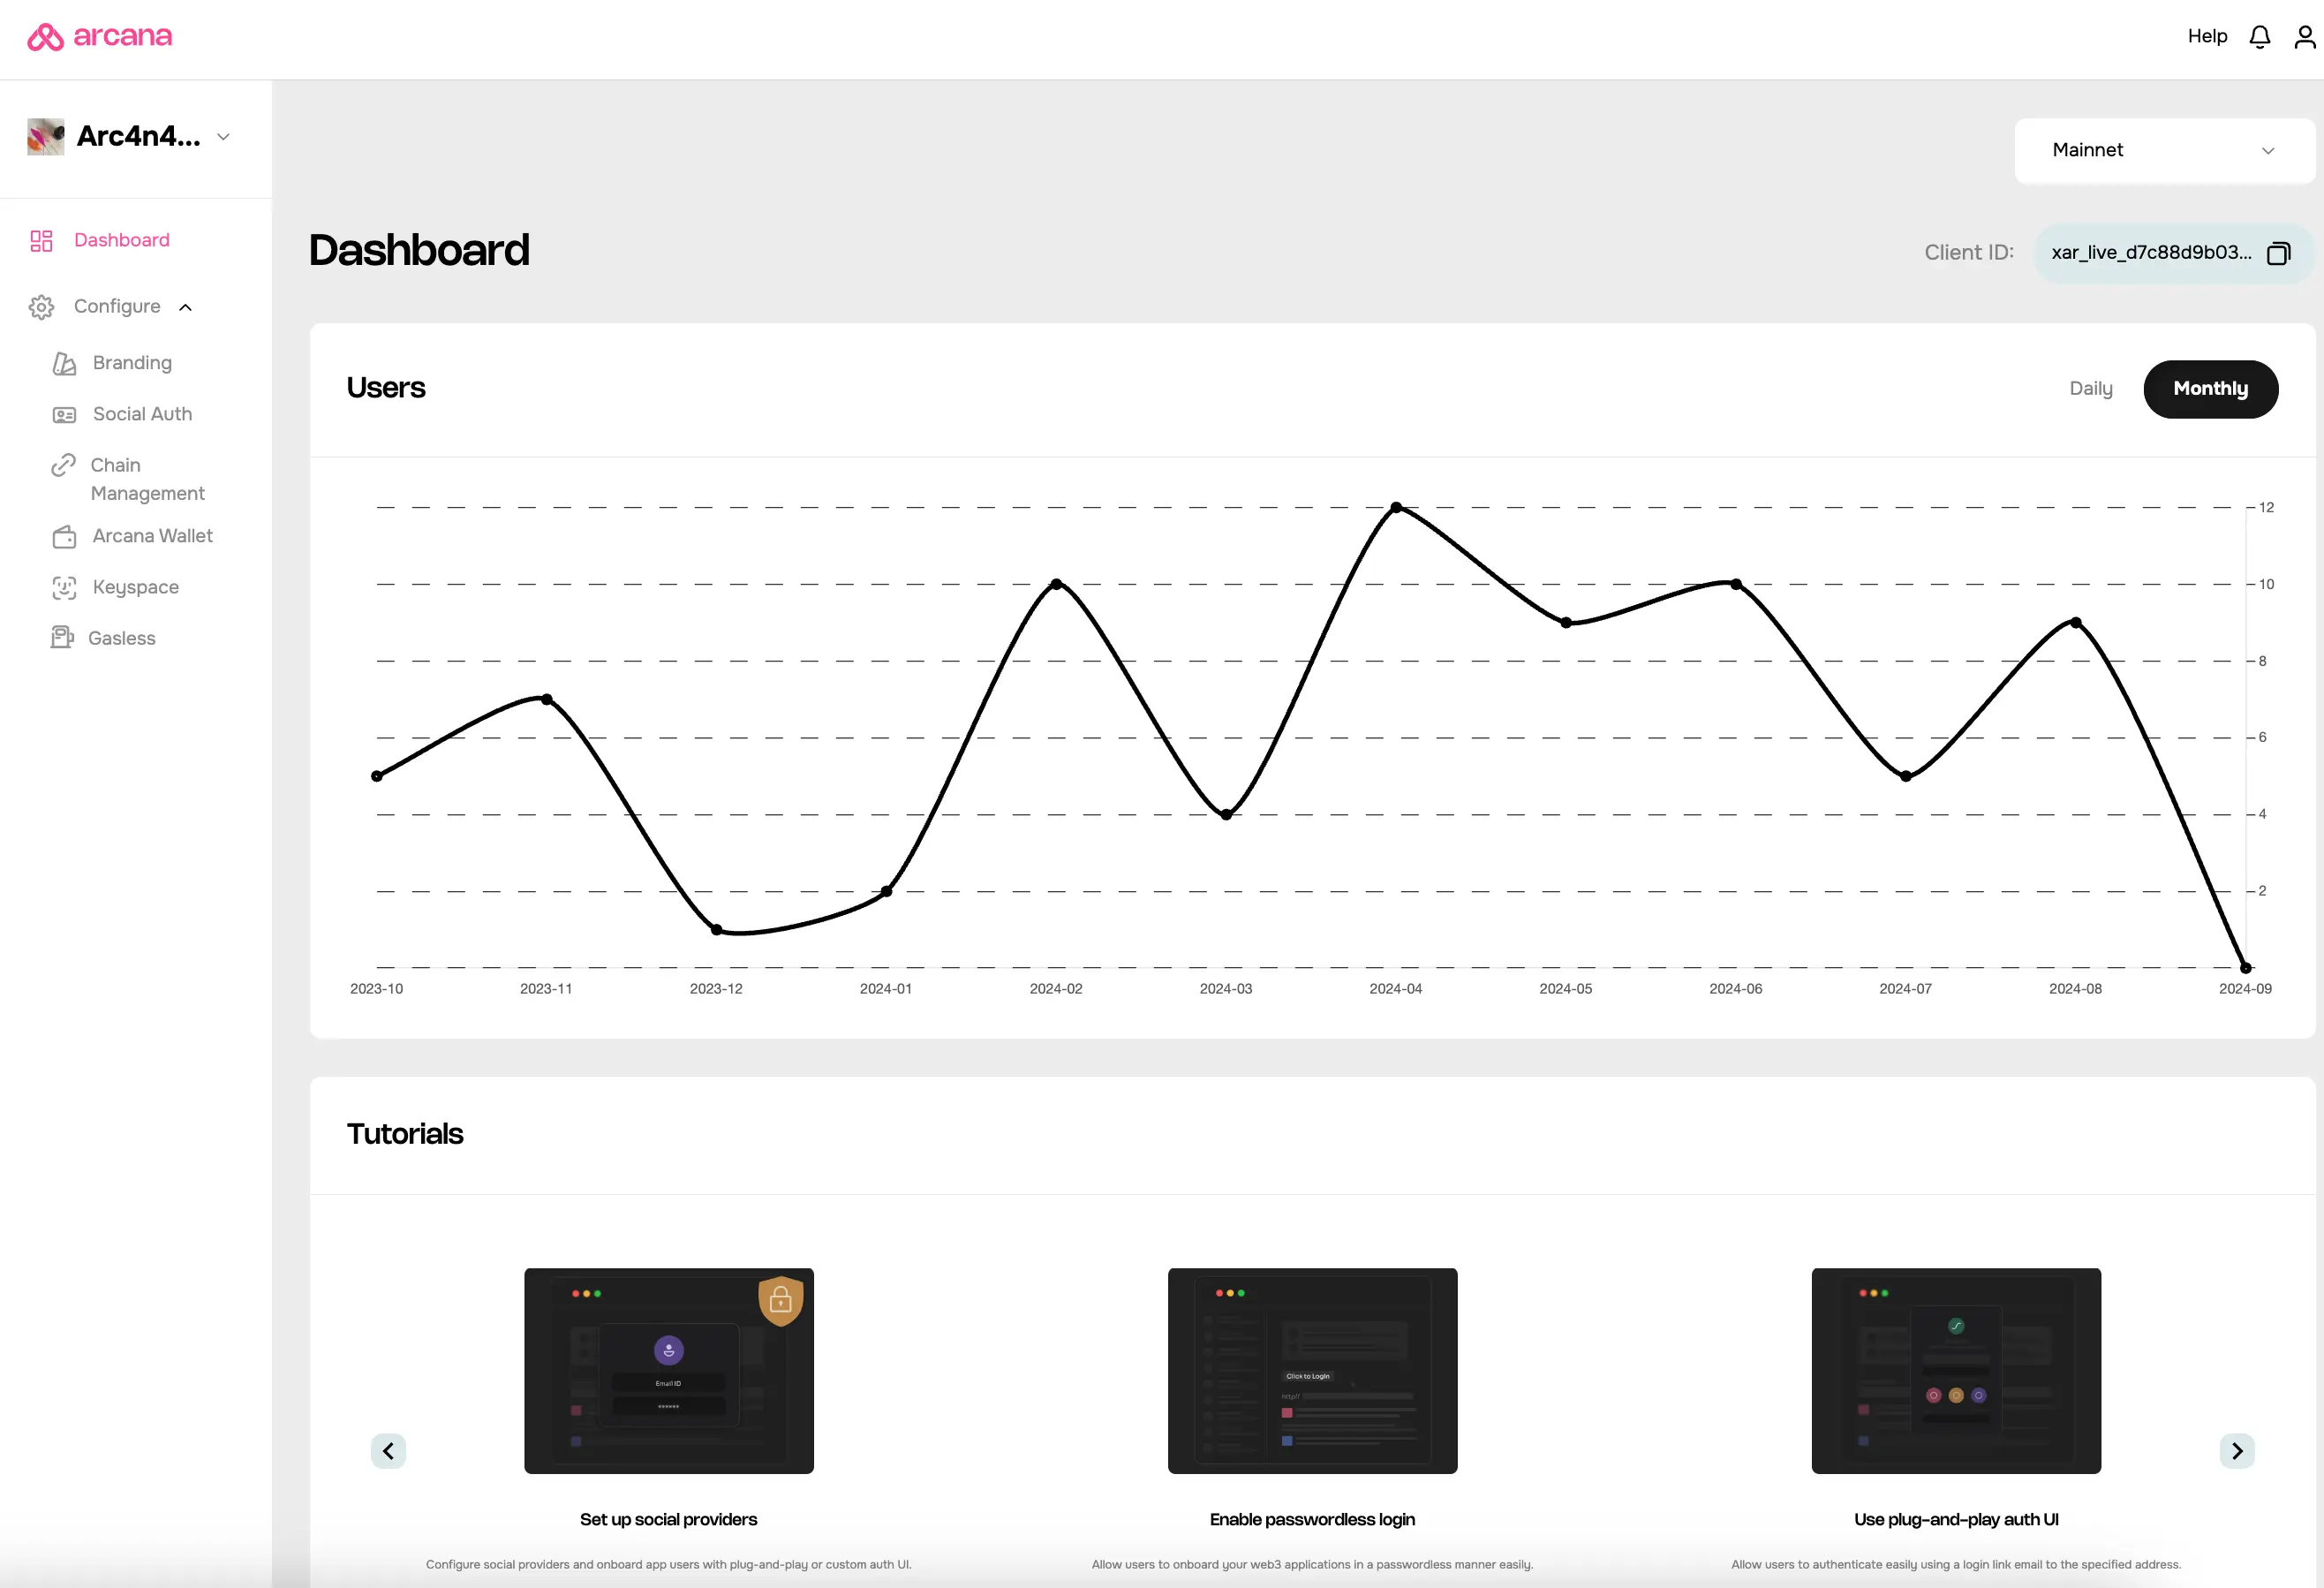
After successful registration, the default Testnet configuration profile settings are displayed in the dashboard.
The Client ID assigned to the app is displayed on the top right. Note that the Client ID differs in Testnet and Mainnet configuration profiles.
To access the Mainnet Client ID, click dropdown on the top RHS and choose Mainnet. Copy the Mainnet Client ID displayed on the dashboard.
When deploying an app on the Arcana Mainnet, use the Client ID associated with the Mainnet configuration profile.
Manage Configuration Profiles
Each registered app is displayed in the 'Manage Apps' dashboard. A Testnet configuration profile is associated with each app by default. The 'Mainnet' button is disabled for a newly registered app. For Mainnet deployment, the developer must create a new Mainnet profile.
Testnet vs. Mainnet Settings
Both Testnet and Mainnet configuration profiles are maintained separately. Each profile is associated with a unique Client ID.
To view Testnet configuration settings, click the 'Testnet' button on the app card in the 'Manage Apps' screen. The usage metrics page will open. A dropdown labeled 'Testnet' at the top right confirms you're viewing the app's Testnet settings.
Testnet
To view or edit the Testnet configuration settings, browse the 'Manage Apps' screen, locate the app card, and click 'Testnet.'
Mainnet
Browse the 'Manage Apps' screen to find your app card. If the 'Mainnet' configuration profile exists, the 'Mainnet' button will be enabled. Click 'Mainnet' to view the application usage metrics and the 'Mainnet' profile. If the button is disabled, the 'Mainnet' profile hasn't been created yet. To create it, view the 'Testnet' profile by clicking the app card. On the usage metrics page, find the dropdown in the top right, click it, and select 'Mainnet' to create the configuration profile.
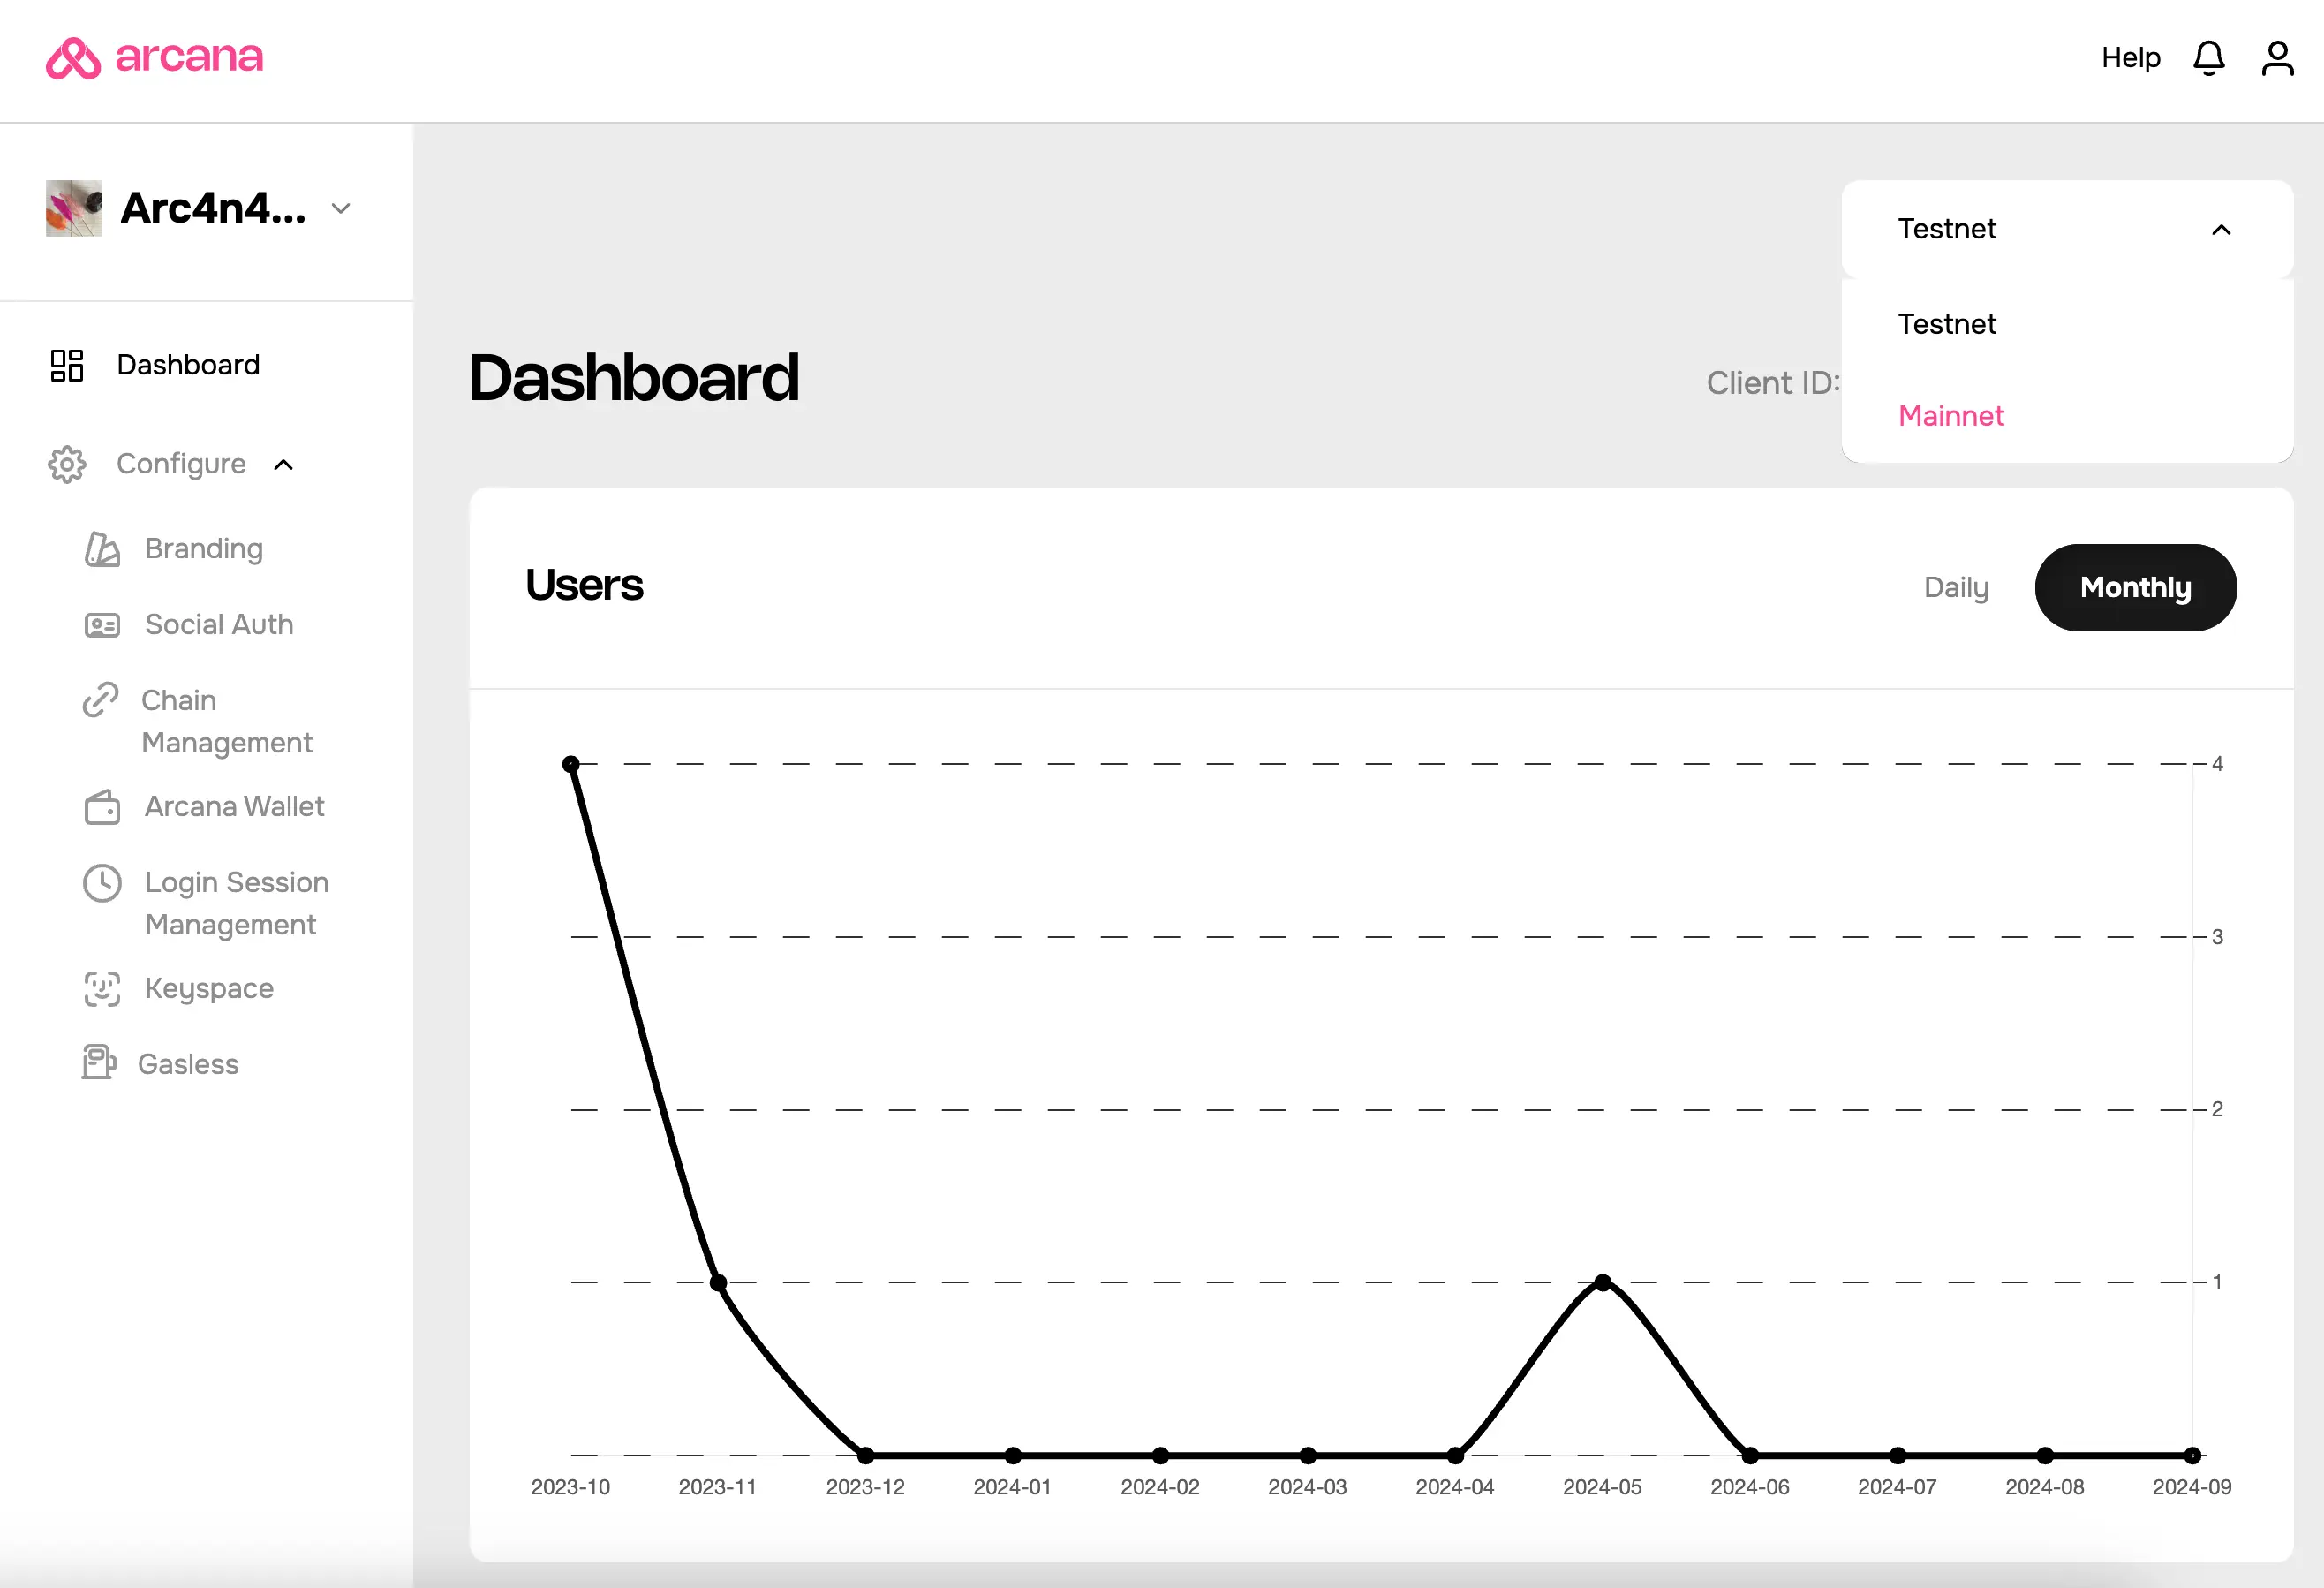
Selecting 'Mainnet' for the first time opens a pop-up with two options to create the 'Mainnet' configuration profile:
- Copy Testnet Profile
- Create a new Mainnet Profile.
Use one of these options to create the 'Mainnet' profile. A new Client ID is assigned to the Mainnet configuration profile. To deploy the app on Mainnet, this new Client ID must be updated in the integration code. Learn more...
Update Redirect URIs
After creating the 'Mainnet' profile, developers must also update the social login provider 'Redirect URI' settings via the respective provider developer consoles or dashboards.
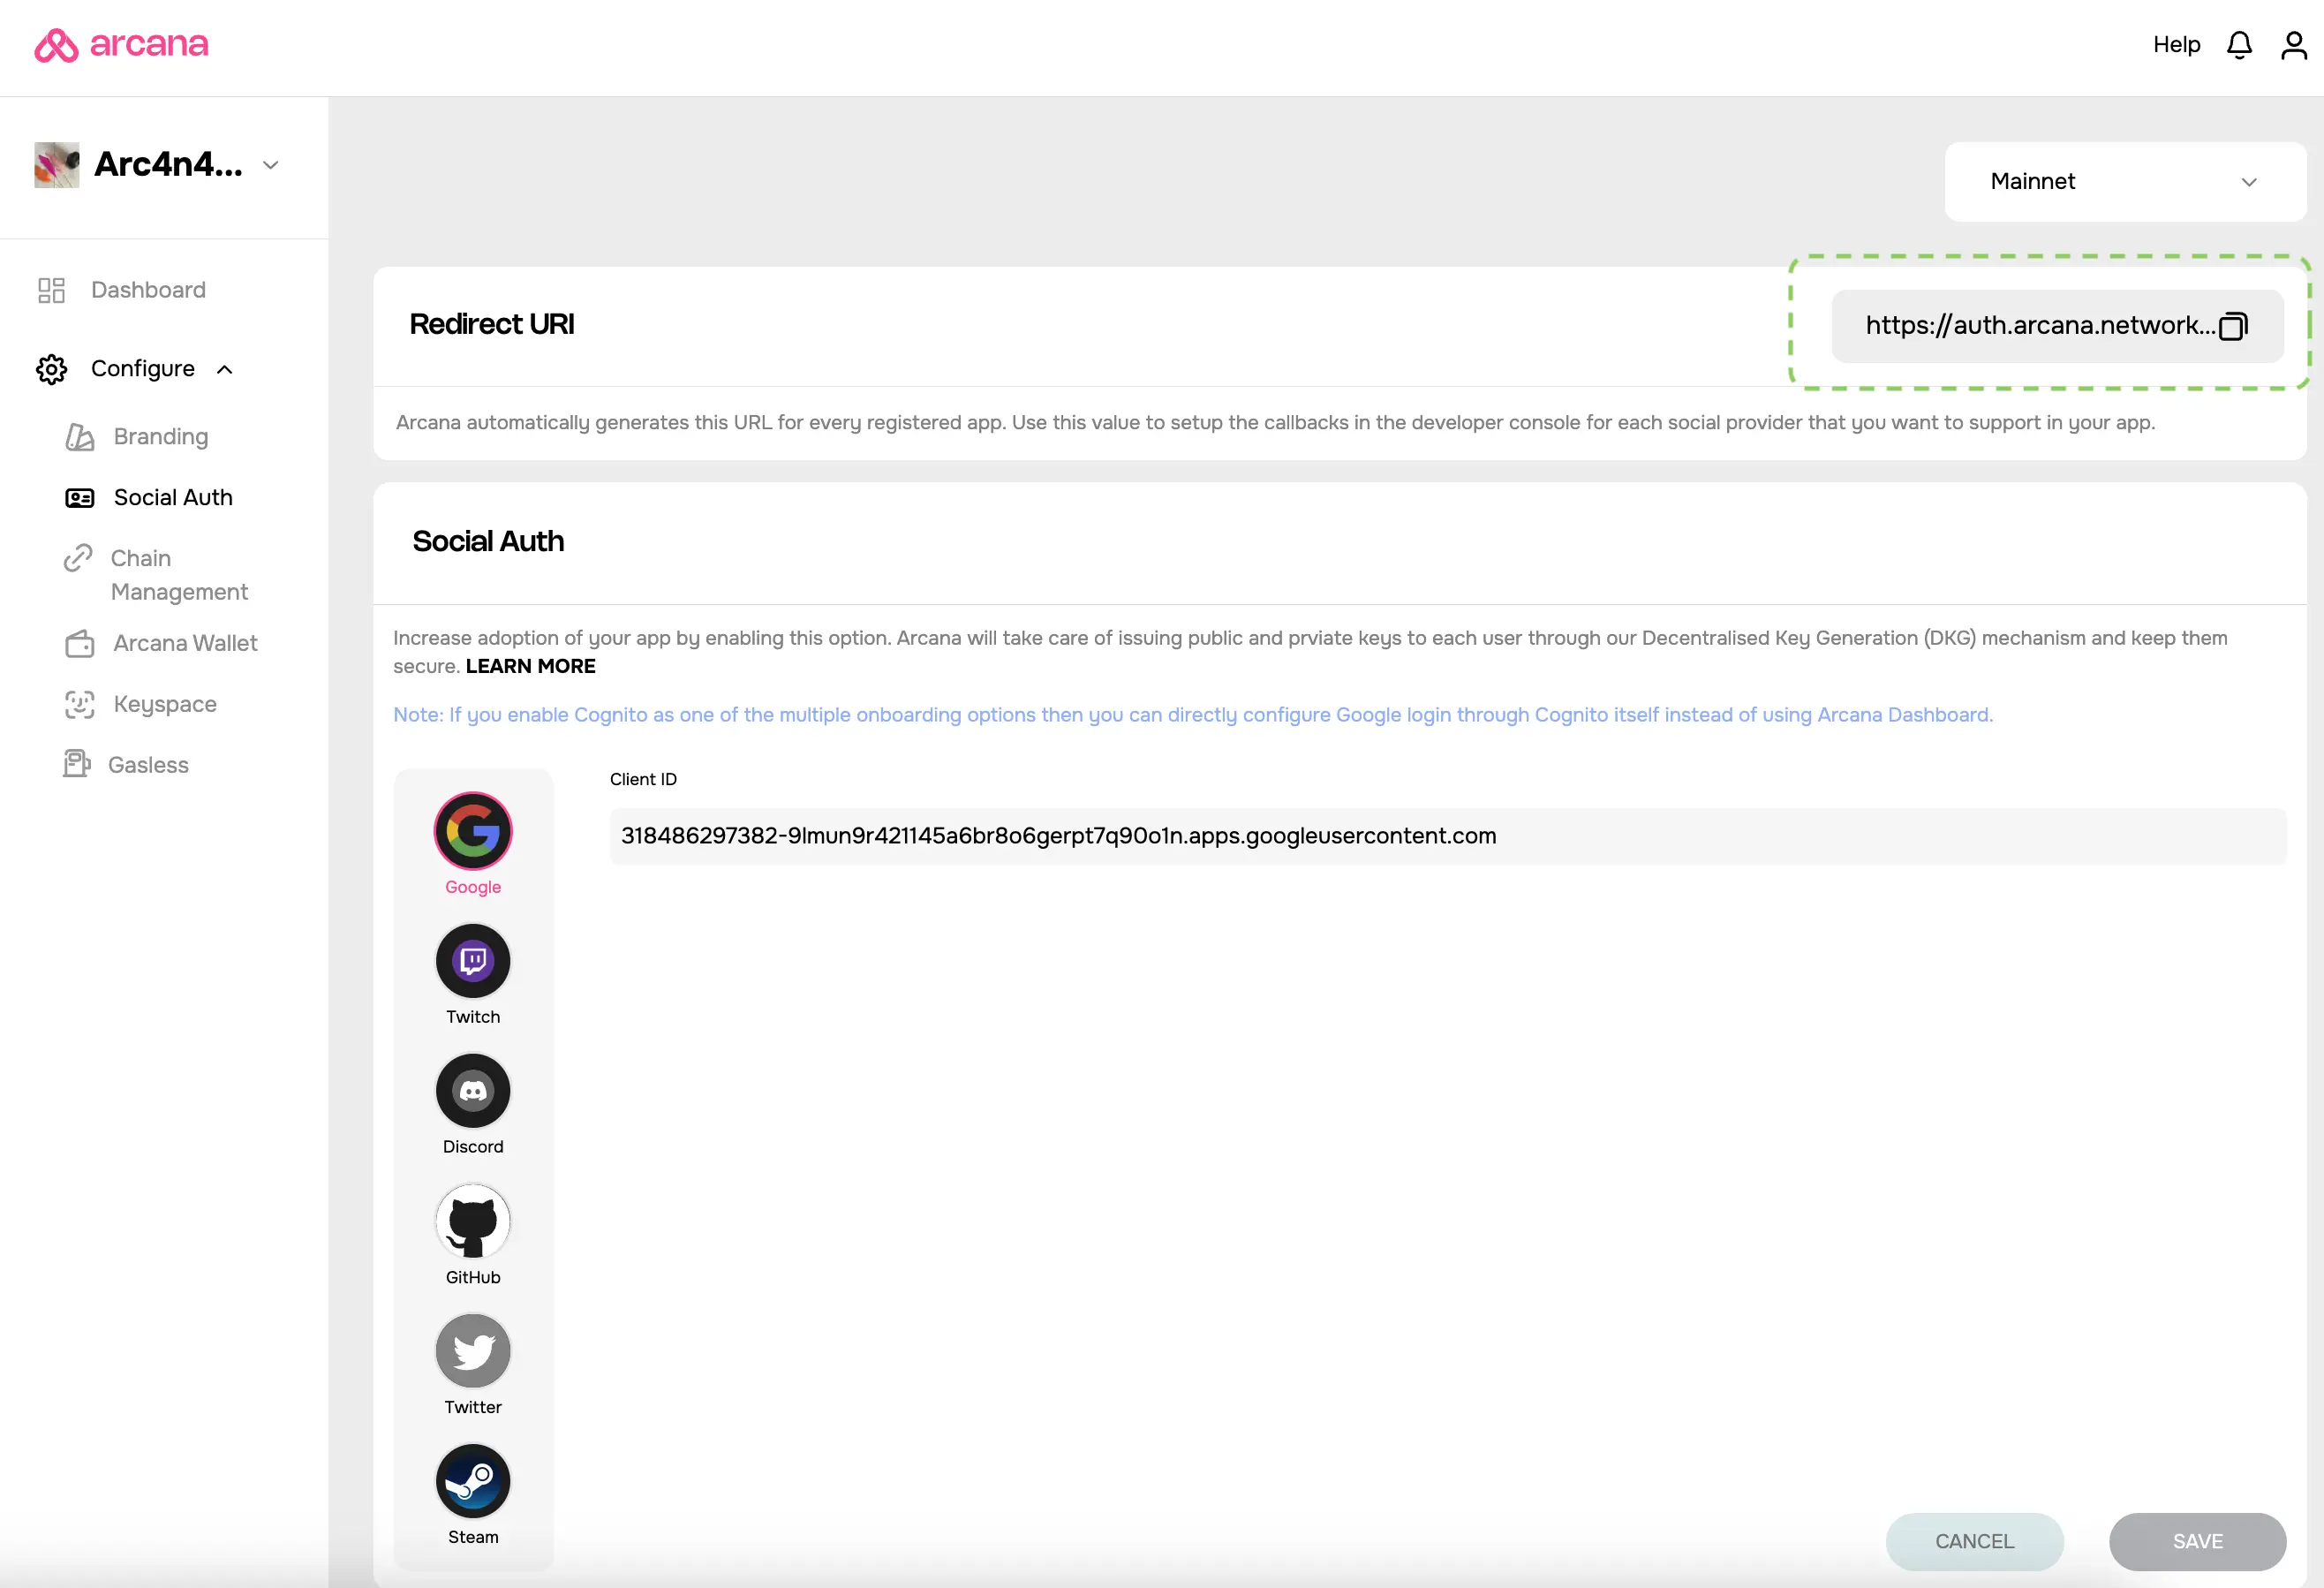
Copy the 'Redirect URI' displayed for the 'Mainnet' profile and update this value in the social login provider's developer console. For e.g., for Google, update the Redirect URI in the Google Developer Console. Learn more...
Example: Copying Google Profile
If Google is enabled in your app's 'Testnet' profile, then during the configuration of the social login provider through the Google Developer console, the Testnet redirect URI was added. Copy the 'Mainnet' profile redirect URI value from the Arcana Developer Dashboard and update them in the Google Console OAuth settings.
Ensure you add the 'Mainnet' redirect URI value for the other social login providers enabled in the 'Testnet' profile. This is required for enabling your app to use the Arcana Mainnet.
The figure below shows how the 'redirect URI' differs from the Testnet Settings where Google and Twitch were configured, and the 'Testnet' profile was copied to create a 'Mainnet' profile.

Switch Profile
When both Testnet and Mainnet profiles are linked to the app, switch profiles using one of the following options:
- On the Manage Apps page, click Testnet or Mainnet to change the configuration profile view.
- On the app settings page, use the dropdown in the top right to switch between Testnet and Mainnet.
If the Mainnet profile isn’t created, use the dropdown on the 'Testnet' page to create it. After creation, the dashboard will automatically switch to the Mainnet settings.
Configuration Settings
To configure Arcana wallet usage settings, the app must be registered. Click on the registered app card in the 'Manage Apps' screen to view the configuration settings and edit them.
Settings Overview
Click Configure in the LHS navigation pane of the Arcana Developer Dashboard to view the following configuration categories:
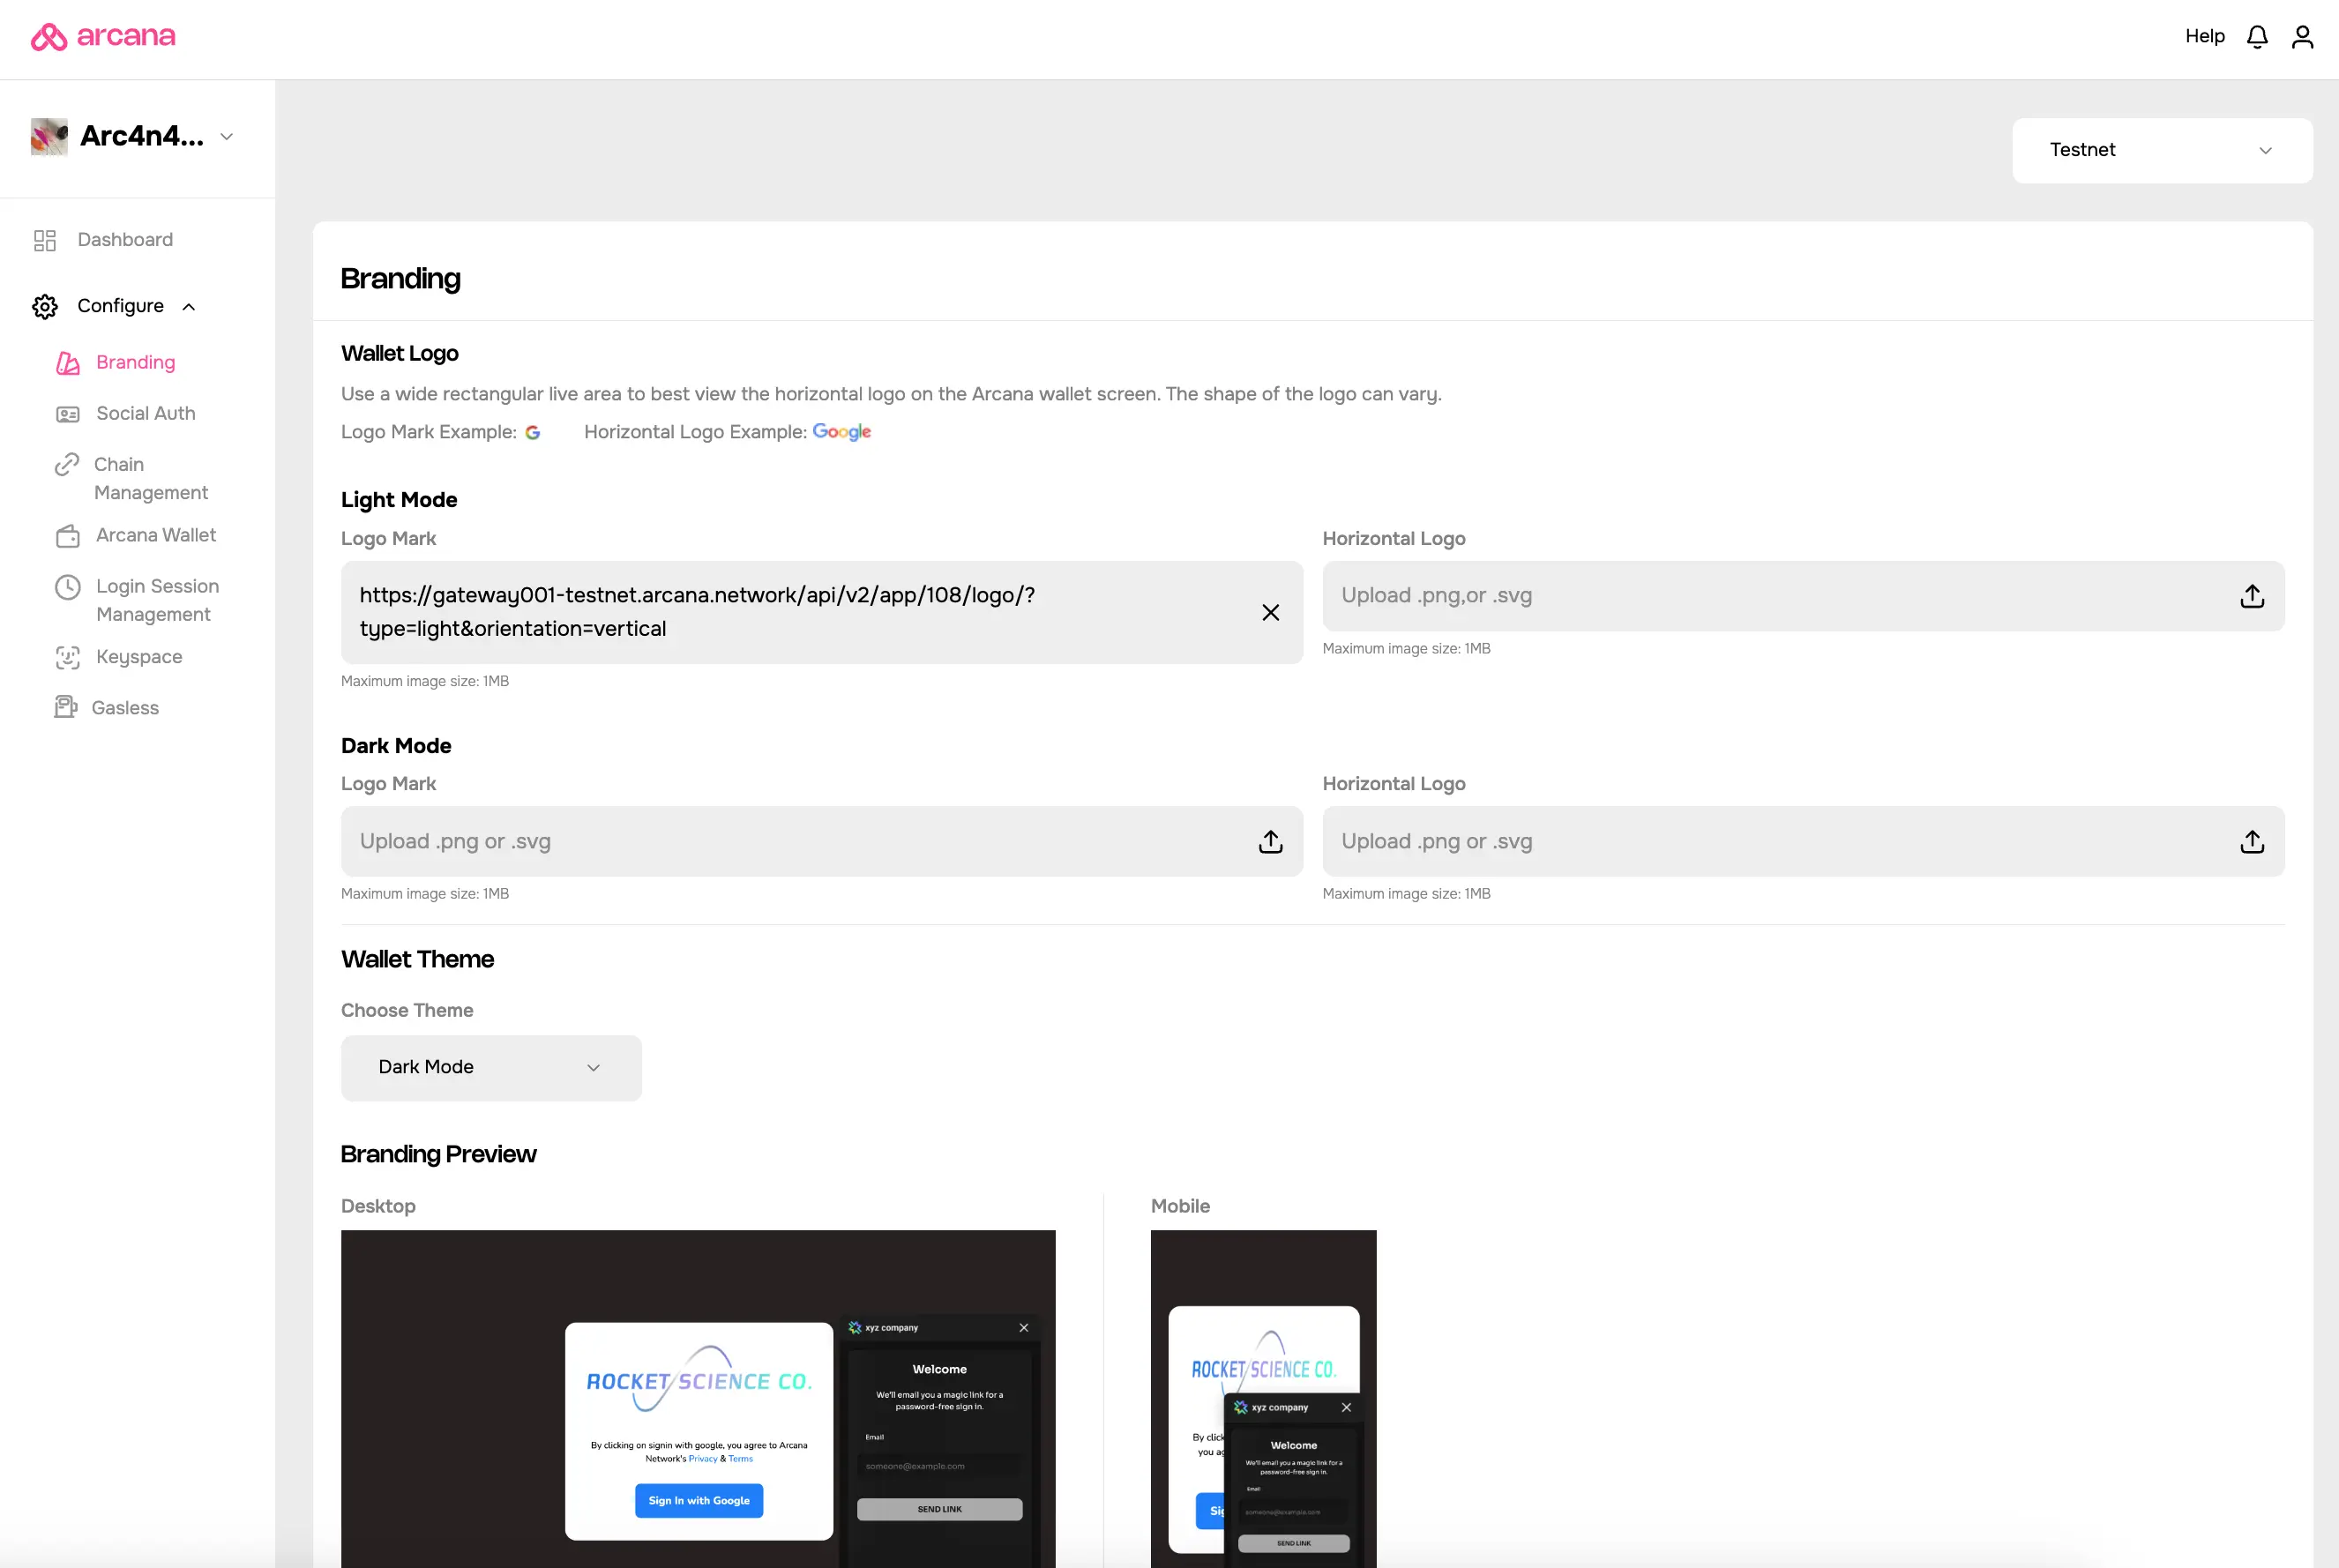
The Branding settings control the look and feel of the embedded Arcana wallet displayed in an app's context.
- Upload Logo
- Wallet Theme
See how to configure branding for details.
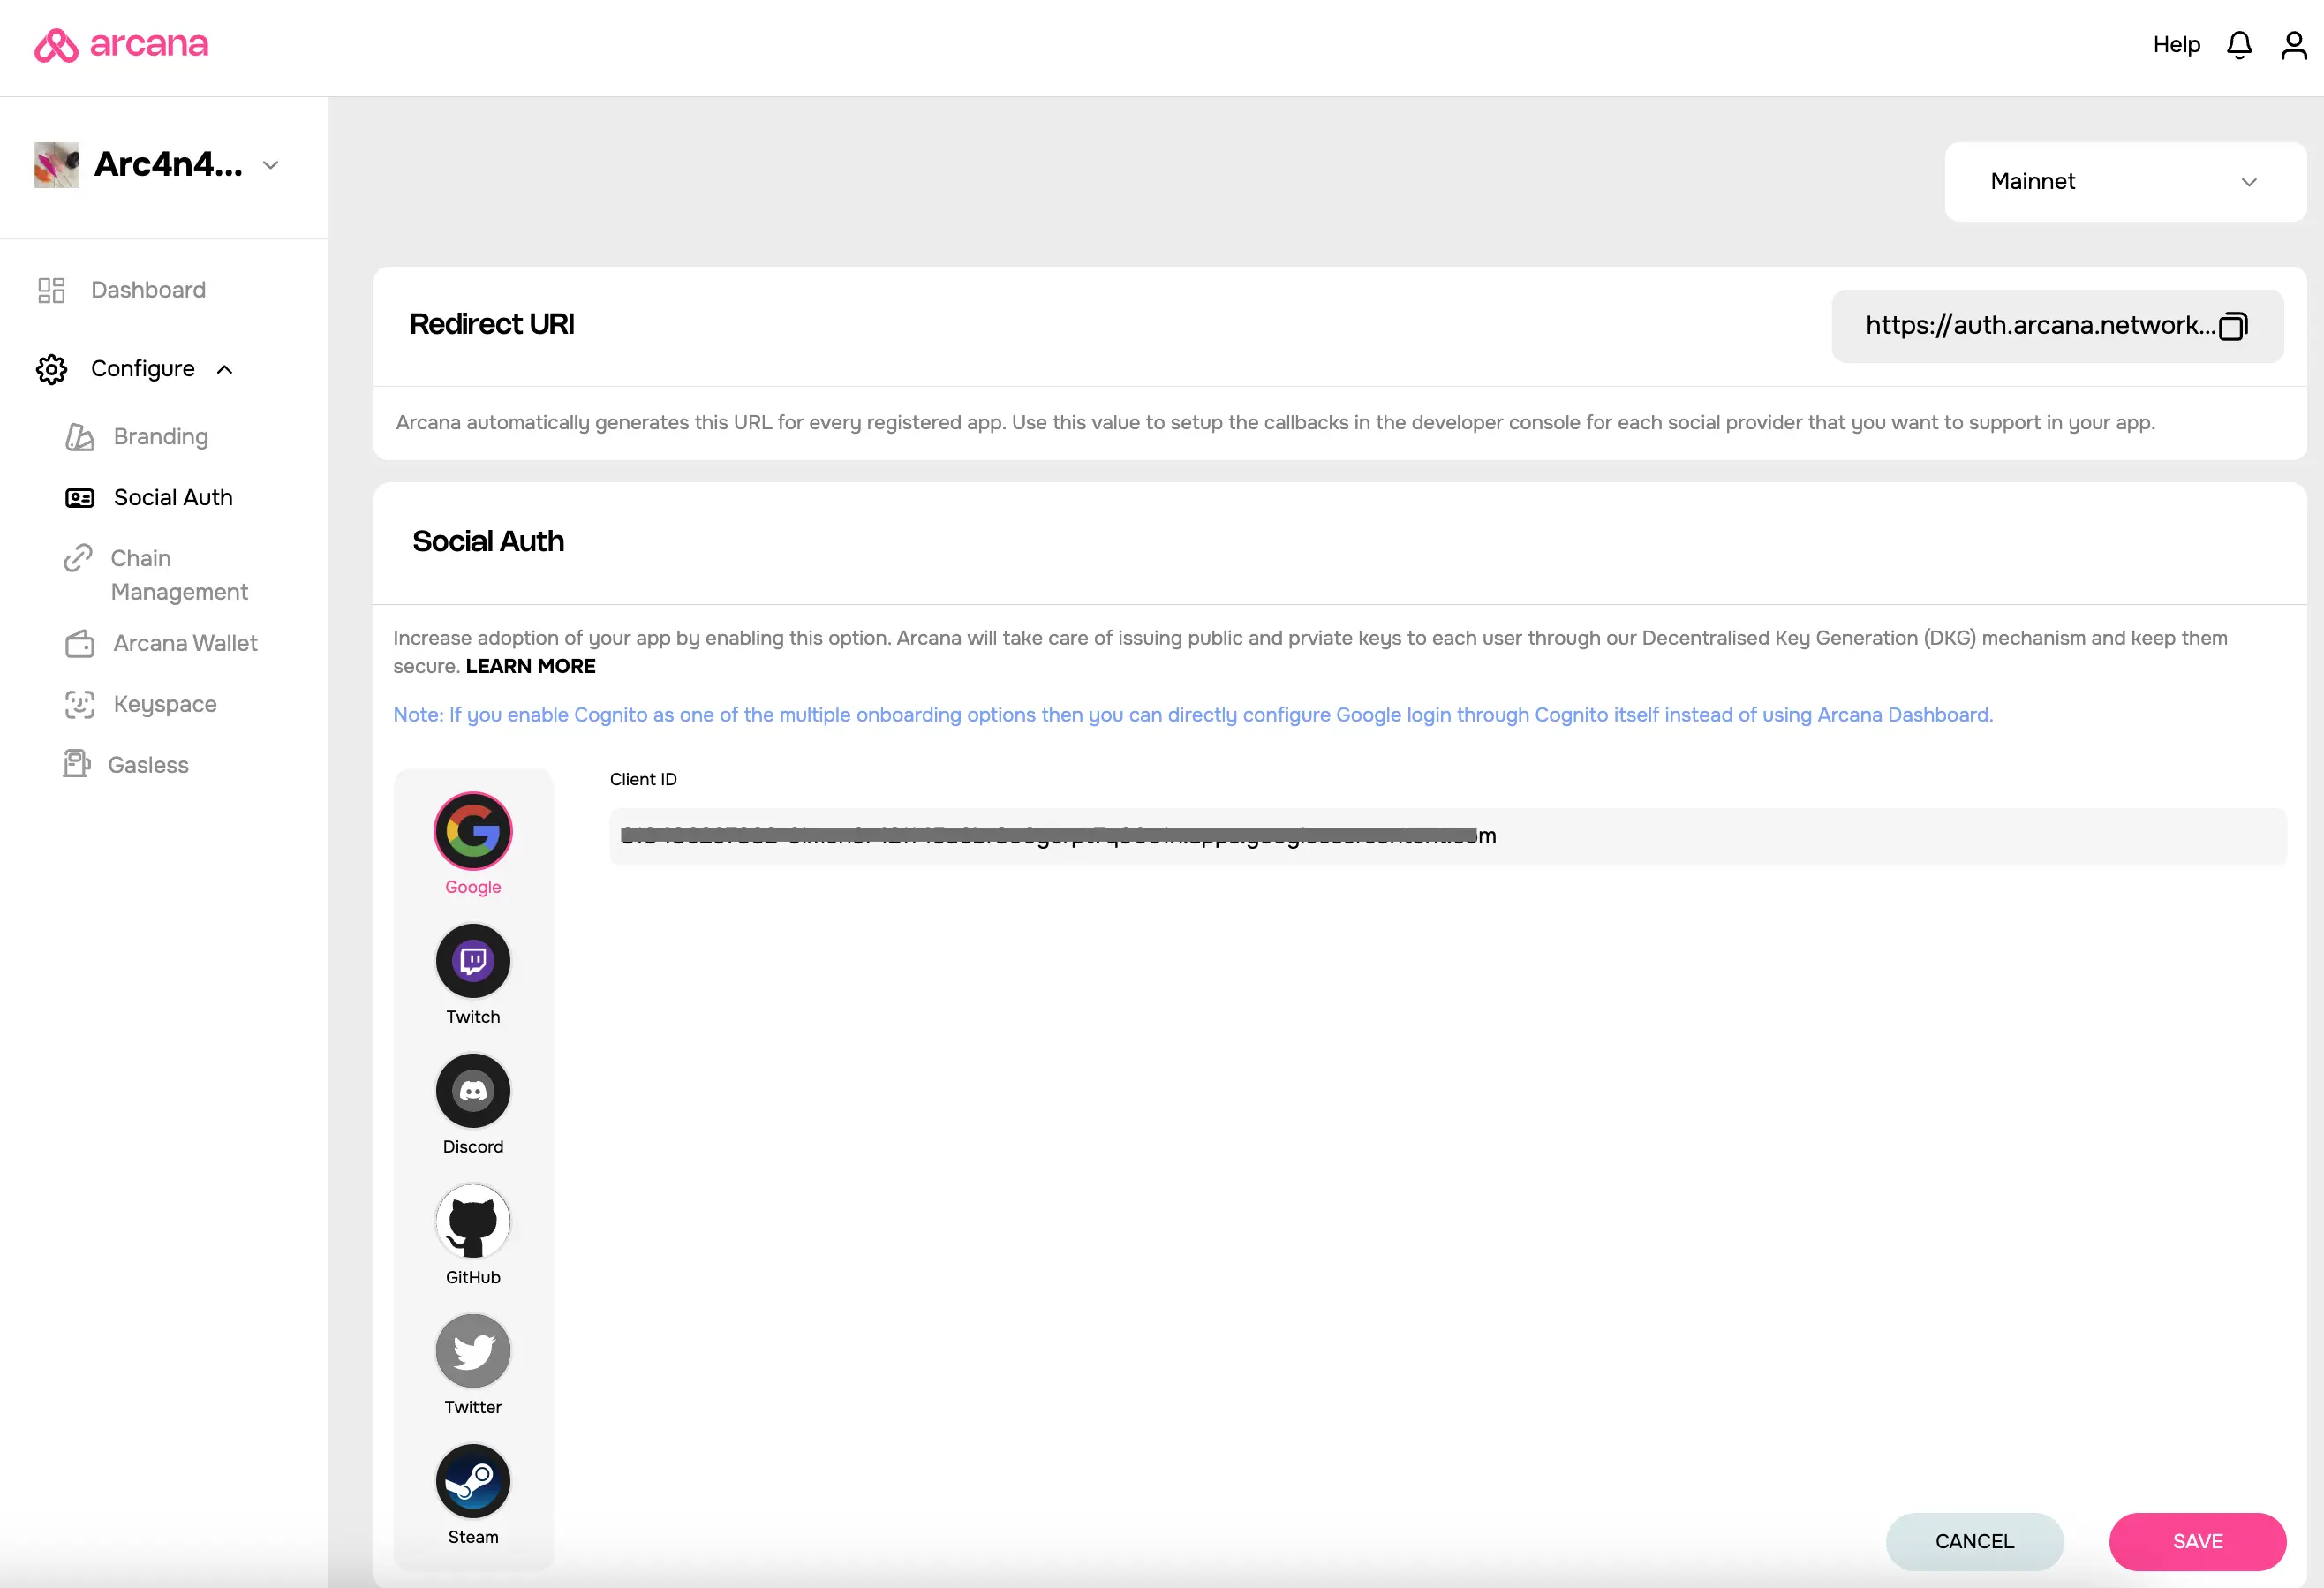
The Social Auth settings manage the user onboarding experience and control which social login providers are available for app login.
- Social Auth
- Identity Access Managers
- Custom Auth
Developers can enable one or more providers for app login. Passwordless login is automatically enabled for all registered apps. See how to configure authentication providers, for details.
Redirect URI
The Redirect URI field in the Social Auth section of the dashboard lists an auto-generated URL. This URL value is used as input when configuring the social login providers.
The Chain Management settings control which chains will be displayed as the default active chain in the wallet from the list of pre-configured chains available out of the box for apps that integrate with the Arcana Auth SDK.
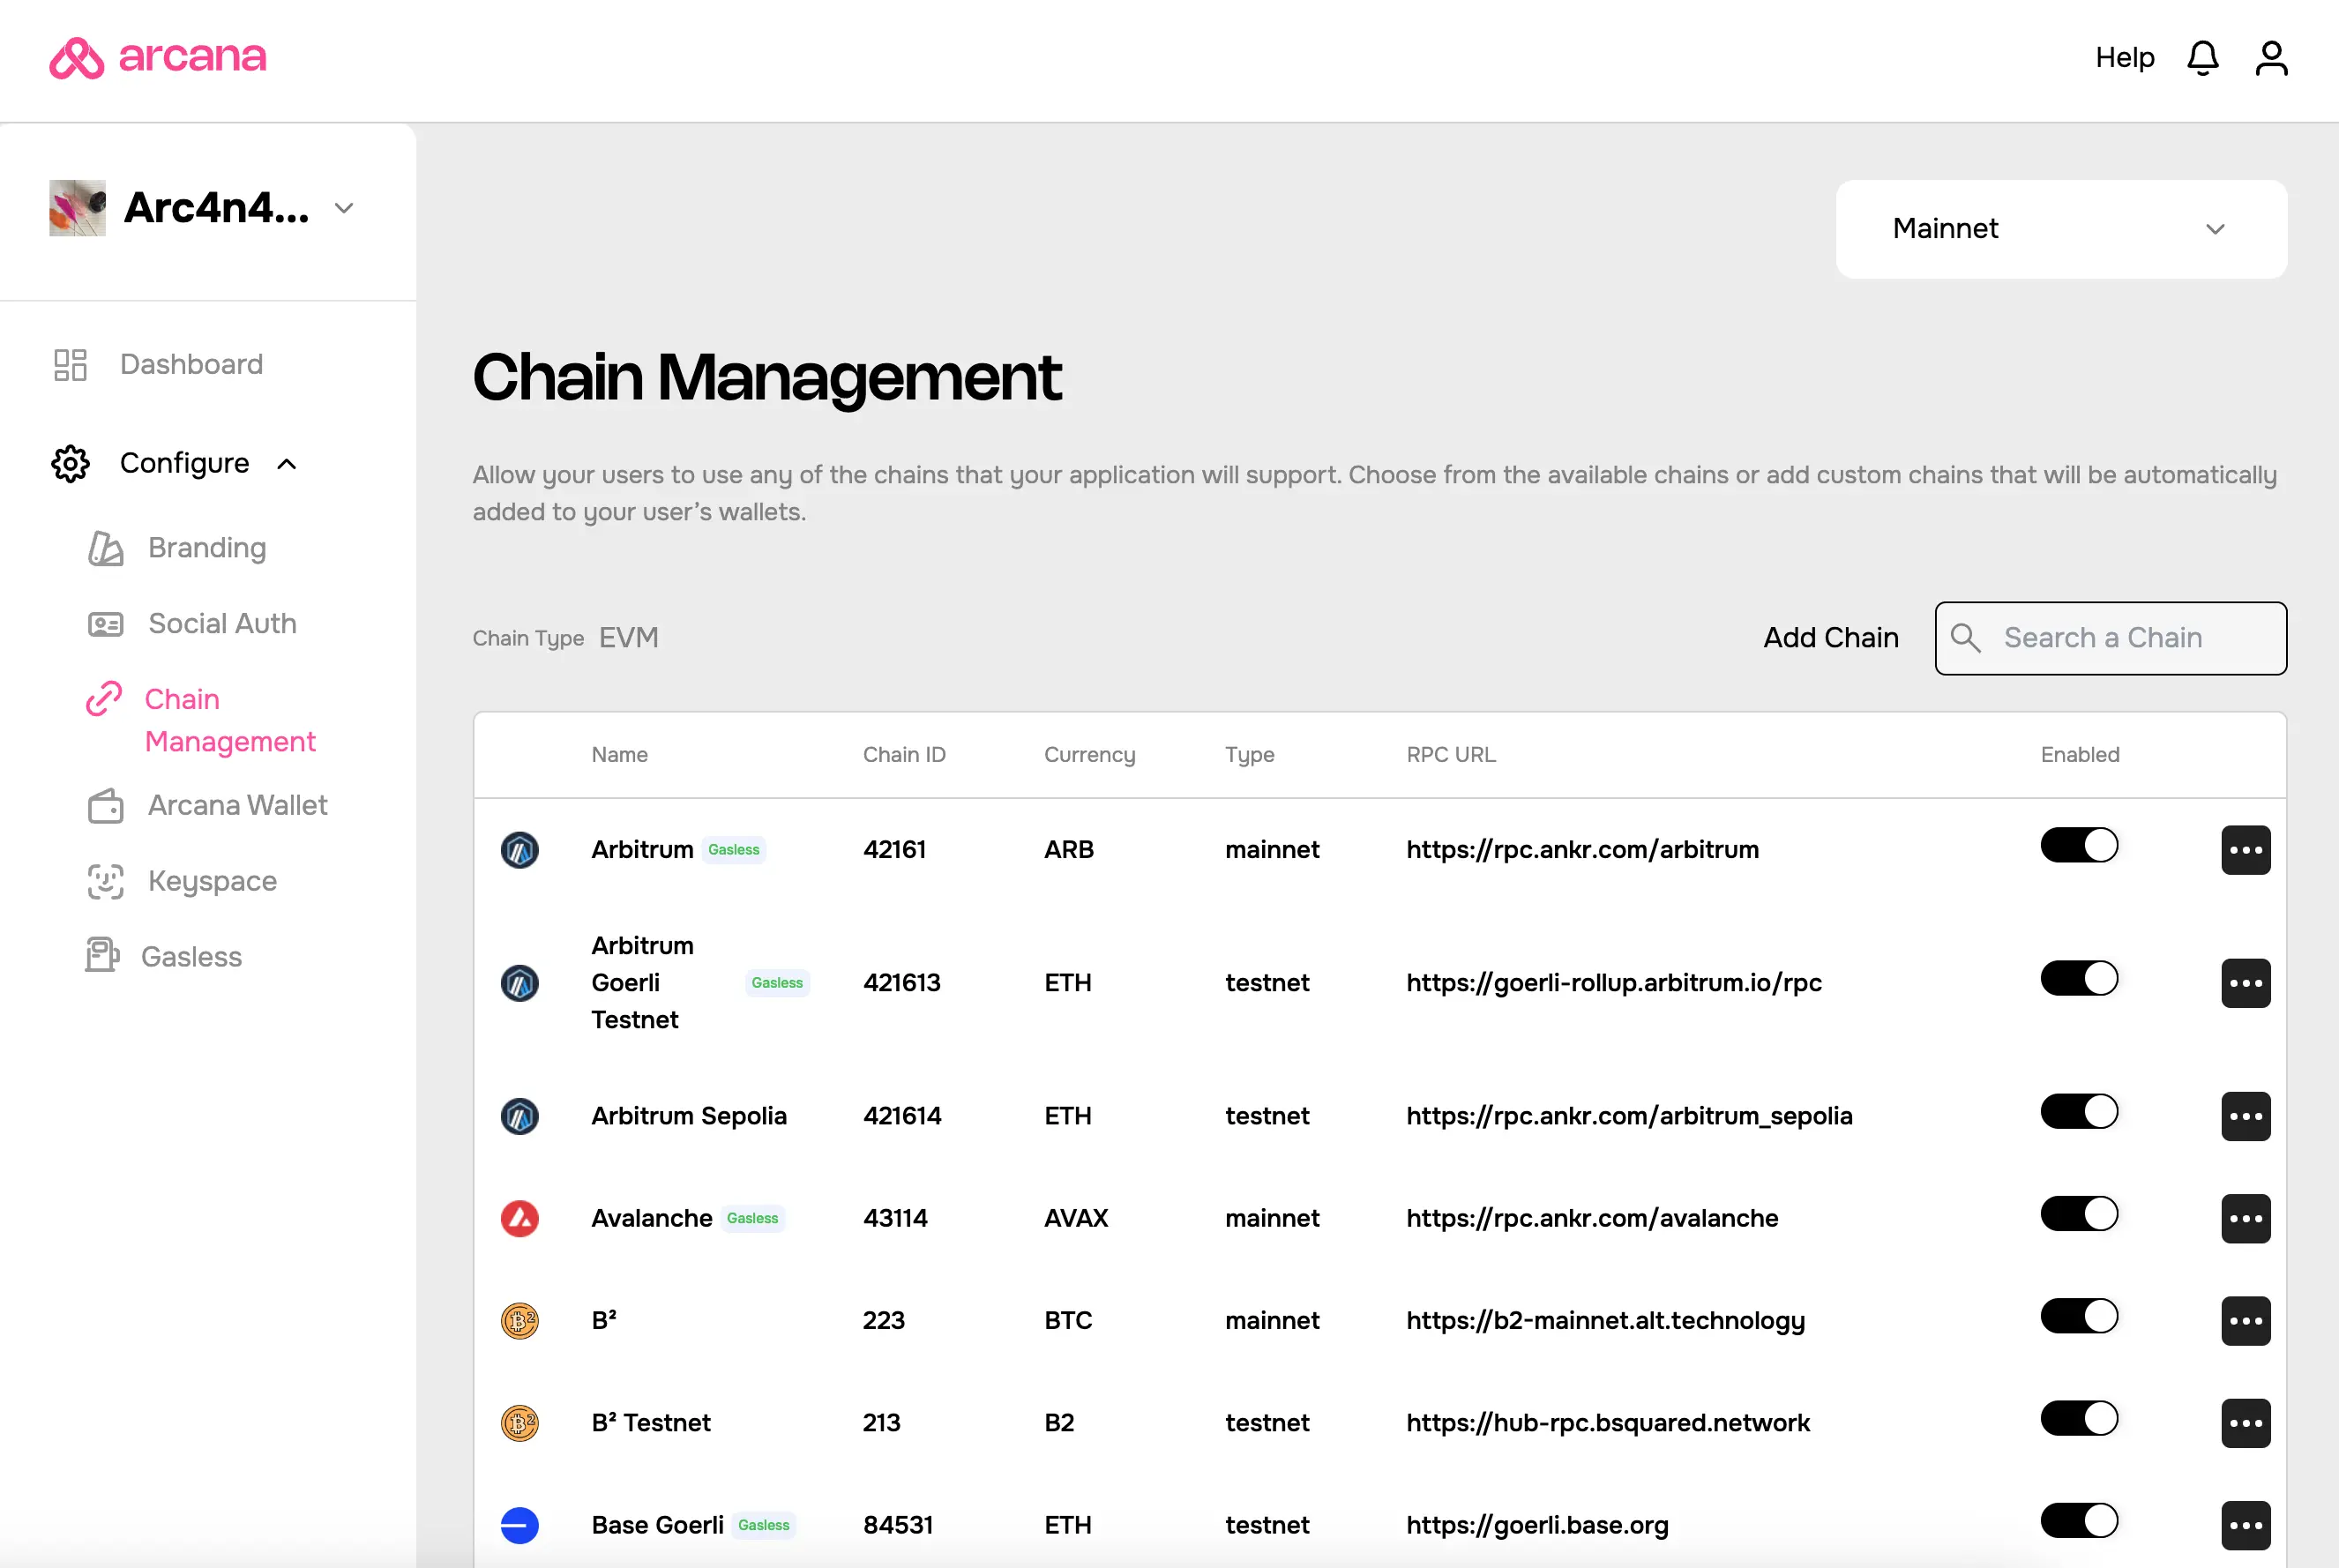
- Add Chains
- Edit Chains
- Set Default Chain

For details, see how to manage chains.
The Arcana wallet settings display whether the app is registered using the built-in, default wallet UI or a custom UI. It also allows for domain restriction whereby the Arcana wallet can be loaded successfully within an app's context.
- Wallet Domain
- Wallet UI
See wallet UI configuration for details.

The login session management settings display whether the app is configured to use persistent or non-persistent session (default) type.
For the persistent session, the developers can view and update the specified time for which the authenticated user login session is persisted (in minutes). Once a user closes the browser and reopens within this specified period, the user is automatically logged in. Learn more...

Not available for Custom Wallet UI
Apps that are registered with the Custom Wallet UI option are not allowed to configure keyspace settings. By default, such apps can only use the app-specific keys.
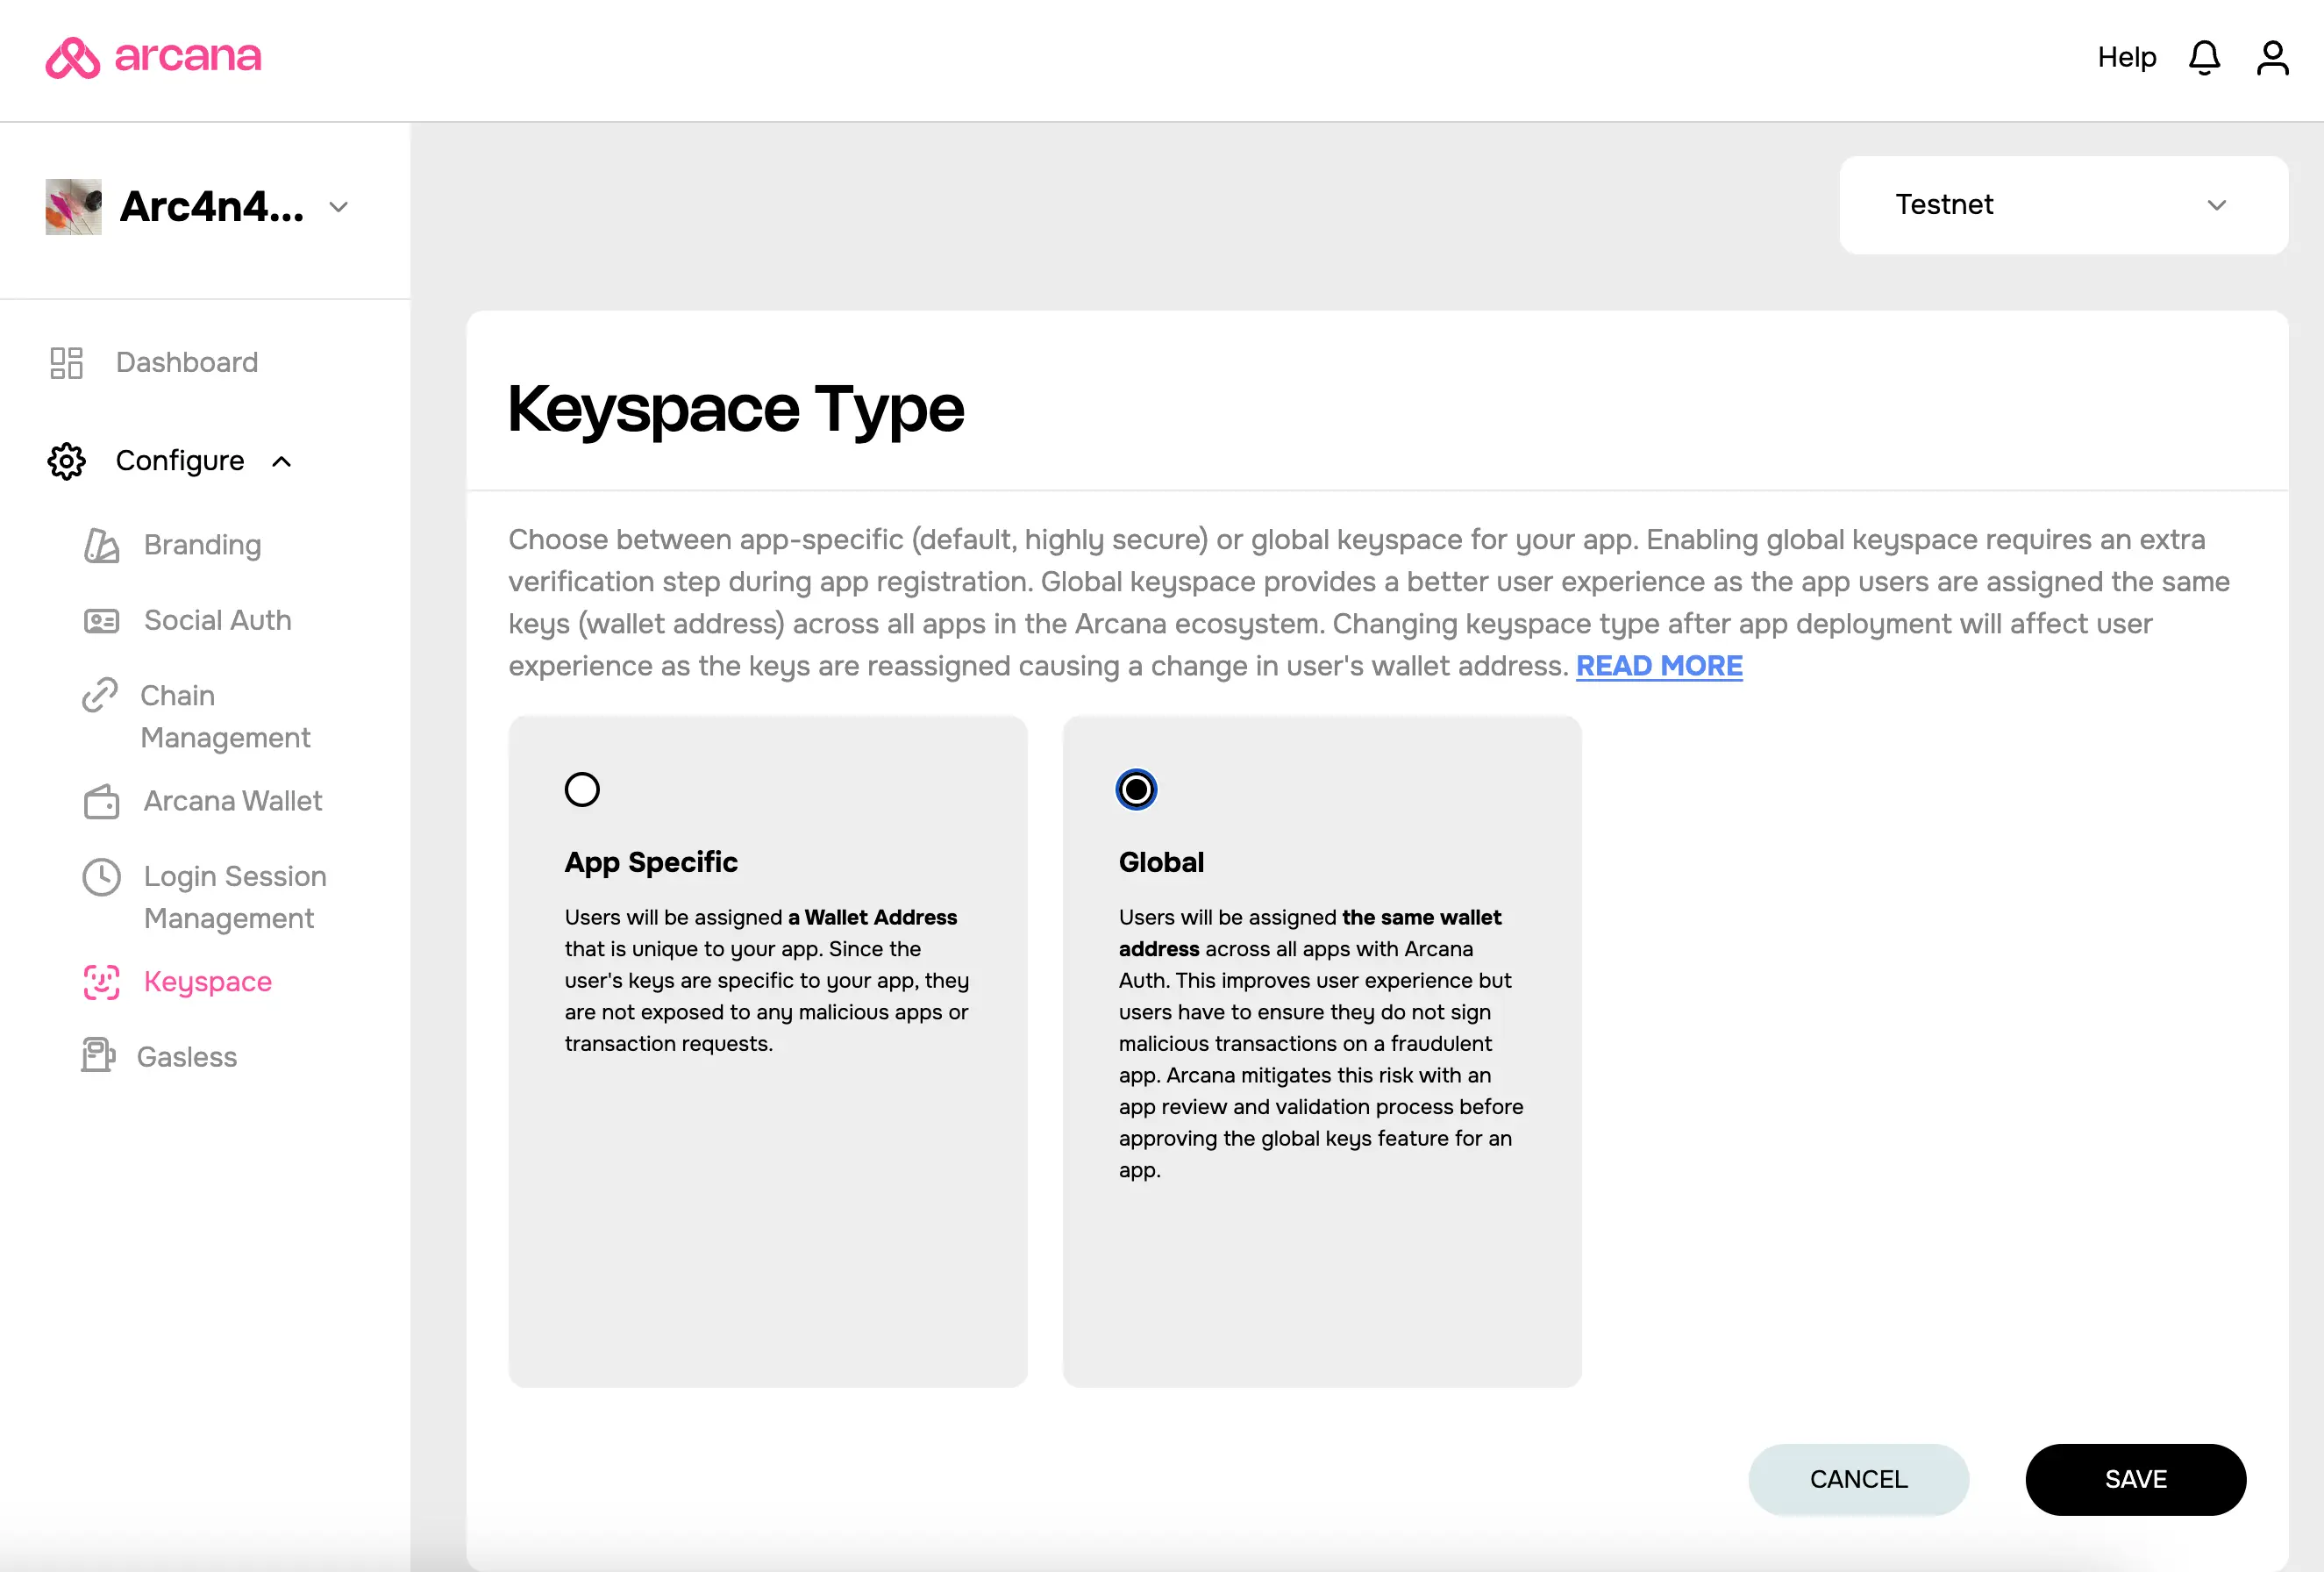
The following Keyspace settings control whether the wallet address for the user remains the same across all the apps that are integrated with the Arcana Auth SDK or are unique for each app.
- App-Specific Keys (default)
- Global Keys
Learn more about App-specific and global keys and how to set up keyspace.
Save the configuration settings to make sure the setting changes take effect.
Branding
To view and edit the look and feel of the embedded Arcana wallet, use Manage Apps > App Card > Testnet/Mainnet Configuration to view the app settings. In the LHS menu, click Configure > Branding.
See how to configure branding for details.
Social Auth
To view and edit the social login provider's settings for a registered app, use Manage Apps > App Card > Testnet/Mainnet Configuration to view the app settings. In the LHS menu, click Configure > Social Auth.
The dashboard screen will display all the user onboarding options and configuration settings to enable them. Note that each user onboarding option may have different settings. Select the onboarding option and provide the required configuration values.
See how to configure social login for details.
Login Providers: Social, IAM, Custom
Besides the social login providers, Arcana Auth SDK also supports IAM Providers and Custom Auth options to onboard users.
Chain Management
Arcana Auth SDK provides a subset of supported blockchains out of the box, and these chains are displayed in the in-app Arcana wallet by default. Developers can configure this list of supported, pre-configured chains in the Arcana wallet and pick up one of the chains as the default active chain in the wallet.
To view and edit the wallet chains, click Manage Apps > App Card > Testnet/Mainnet Configuration to bring up the app usage metrics page in the dashboard. In the LHS menu, click Configure > Chain Management.
An-note
Arcana Auth SDK supports both EVM and non-EVM chains. When registering the app using the dashboard, the decision to use EVM or non-EVM chains must be made.
If the EVM chain type is selected during app registration, then the pre-configured chain list will consist of only the EVM-compatible chains as available options. Similarly, if a non-EVM chain, Solana, is selected during app registration, the chain options displayed will be only those belonging to the Solana ecosystem. Developers can switch chains from among the ones that are displayed. Switching from an EVM chain to a non-EVM chain is impossible once an app is registered.
For details, see how to manage chains.
Configure Non-EVM Chains
Use the dashboard to enable non-EVM chains in your Web3 apps.
Arcana Wallet Customization
To view and edit the wallet settings, click Manage Apps > App Card > Testnet/Mainnet Configuration and bring up the app usage metrics page in the dashboard. In the LHS menu, click Configure > Arcana Wallet.
See how to configure wallet settings for details.
Login Session Management
To view and edit the login session management settings, click Manage Apps > App Card > Testnet/Mainnet Configuration and bring up the app usage metrics page in the dashboard. In the LHS menu, click Configure > Login Session Management.
Choose between persistent and non-persistent session types to manage whether the user must re-login to the app after closing the browser or they are automatically logged in within a specified window of time.
In the Manage Apps screen, select the app card, and click on the configuration profile to view setting details. You will see the app configuration settings dashboard screen. In the LHS navigation, select Configure > Session Management settings.

You can view and change the session type or the Require login after time setting later as well. Apps that require the user to be immediately logged out automatically, if they close the browser window without explicitly logging out, should choose the default Non-Persistent setting.
Persistent Session
When selecting the persistent session type, specify the 'Require log in after` value. This setting is not required for non-persistent sessions. The specified time determines how long the session persists, allowing users to close and reopen the browser without needing to log in again.
Configure Keyspace
To view and edit the keyspace settings for the app, click Manage Apps > App Card > Testnet/Mainnet Configuration and bring up the app usage metrics page in the dashboard. In the LHS menu, click Configure > Keyspace.
Arcana offers two types of keyspace options for keys assigned to the Web3 apps: App-specific and Global Keys.
App-specific keys are the default.

Switch Application
To switch viewing configuration settings from one application configuration profile screen to another, click on the dropdown next to the application name in the LHS navigation. You will see other registered applications in your account. Select another app name in the dropdown to view its configuration settings.
'Manage Apps' is the last entry in the dropdown. Click 'Manage Apps' to access the dashboard landing page with the app cards. Switch to another app by clicking on the app card.
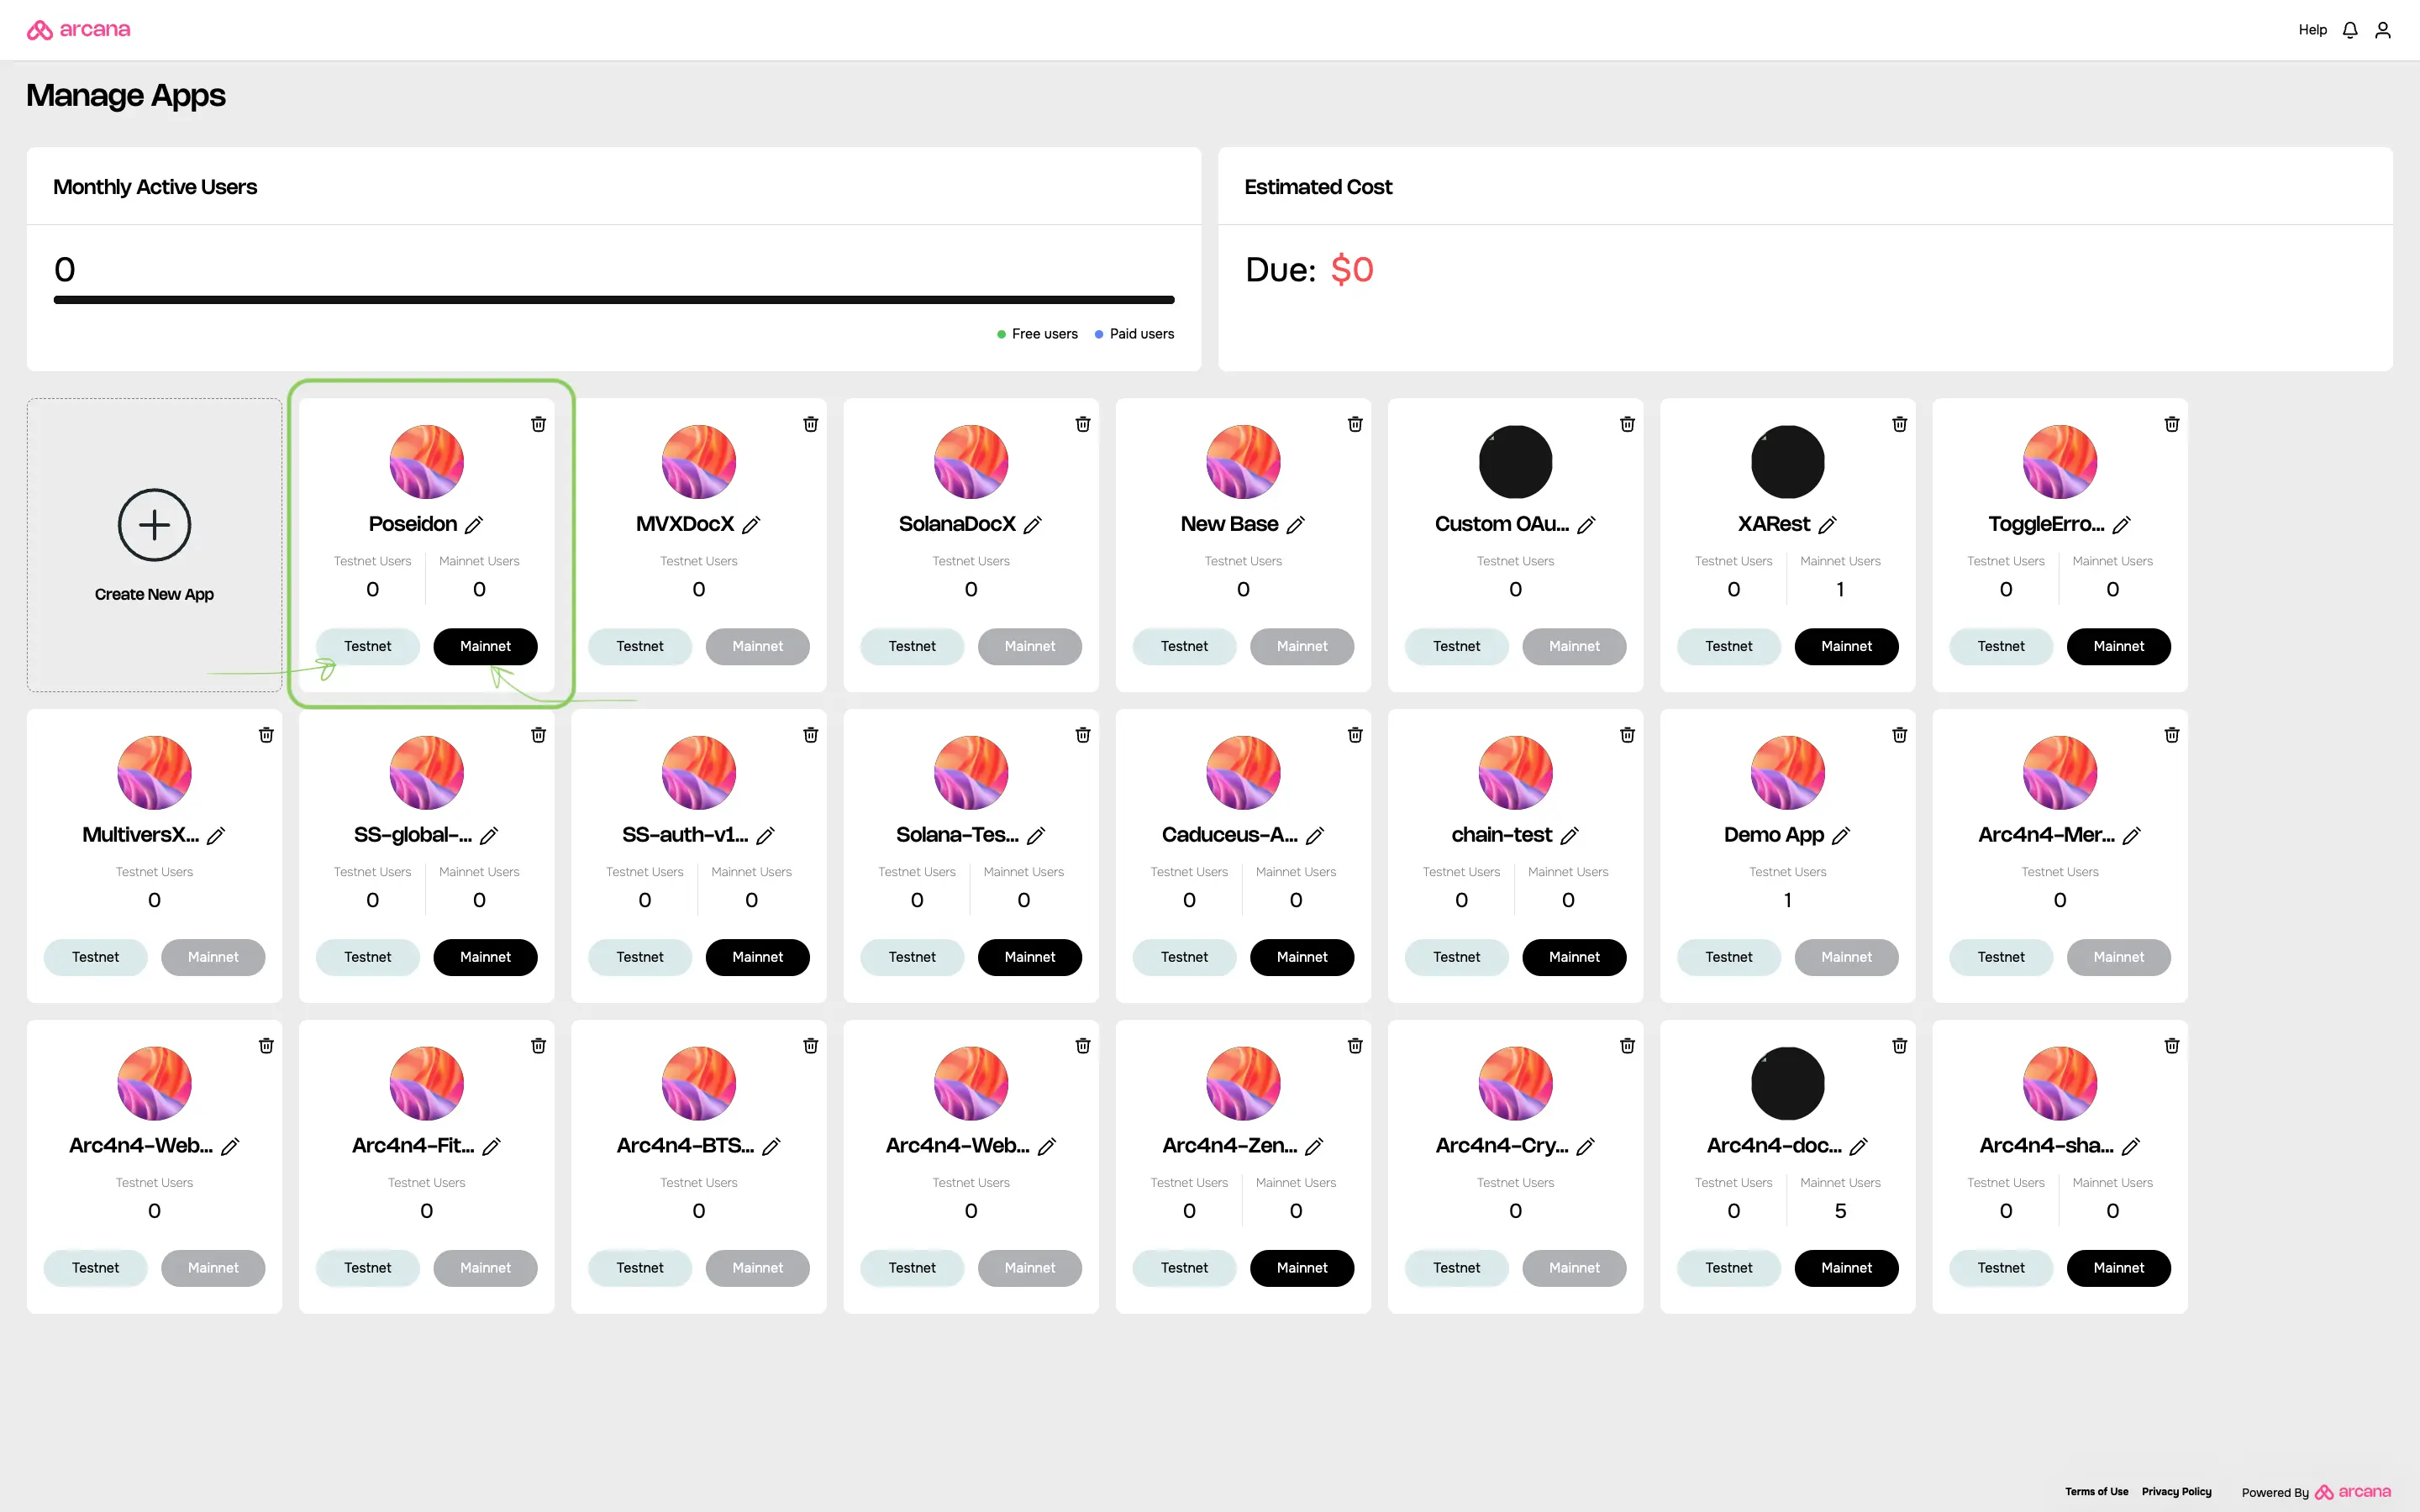
Monitor Usage
Developers can monitor their registered application usage statistics via the Arcana Developer Dashboard. The Manage Apps screen displays the account-level usage metrics for all the applications registered in the developer account. Click on the app card to drill down into the application-specific usage details.
Account Usage Metrics
The Manage Apps screen displays Monthly Active Users (MAU) for the developer account. This is an aggregate score across all applications registered for a developer account and configured to use the Arcana Mainnet. Any application using the 'Testnet' is not billed or included in the overall account usage statistic.
Mainnet Billing
The billing data only applies to Mainnet usage and will be available in the forthcoming releases.
Usage per Application
Arcana maintains per-application usage statistics separately for the 'Testnet' and 'Mainnet' configuration profiles.
The Manage Apps dashboard screen lists all registered applications as cards. Each application card displays the 'Total Users' statistic. This refers to the monthly active application users utilizing the Arcana Testnet/Mainnet. To view per-application usage details, click on the app card and select 'Testnet' or 'Mainnet' profile to see the following statistics:
- Number of logged-in users
Use the 'Daily' and 'Monthly' tabs to see the respective usage statistics.
Use the dropdown in the top right of the application dashboard screen to select Testnet/Mainnet usage details.
Billing
Arcana tracks the Mainnet app usage in terms of MAU for every developer account. At the end of every month, an invoice is generated. The chargeable amount against the invoice is auto-deducted using the payment method configured by the developer in their profile section.
To begin using the Arcana Auth SDK, the app developers don't need to update the profile details, including the billing information. The developer must provide the billing details via the profile section of the Arcana Developer Dashboard once the app uses up all the available free tiers of Arcana Mainnet usage. Otherwise, the registered apps will be suspended and users will not be allowed to log in to any registered app using the developer account.
For details on current pricing and free tier limits, contact our Arcana support.
Payment Method Setup
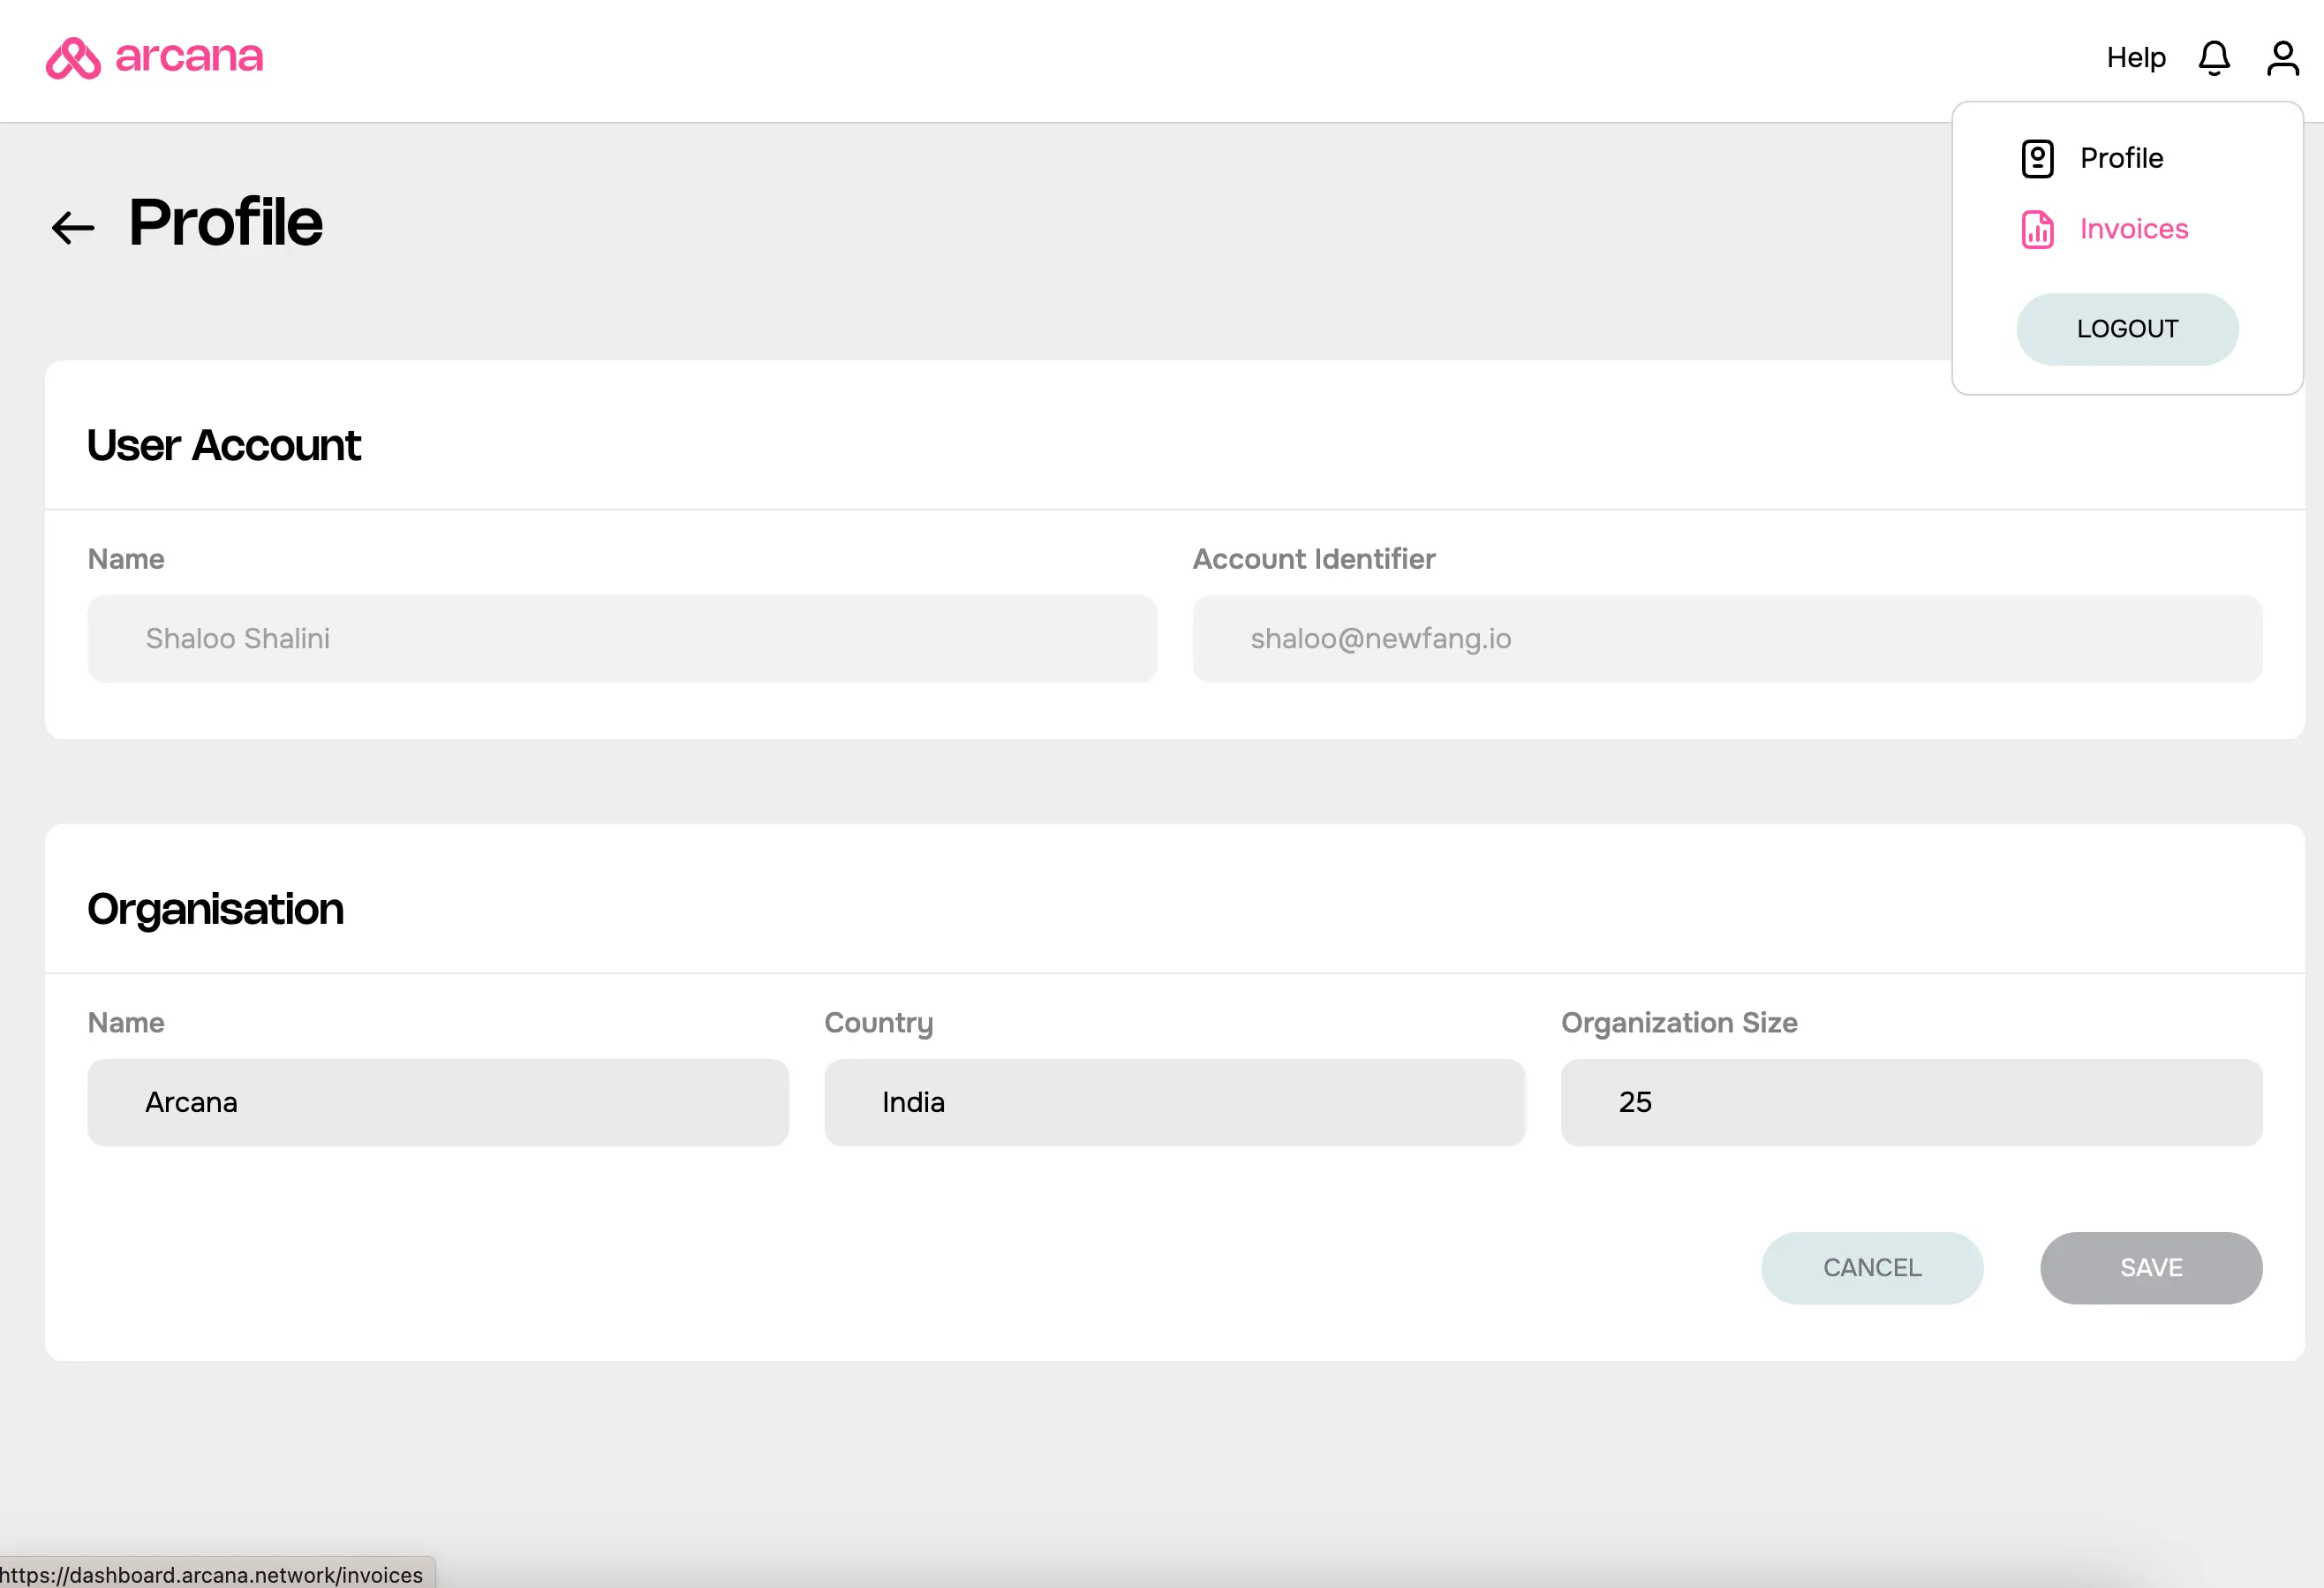
Click on the user icon on the top right of the Arcana Developer Dashboard screen. Select Profile in the dropdown.
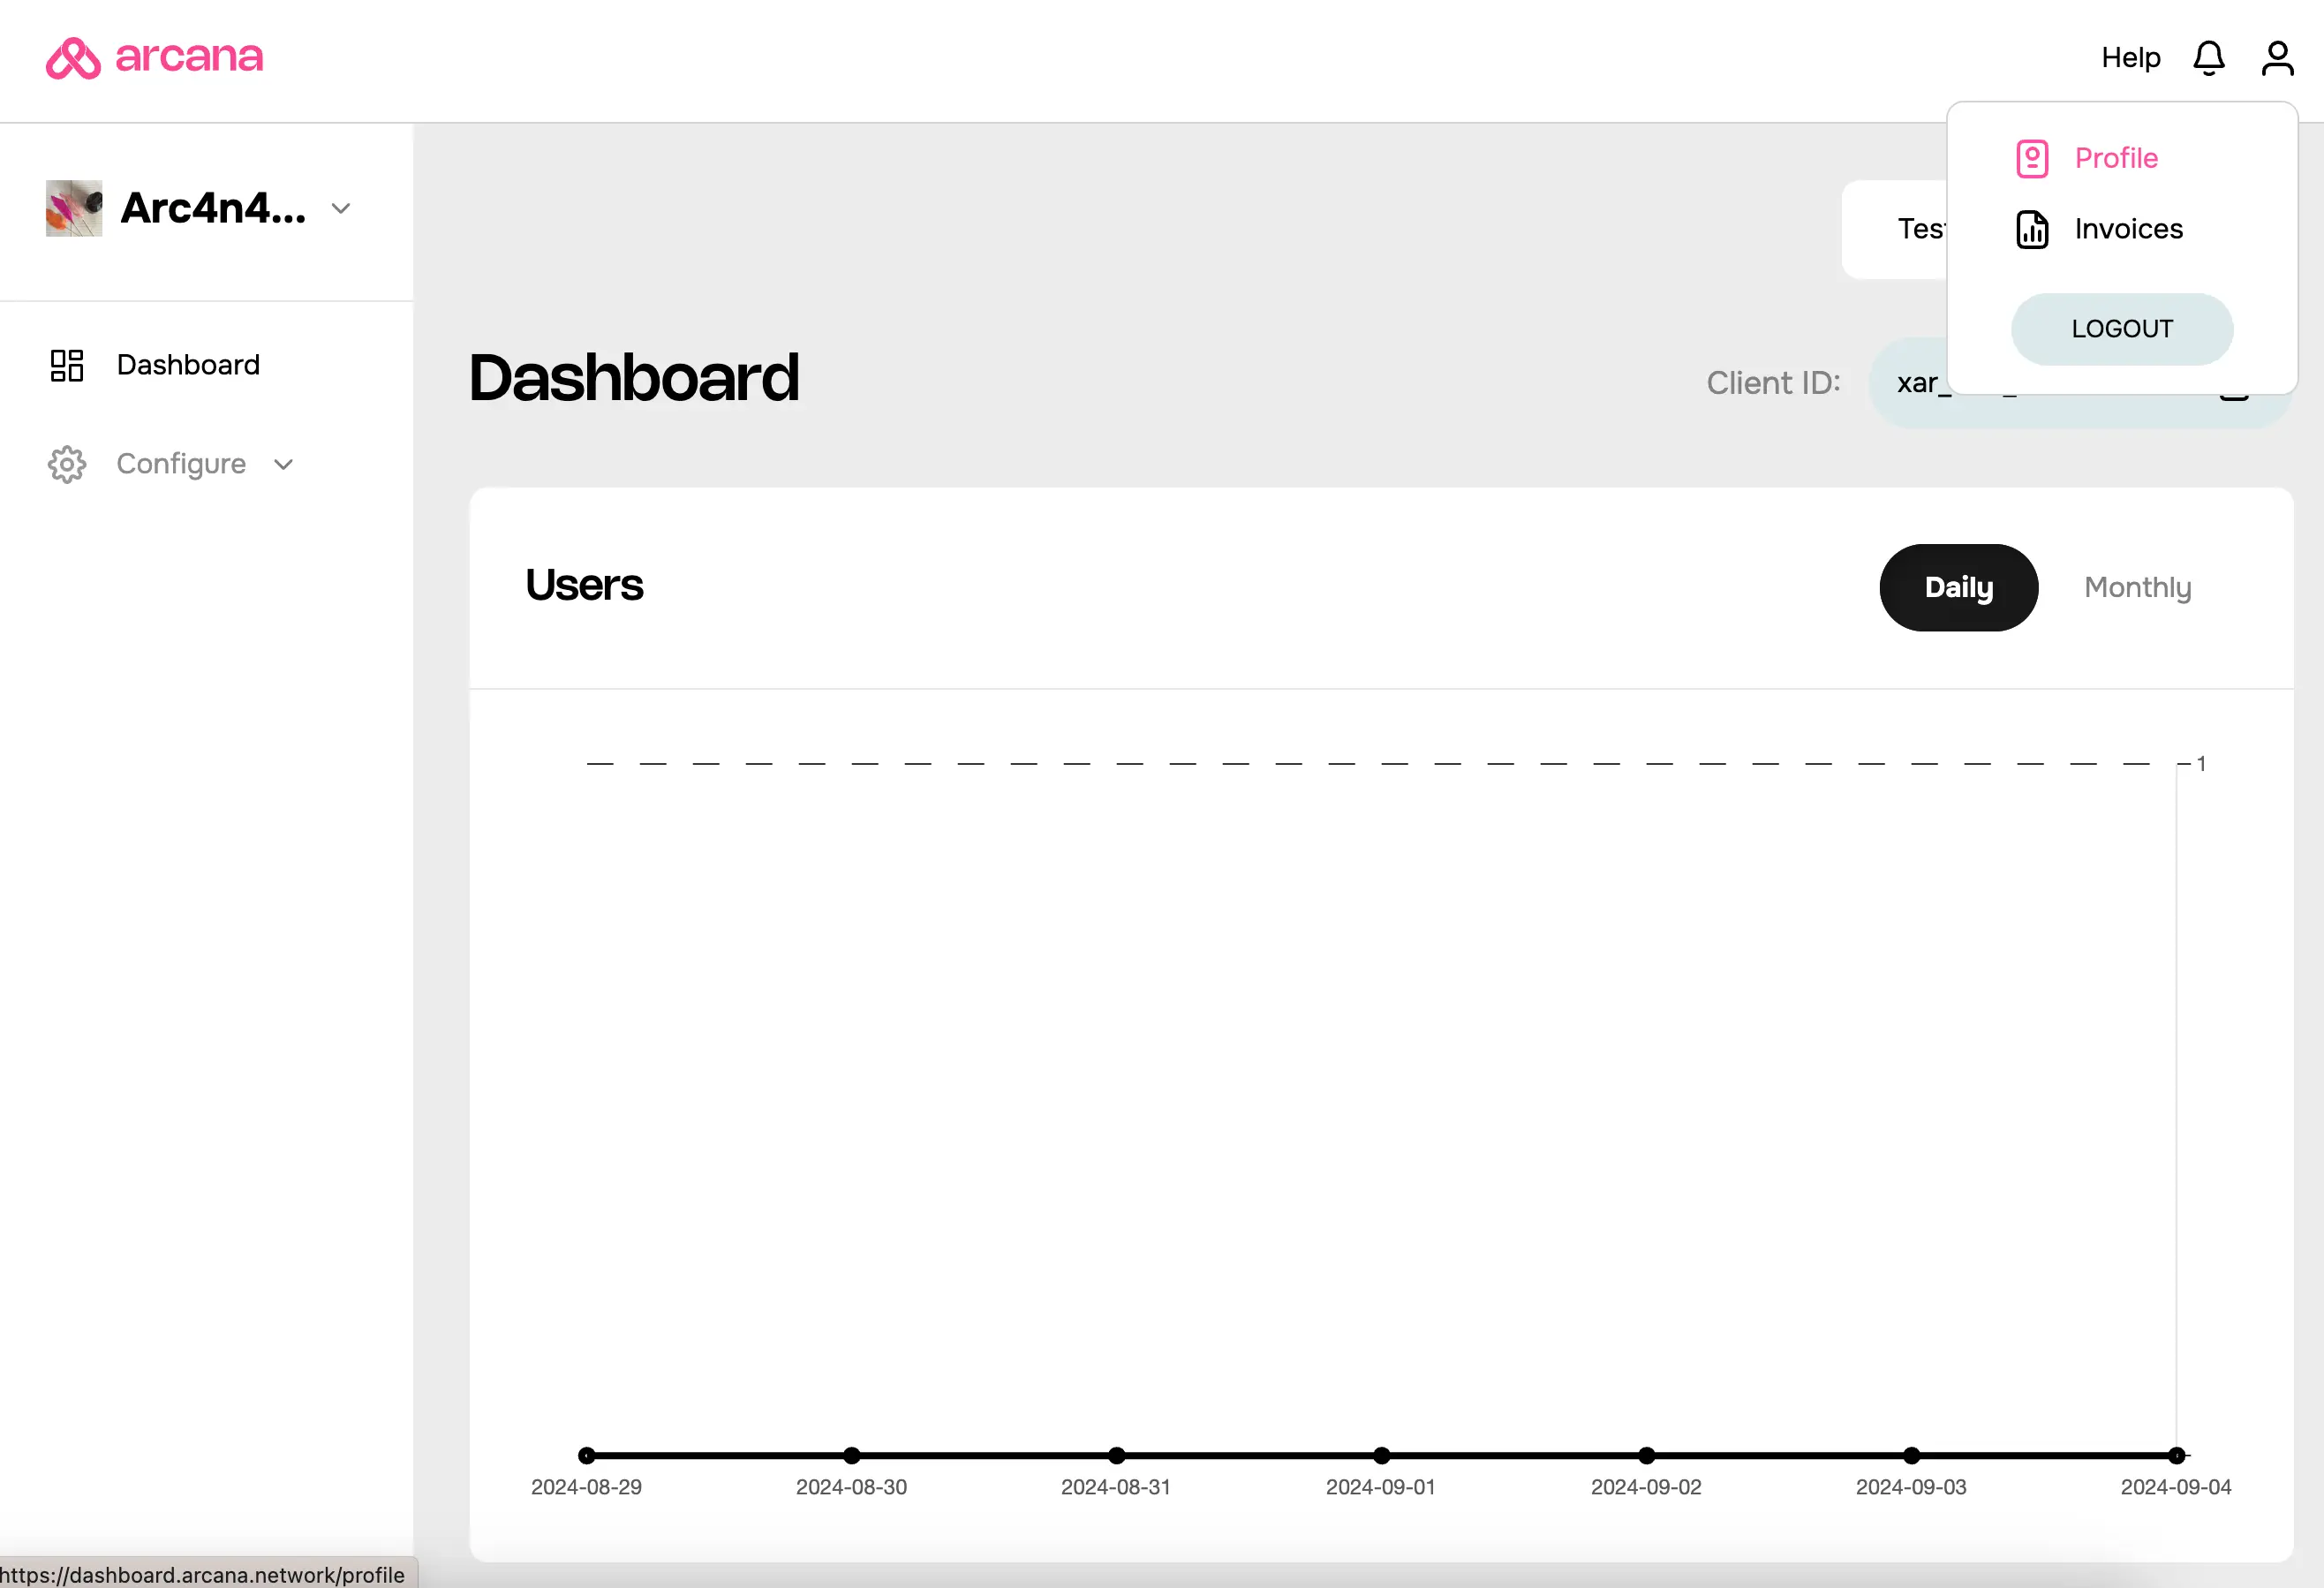
You will see the developer's Arcana account profile details. The developer account name and public identifier (email) are automatically retrieved based on the account used to log into the Arcana Developer Dashboard.
Developers must update the following profile details and then click Save.
- Organization
- Billing Address Details
- Payment Method
Payment Method
By default, the 'Payment Method' section is disabled. It is enabled once the billing address details are configured.
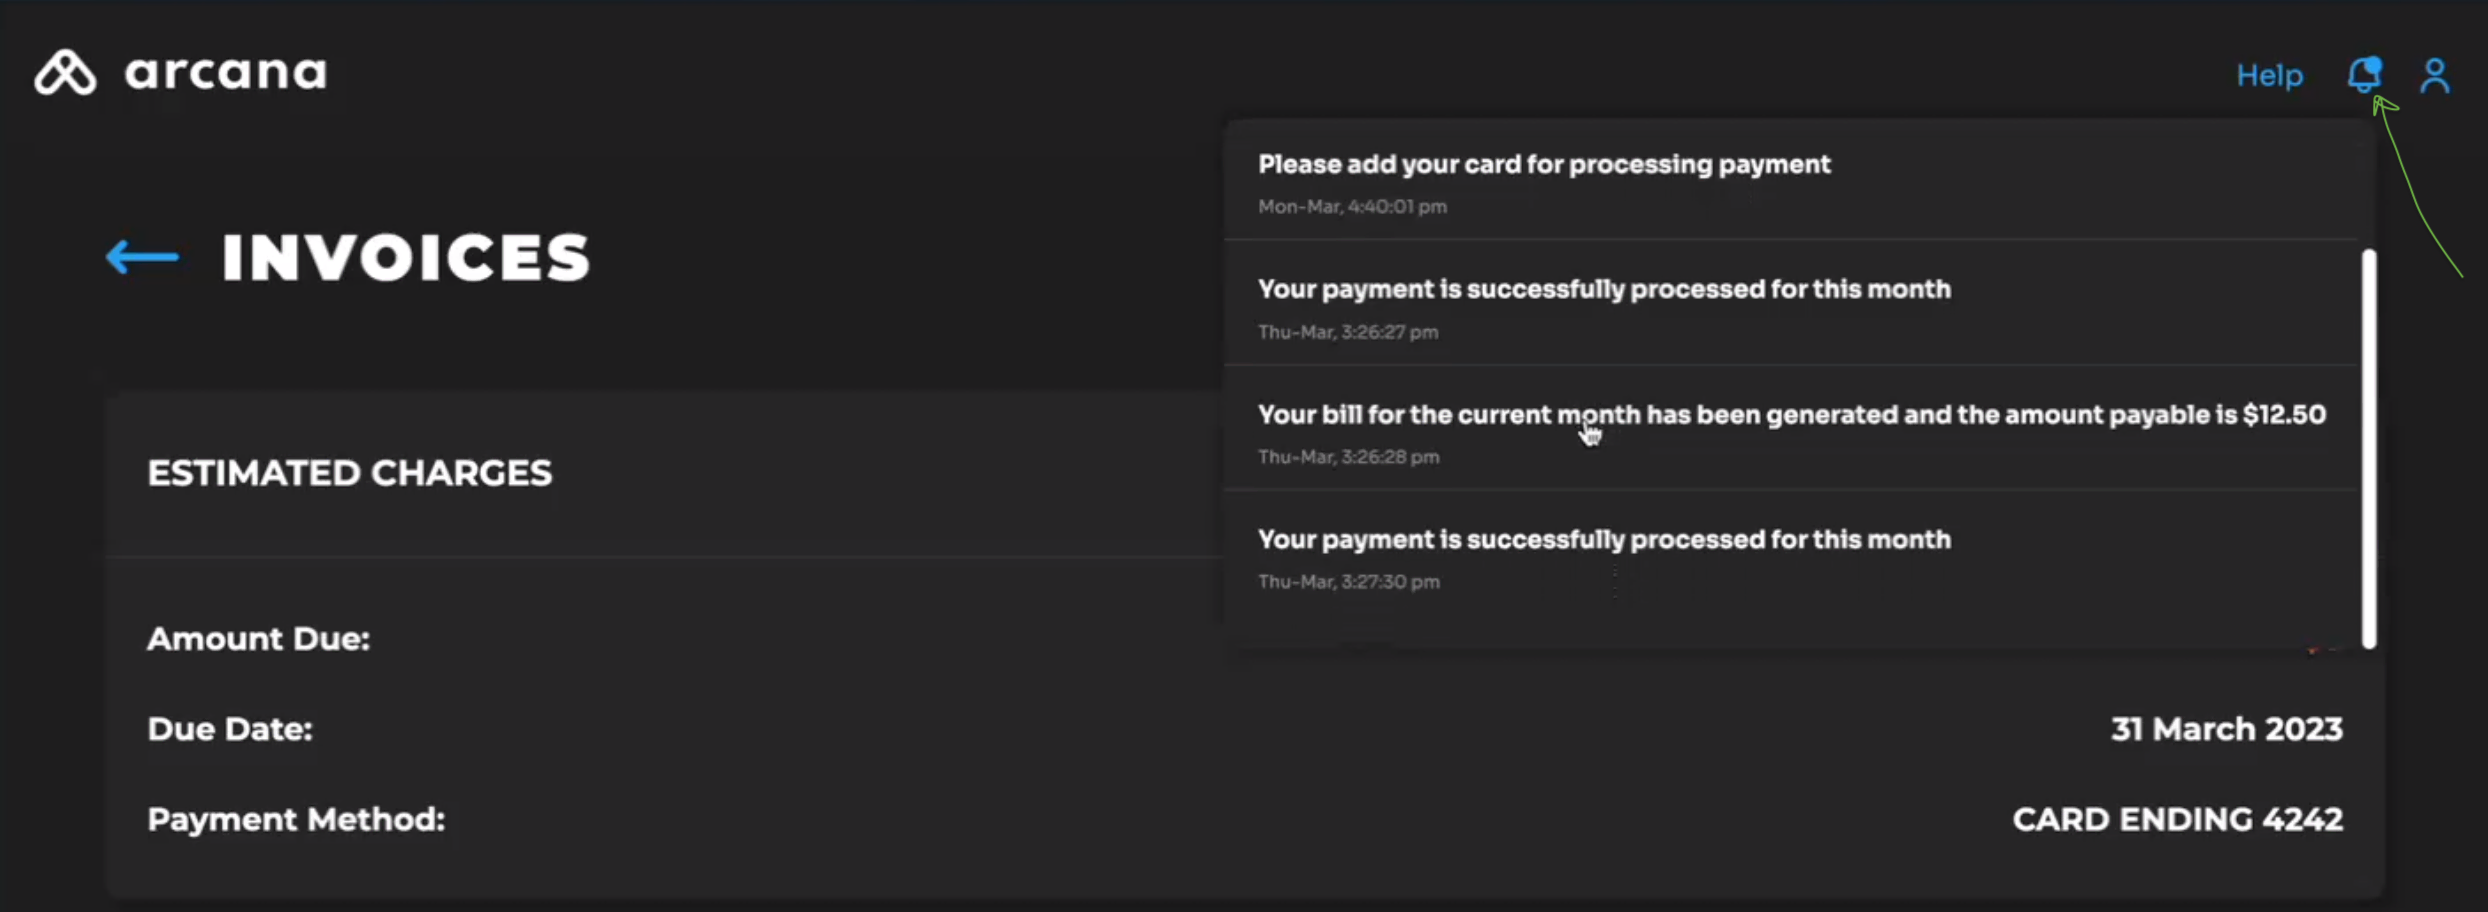
View Invoices
Click on the user icon on the top right of the Arcana Developer Dashboard screen. Select Invoices in the dropdown.
On the Invoices page, you will see the details of the current pending dues, followed by the billing history of previous invoices that can be downloaded for reference.
View Billing Notifications
Click the bell icon to view all notifications for the developer account. Check the billing notifications list for details.
Delete Application
To de-register an application, delete the entry in the 'Manage Apps' screen of the Arcana Developer Dashboard.
Select the application you wish to de-register and click on the delete icon. Confirm delete action.